Know Your Options: Fire Restoration vs. DIY in Austin

Emergency Fire Restoration Insights

A sudden fire leaves more than visible damage; it creates a complex mix of smoke, soot, water intrusion, and structural risk that requires rapid, informed action. This article explains why emergency fire restoration differs from DIY repairs, what health and structural dangers homeowners often underestimate, and when professional intervention delivers better outcomes for safety, odor control, and insurance recovery. Readers will learn the specific mechanisms by which smoke and soot penetrate materials, the advanced equipment and techniques professionals use to neutralize odors and restore structure, and practical steps to take immediately after a fire. The guide also walks through a standard professional restoration workflow, describes how restoration teams support insurance claims, and offers clear triggers for calling 24/7 emergency services. Throughout, the focus is on actionable guidance tailored for Austin and Central Texas conditions, including regional considerations like local codes and rapid response needs.

What Are the Risks of DIY Fire Damage Repairs?

DIY fire cleanup can appear cost-saving at first, but the core risk is invisible harm: smoke particles and soot often penetrate deeply into building materials and contents, causing lingering odors and health hazards that surface cleaning cannot fix. Smoke particles → adhere to → porous materials, which means superficial wiping only moves contamination rather than removing it. Attempting repairs without proper hazard assessment can also compromise structural safety and void insurance coverage, creating higher costs over time. Homeowners should evaluate hazards first and avoid premature reconstruction until professionals verify safety and moisture levels.

Homeowners face several primary risk categories when attempting DIY fire repairs:

  • Health risks: Exposure to fine particulates and chemical byproducts is hazardous.

  • Structural risks: Hidden charring or compromised supports can cause collapse or failure.

  • Financial/insurance risks: Improper documentation and amateur repairs may complicate claims or lead to denials.

These risk categories make clear why understanding the specific health hazards of soot and smoke cleaning is the next essential step.

What Health Hazards Does DIY Smoke and Soot Cleanup Pose?

Smoke and soot contain fine particulate matter, polycyclic aromatic hydrocarbons (PAHs), and volatile organic compounds (VOCs) that can irritate airways and carry long-term health risks. Inhalation of ultrafine particulates can exacerbate asthma, cardiovascular conditions, and create carcinogenic exposure pathways, while off-gassing from burned synthetics releases irritant gases that linger in indoor air. Proper protection requires respirators rated for particulates (such as N95 or higher), gloves, and eye protection, plus HEPA-grade containment and air filtration to prevent recontamination. Because DIY approaches often lack HEPA filtration and containment, they leave residents exposed and increase the likelihood of persistent indoor air quality problems.

Transitioning from health hazards to structural concerns highlights why safety assessments and professional stabilization are commonly required after a fire event.

HEPA Air Cleaner Efficiency in Particle Removal for Fire Restoration

Use of a portable HEPA filter(s) in hospital wards is hypothesized to increase the effective ventilation rate (for particles only). Use of a portable HEPA filter is also hypothesized to increase the effective airflow rate of the general ward to the standard of an isolation ward for emerging infectious diseases. This may be a good solution for housing patients when the number of beds in an isolation ward is insufficient. An experiment was conducted in a full-scale experimental ward with a dimension of 6.7 m × 6 m × 2.7 m and 6 beds to test these hypotheses for a portable HEPA filter. The removal efficiency for different sizes was measured at different locations. The influence of the portable HEPA air cleaner on the airflow pattern was also studied through smoke visualization and computational fluid dynamics (CFD) simulations. Results show that the HEPA filter can effectively decrease the particle concentration level. The effective air change rate achieved by the HEPA filter (for particle removal only) is from 2.7 to 5.6 ACH in the ward. The strong supply air jet from the portable HEPA filter interacted with the room airflow pattern and became dominant, introducing global airflow mixing in the room. Background noise levels were also measured, and the noise level in the room increased when the maximum airflow of the filter was used.

Particle removal efficiency of the portable HEPA air cleaner in a simulated hospital ward, H Qian, 2010


How Can DIY Fire Repairs Affect Structural Safety?

Fire weakens structural members in ways not always apparent to untrained observers: charring reduces cross-sectional strength, and heat can degrade fasteners and connections even when surfaces look intact. Water used to suppress fires worsens the issue by causing swelling, rot, and corrosion that accelerate structural decline, and hidden hotspots can rekindle if not fully mitigated. Professionals perform targeted structural assessments, including probing, moisture mapping, and thermal imaging, to identify compromised load-bearing elements and determine where shoring or board-up is necessary. Ignoring these checks during DIY repairs risks occupant safety and can increase repair scope and cost later when underlying failures reveal themselves.

To make a clear comparison between DIY approaches and professional responses, the table below summarizes key attributes homeowners should weigh before choosing a path.

The following comparison clarifies how DIY and professional methods differ across safety, thoroughness, equipment, cost, and insurance impact:

Approach

Safety

Thoroughness

Equipment

Insurance Impact

DIY cleanup

Limited; PPE often inadequate

Surface-level; hidden contamination likely

Household cleaners; shop vacs

Higher risk of claim complications

Professional restoration

Trained on safety protocols and containment

Full remediation, including porous materials

Thermal cameras, HEPA air scrubbers, and hydroxyl generators

Proper documentation reduces delays/denials

Hybrid (partial pro help)

Better than DIY, but variable

Depends on tasks left to professionals

Selective professional tools

Can help with claims if documented thoroughly

This comparison shows why professional remediation typically reduces long-term risk and preserves insurability, and it leads directly to why choosing certified technicians and advanced equipment matters.

Why Choose Professional Fire Damage Restoration Services in Austin?

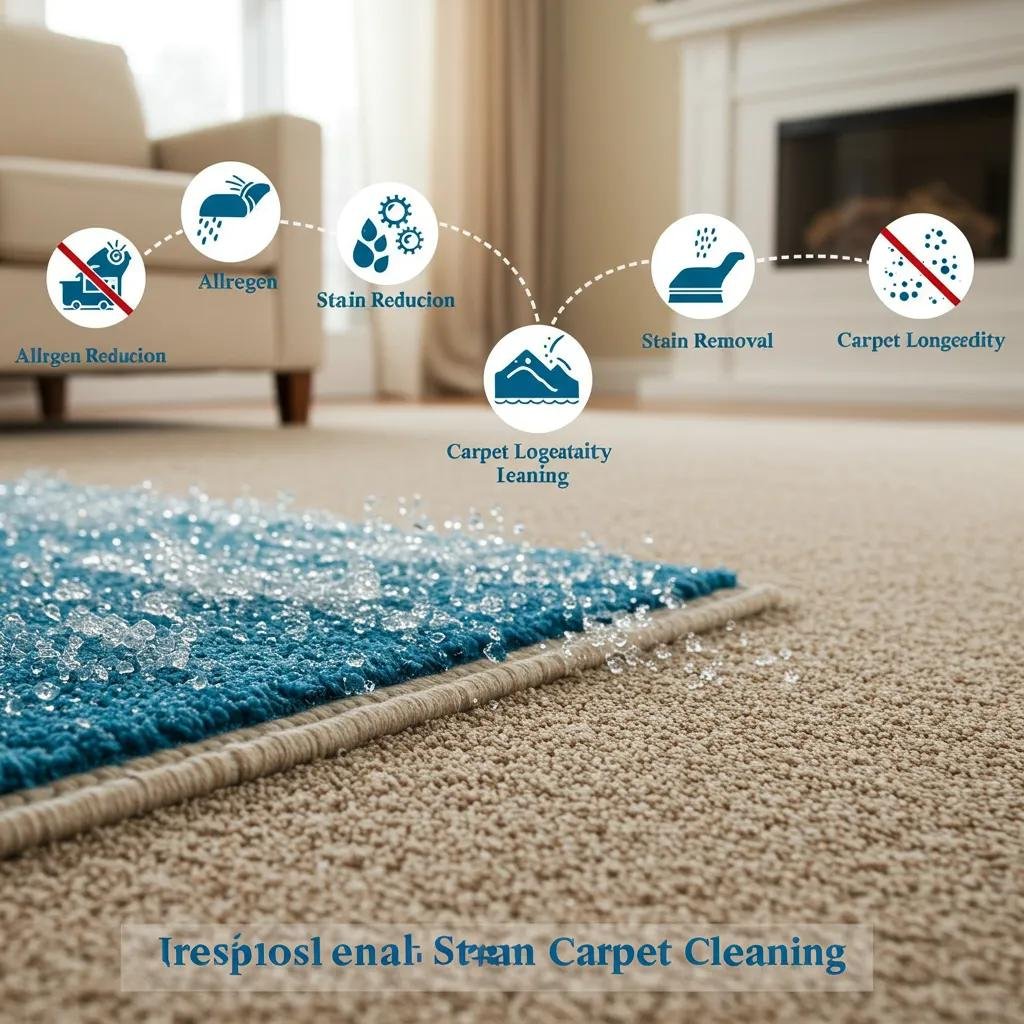
Professional restoration teams combine safety protocols, certified expertise, and specialized equipment to remove hazards, salvage contents, and stabilize structures efficiently. Certification standards such as IICRC and NADCA ensure technicians follow industry best practices for cleaning, deodorization, and air system restoration, which improves outcomes and reduces secondary damage. Advanced equipment thermal imaging for hidden heat, HEPA air scrubbers for particulate removal, and hydroxyl generators or thermal fogging for odor neutralization target contamination mechanisms at the material level rather than masking symptoms. Choosing professionals also streamlines coordination with insurance adjusters and municipal code requirements, reducing the administrative burden on homeowners during recovery.

Professional credentials and local availability further differentiate reliable providers in Austin; one local example is The Steam Team, which offers IICRC-certified technicians, NADCA-certified air duct cleaning where applicable, and 24/7 emergency response backed by an A+ BBB accreditation and local recognition. These organizational attributes translate to faster mobilization and trusted documentation during claims, while local knowledge helps navigate Austin permits and vendor networks. For homeowners deciding whether to call professional services, the presence of certified crews and emergency availability are practical indicators of capability and reliability.

What Expertise and Certifications Do Professional Technicians Have?

Certified restoration technicians hold credentials that standardize training and quality, such as IICRC certifications, which cover fire, smoke, and soot restoration protocols, and NADCA certification for specialized air duct cleaning where HVAC contamination is present. These certifications require structured training in safety, containment, and cleaning chemistry, ensuring technicians understand how to select appropriate methods for different materials and contamination types. Certification also signals to insurers that restoration work follows accepted industry standards, which can simplify approvals. For homeowners, certified technicians provide documented procedures and measurable quality checks that an uncertified DIY approach rarely produces.

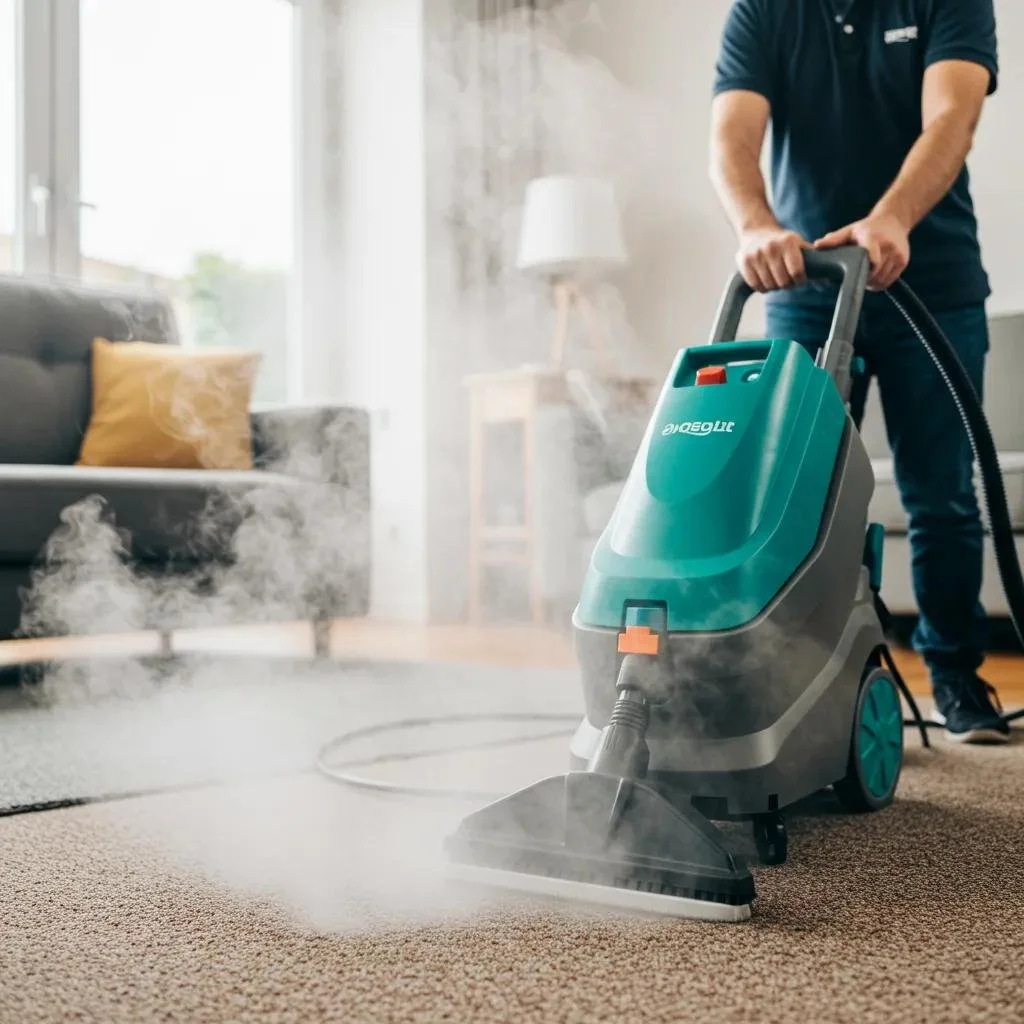
How Do Professionals Use Advanced Equipment for Fire Cleanup?

Professionals deploy technology to detect, isolate, and remediate contamination at a scale and depth beyond household tools. Thermal imaging cameras reveal hidden hotspots and compromised insulation, enabling targeted demolition rather than wholesale teardown. HEPA air scrubbers and negative-pressure containment remove ultrafine particulates from indoor air during cleaning, and moisture meters guide drying to prevent mold after water exposure. Odor-neutralization tools, hydroxyl generators, and controlled thermal fogging interact with odor molecules rather than simply masking them, reducing the risk of return. These tools, combined with trained application techniques, yield more complete restoration and safer indoor environments than DIY attempts typically achieve.

What Is the Step-by-Step Process of Professional Fire Damage Restoration?

Professional restoration follows a defined sequence: assessment and safety stabilization, mitigation (including water extraction and drying if suppression occurred), soot and smoke cleaning, deodorization and contents restoration, and reconstruction/repairs. This workflow ensures hazards are controlled before cleaning begins, limits secondary damage, and preserves insurance documentation. A numbered process clarifies homeowner expectations and helps prioritize immediate actions after a loss.

Professionals generally adhere to these six core steps during restoration:

  1. Emergency Assessment & Board-Up: Safety triage, hazard identification, and temporary protection of openings.

  2. Mitigation & Water Removal: Extraction, drying, and humidity control to prevent mold and structural deterioration.

  3. Soot and Smoke Cleaning: Material-specific cleaning using dry and wet methods plus HEPA filtration.

  4. Contents Recovery & Pack-Out: Inventory and off-site cleaning of salvageable items for deep restoration.

  5. Deodorization & Odor Control: Targeted thermal fogging or hydroxyl treatment to neutralize odors at the molecular level.

  6. Reconstruction & Final Verification: Repairs, finishing, and final indoor air quality (IAQ) testing to confirm restoration completeness.

The EAV table below summarizes each process step, what it fixes, and typical time/outcome expectations as a practical reference.

Process Step

What It Fixes

Typical Time / Outcome

Emergency Assessment & Board-Up

Immediate safety hazards and open exposure

1–2 days; secures property and documents damage

Mitigation & Water Removal

Moisture intrusion and early mold risk

2–7 days; reduces secondary damage with drying

Soot & Smoke Cleaning

Surface and embedded soot contamination

3–10 days; material-specific cleaning restores surfaces

Contents Recovery & Pack-Out

Damaged furnishings and textiles

Variable: off-site cleaning improves salvage rates

Deodorization & Odor Control

Persistent smoke odors

1–3 days; neutralizes odors with the proper method

Reconstruction & Final Verification

Structural repairs and final testing

Weeks depending on the scope; returns the property to use

This timeline provides homeowners with realistic expectations about sequencing and duration while preparing them for the coordinated efforts professionals undertake. In practice, a local provider like The Steam Team performs each step using standardized protocols: they begin with immediate safety assessments and board-up, document damage for insurers, deploy drying and HEPA filtration equipment during mitigation, manage contents pack-out, apply targeted deodorization, and coordinate reconstruction through trusted subcontractors to complete repairs.

How Does Professional Fire Damage Restoration Support Insurance Claims in Austin?

Professional restoration supports insurance claims by producing thorough documentation, creating accurate repair estimates, and coordinating directly with adjusters to clarify scope and timing. Early, structured documentation photos, inventories, moisture maps, and method statements, establishes the cause and extent of loss and reduces ambiguity that can delay approvals. Restoration firms that maintain preferred-vendor relationships with insurers can expedite certain approvals and streamline billing, although homeowners retain the right to choose their contractor. Clear communication between the provider and insurance adjuster minimizes scope disputes and helps maintain momentum toward restoration.

Below is an EAV-style table showing how specific restoration services translate into tangible insurance benefits for homeowners and practical effects on claim outcomes.

Service

Insurance Benefit

Practical Effect

Detailed photographic documentation

Faster adjuster validation

Shorter claim review time

Itemized contents inventory

Clear loss valuation

Accurate reimbursement for contents

Preferred-vendor coordination

Smoother approvals

Reduced administrative back-and-forth

Rapid emergency mitigation

Demonstrates loss of control

Limits further damage, lowers claim amounts

This mapping illustrates how documentation and vendor coordination materially improve claim trajectories and reduce homeowner stress. In Austin, The Steam Team emphasizes these insurance-support capabilities through documented inventories, adjuster coordination, and established local relationships that help homeowners move from immediate mitigation to approved repairs more quickly.

How Do Restoration Companies Assist with Fire Damage Insurance Paperwork?

Restoration companies prepare comprehensive documentation packages including dated photographs, room-by-room inventories, scope-based repair estimates, and moisture/thermal readings to substantiate loss and necessary actions. These items create an audit trail that supports coverage determinations and reduces subjective disputes over scope or causation. Providers often attend adjuster walk-throughs to explain technical findings and to ensure the estimate reflects restoration best practices rather than minimal repair. Clear documentation also helps homeowners track salvageable items and simplifies replacement planning once claims are approved.

What Are the Benefits of Using Preferred Vendors for Insurance?

Preferred-vendor arrangements can speed approvals because insurers are familiar with the vendor's work quality and documentation style, which reduces the need for repetitive verification. These relationships often result in streamlined communication channels that coordinate scheduling, billing, and repair sequencing to shorten restoration timelines. Homeowners should still confirm vendor independence and retain decision-making authority, asking insurers how preferred status affects estimates and warranty terms. When managed transparently, preferred-vendor engagement can substantially reduce downtime and administrative friction during the claims process.

When Should You Call 24/7 Emergency Fire Restoration Services?

Call emergency restoration services immediately if there is ongoing smoke or heat, significant water intrusion from fire suppression, visible structural instability, or if occupants experience persistent respiratory symptoms after the fire. Early professional mobilization reduces secondary damage, increases salvageable contents, and documents conditions for insurance. A prioritized checklist helps homeowners decide when to call: imminent danger and active hazards come first, then property stabilization, moisture control, and mitigation to prevent mold. Rapid response is particularly important in Austin and Central Texas, where weather and humidity can accelerate secondary problems after suppression.

Immediate action yields measurable advantages that go beyond initial safety; the next subsection explains the mitigation benefits of swift professional response.

What Are the Advantages of Immediate Professional Fire Damage Response?

Immediate professional response reduces secondary damage by removing water, stabilizing the structure, and starting containment and filtration before soot and moisture set into materials. Rapid mitigation increases salvage rates for textiles and furnishings because timely pack-out and off-site cleaning prevent permanent staining and odor entrenchment. Prompt involvement also positions homeowners to open claims sooner, which can speed adjuster engagement and reduce overall downtime. These combined effects often translate into lower total repair costs, faster occupancy restoration, and better long-term indoor air quality.

How Does Local Expertise Improve Emergency Fire Restoration Outcomes?

Local restoration teams bring knowledge of Austin building codes, permitting processes, and regional climate effects that influence drying and mold risk, plus established networks of local subcontractors for rapid reconstruction. Familiarity with common Central Texas construction types helps technicians anticipate hidden vulnerabilities as roof decking assemblies or common HVAC configurations, so interventions are more targeted. Proximity reduces mobilization time, which is crucial for limiting moisture-related secondary damage in humid conditions. Local expertise, therefore, shortens timelines and often reduces total project cost through efficient resource allocation.

Can DIY Methods Fully Remove Smoke Odor and Soot?

No, DIY methods rarely fully remove smoke odor and embedded soot because smoke particles penetrate porous materials and bond with fibers and HVAC pathways, requiring specialized chemistry and equipment to neutralize. Surface cleaning and consumer-grade deodorants often mask odors temporarily while underlying contamination remains. Professionals address odors at a molecular level with controlled applications such as thermal fogging or hydroxyl generation, combined with HEPA filtration and material-specific cleaning, which reduces the likelihood of odor return and ongoing indoor air quality problems.

Why Do DIY Smoke Odor Removal Attempts Often Fail?

DIY attempts typically focus on visible residues and use household cleaners or scented masks that do not reach deep within porous materials or the HVAC system, where smoke molecules lodge. Smoke particles are small and adsorb into drywall, insulation, and fabrics, meaning superficial wiping or masking does not remove the source. Some household chemicals can react with soot and create secondary odors or damage finishes, worsening the problem. This reality underscores the need for professional assessment to identify which materials can be cleaned, which require replacement, and which odor-control method is appropriate.

Identifying why DIY fails sets up an explanation of the professional techniques that can achieve complete smoke and soot removal.

What Professional Techniques Ensure Complete Smoke and Soot Removal?

Professional techniques target both particles and odor molecules using a combination of mechanical, chemical, and thermal approaches. Thermal fogging creates a solvent-based fog that penetrates materials and allows deodorants to react with odor molecules, while hydroxyl generators oxidize and neutralize organic odors without harmful residues, safe for occupied spaces when used correctly. HEPA filtration and negative-pressure containment remove airborne particulates during cleaning to prevent recontamination, and material-specific cleaning methods (e.g., dry cleaning sponges for soot, ultrasonic contents cleaning) restore salvageable items. Choosing the right technique requires professional assessment to balance efficacy, safety, and preservation of materials.

For homeowners ready to engage professionals, remember that timely, certified, and documented restoration not only improves safety and indoor air quality but also supports better insurance outcomes. If you need emergency response or a damage assessment in Austin and Central Texas, The Steam Team provides 24/7 emergency restoration with IICRC-certified technicians, NADCA-certified duct specialists where applicable, and documented insurance support, call (512) 451-8326 or visit the local office at 9901 Burnet Road, Austin for immediate assistance and to request a restoration estimate.

Frequently Asked Questions

What should I do immediately after a fire incident?

After a fire, prioritize safety by ensuring the area is secure and that there are no ongoing hazards like smoke or structural instability. Evacuate the premises if necessary and call emergency services. Once safe, document the damage with photos and notes for insurance purposes. Avoid entering the property until it has been assessed by professionals. Contact a certified fire restoration service to begin the recovery process, as they can help mitigate further damage and guide you through the next steps.

How can I choose the right fire restoration company?

When selecting a fire restoration company, look for certifications such as IICRC and NADCA, which indicate adherence to industry standards. Check for local experience, as familiarity with Austin's building codes and climate can enhance service quality. Read reviews and ask for references to gauge past performance. Ensure they offer comprehensive services, including documentation support for insurance claims. A reliable company should also provide 24/7 emergency response and have a clear process for assessing and restoring fire damage.

What are the costs associated with professional fire restoration?

The costs of professional fire restoration can vary widely based on the extent of damage, the size of the property, and the specific services required. Factors influencing cost include the need for structural repairs, content cleaning, and odor removal. On average, homeowners can expect to pay anywhere from a few thousand to tens of thousands of dollars. It's essential to obtain detailed estimates from multiple restoration companies and understand what is included in the pricing to avoid unexpected expenses.

How long does the fire restoration process typically take?

The duration of the fire restoration process depends on the severity of the damage and the specific steps involved. Generally, the process can take anywhere from a few days to several weeks. Initial assessments and emergency board-up can be completed within a couple of days, while full restoration, including cleaning, deodorization, and reconstruction, may take longer. A professional restoration company will provide a timeline based on the assessment of your property and keep you updated throughout the process.

What should I look for in a fire damage restoration contract?

When reviewing a fire damage restoration contract, ensure it includes a detailed scope of work outlining all services to be provided. Look for clear timelines, payment terms, and warranty information. The contract should specify the materials and methods to be used, as well as any necessary permits. Additionally, check for clauses regarding insurance coordination and documentation support. A transparent contract will help prevent misunderstandings and ensure that all parties are aligned on expectations and responsibilities.

Can I file an insurance claim for fire damage restoration?

Yes, you can file an insurance claim for fire damage restoration, provided your policy covers such incidents. It's crucial to document all damage thoroughly and keep records of any restoration work done. Professional restoration companies often assist with this process by providing detailed reports and estimates that support your claim. Contact your insurance provider as soon as possible to understand your coverage and the claims process, ensuring you meet any deadlines for filing.

What preventative measures can I take to avoid fire damage in the future?

To prevent future fire damage, implement safety measures such as installing smoke detectors on every level of your home and testing them monthly. Create and practice a fire escape plan with your family. Regularly inspect electrical systems and appliances for wear and tear, and avoid overloading outlets. Keep flammable materials away from heat sources and ensure that your home has a fire extinguisher readily available. Additionally, consider professional fire safety assessments to identify potential risks in your home.

Conclusion
Choosing professional fire restoration services ensures that homeowners in Austin can effectively address the complex challenges posed by fire damage, including health risks and structural safety. With certified technicians and advanced equipment, these services not only restore properties but also streamline insurance claims, reducing stress during recovery. By prioritizing safety and thorough remediation, homeowners can safeguard their investments and improve indoor air quality. For immediate assistance and expert restoration, contact The Steam Team today.

Key Steps to Follow for Effective Post Fire Restoration

Post-Fire Recovery Guide

After a fire, immediate safety, clear documentation, and an organized restoration plan determine how quickly you can recover your property and possessions. This guide explains step-by-step post-fire restoration actions, what professional crews do during assessment and cleanup, how to restore belongings, and how to work with insurers in Austin and Central Texas. Many homeowners and business owners ask "what to do after a fire" because the sequence of safety checks, mitigation, and claims documentation directly affects recovery outcomes; this article gives practical, local-focused instructions and checklists to reduce secondary damage like water intrusion and mold. You will learn immediate priorities, an overview of professional fire damage restoration processes, technical cleanup phases such as soot removal and structural drying, contents salvage and deodorization options, and the insurance steps to file and support a claim in Texas. Practical lists, comparison tables of processes and timelines, and snippet-ready answers are included so you can act confidently and prepare to engage qualified restoration help if needed.

What Are the Immediate Steps to Take After a House Fire?

Immediate steps after a house fire focus on safety, securing the structure, and creating a record of loss so recovery and insurance processes can begin without delay. Prioritize human safety and wait for the fire department to declare the property safe before attempting re-entry; this reduces risk from structural collapse, hot spots, and toxic residues. Quickly documenting damage with photographs and a dated inventory preserves evidence for insurers, while emergency mitigation, such as boarding openings and removing standing water, reduces secondary problems like theft and mold growth. These initial actions limit further property loss and form the foundation for a restoration plan and claims workflow.

Before the table below, here is a quick checklist you can follow to prioritize tasks immediately after a fire. This list summarizes the safety and documentation priorities and prepares you to work with emergency responders and restoration professionals.

  1. Ensure Safety First: Do not re-enter until authorities clear the structure and allow only authorized personnel inside.

  2. Document Damage: Photograph every room, all damaged items, and any visible structural issues from multiple angles.

  3. Secure the Property: Arrange emergency board-up and tarping to prevent weather and vandalism damage.

  4. Notify Insurer and Secure Records: Call your insurance company to start the claim and preserve receipts for emergency expenses.

This numbered checklist prepares you for the more detailed actions and the EAV mapping that follows, which clarifies who and what to prioritize in the minutes and hours after a fire.

The following table maps immediate entities, their safety priority, and the immediate actions to take so you can triage tasks clearly for family members, contractors, and adjusters.

Person/Item

Priority Level

Immediate Action

Occupants

Highest

Evacuate, seek medical attention if needed, and obtain official clearance to return

Structural Openings

High

Board up or tarp openings to secure property and prevent weather damage

Valuables/Documents

High

Photograph, collect if safe, move to a secure location or arrange a pack-out with a restoration provider

Utilities (gas/electric)

Critical

Do not attempt reconnection; have licensed professionals shut off and inspect systems

This table clarifies who should act first and why, and it helps coordinate calls to emergency services, insurance, and a restoration contractor.

How Do I Ensure Safety and Secure the Property After a Fire?

Ensuring safety combines waiting for official clearance, recognizing common hazards, and using professionals for structural stabilization and utility checks. Structural hazards include weakened load-bearing elements, compromised roofing, and hidden hot spots that may reignite; seasoned responders use thermal imaging and structural shoring to locate and mitigate these risks before non-professionals return. Electrical systems and gas lines must remain de-energized until a licensed inspector or utility representative declares them safe, because contact with damaged wiring or appliances can cause shock or fire reignition. After safety verification, emergency board-up and temporary tarping reduce exposure to rain and theft, which prevents additional damage and preserves claim integrity.

To secure the property effectively, coordinate these actions with first responders and a reputable restoration provider so mitigation aligns with insurance and repair plans.

What Is the Best Way to Document Fire Damage for Insurance Claims?

Documenting fire damage begins with comprehensive photos and videos that capture the full extent of structural and contents loss, coupled with a dated inventory and receipts for emergency expenses. Photograph entire rooms from multiple angles, close-ups of burned or smoke-affected items, and any mechanical or utility damage; record a video walkthrough while narrating visible issues to create a time-stamped record for adjusters. Create an inventory using simple columns (item description, approximate value, damage level) and back up files to cloud storage or an off-site drive to preserve evidence. Maintain a log of all communications with the insurer, emergency services, and contractors, noting names, dates, and summary points for each call.

A clear documentation practice speeds claims processing and helps restoration teams prepare accurate scopes of work and estimates that reflect the true extent of damage.

How Does Professional Fire Damage Restoration Work in Austin?

Professional fire damage restoration is a phased process that begins with a certified assessment, moves through emergency mitigation and technical cleaning, and culminates with repair and reconstruction tailored to local climate and building codes. An initial inspection identifies safety hazards, hidden smoke or water damage, and contents that need immediate pack-out; technicians then create a scope of work that outlines mitigation, cleaning methods, deodorization, and repair sequencing. Advanced tools like thermal imaging, moisture mapping, and air quality testing guide targeted interventions to prevent mold and ensure thorough structural drying. Local providers factor Central Texas humidity and seasonal weather into drying plans and mold-prevention strategies so that repairs are durable.\

Working with a certified team improves predictability: IICRC-aligned methods, documented drying logs, and detailed reports give homeowners and adjusters a defensible record of work and timelines.

The Steam Team is locally owned and operated in Austin and Central Texas, provides IICRC-certified technicians, and offers 24/7 emergency response to begin mitigation quickly; contact The Steam Team at 512-451-8326 to request a quote or emergency assistance if you need immediate help.

What Does a Fire Damage Assessment and Inspection Include?

A professional assessment inspects structural integrity, locates hidden smoke and water migration, and documents contents loss to form a full scope of work for restoration and insurance estimates. Inspectors use visual surveys, moisture meters, and thermal imaging to map wet cavities and concealed smoke residues that can cause long-term odor and corrosion if left unaddressed. Air quality testing and particulate sampling may be performed to evaluate soot contamination and guide containment and HEPA filtration strategies during cleanup. The final inspection report includes recommended remediation steps, equipment lists, estimated timelines, and photographic documentation that support a clear, auditable restoration plan for homeowners and adjusters.

This detailed inspection forms the roadmap for effective cleanup, drying, and eventual repairs.

Why Choose IICRC Certified Technicians for Fire Restoration?

IICRC certification indicates technicians trained to follow standardized, science-based restoration protocols that improve outcomes and documentation quality for insurance workflows. Certified technicians understand soot chemistry, and the appropriate selection of cleaning agents and deodorization technologies are crucial choices that affect whether surfaces can be salvaged or must be replaced. Certification also emphasizes proper containment, cross-contamination prevention, and validated drying procedures with documented moisture readings that insurers expect. Choosing IICRC-certified teams helps ensure consistent processes, clearer estimates, and communication that supports faster approvals and confident repair planning. Understanding certification benefits leads to the specific cleanup processes technicians use during restoration.

What Are the Key Fire Damage Cleanup Processes?

Key cleanup processes after fire combine targeted soot and smoke removal, structural drying after firefighting water, and advanced deodorization techniques to restore habitability and protect building systems. Soot removal requires classifying residue (dry, wet, protein-based) to select the right mechanical, chemical, or abrasive cleaning method so surfaces are restored without damage. Water extraction and documented dehumidification follow firefighting to prevent mold, relying on pumps, air movers, and dehumidifiers guided by moisture mapping and drying logs. Deodorization employs thermal fogging, hydroxyl generators, and activated carbon filtration combined with thorough ventilation and cleaning to reduce persistent smoke odor. These processes work together: accurate assessment directs the correct cleaning strategy, which then enables safe drying and odor control before reconstruction begins.


The next table compares major cleanup processes, their purpose, and typical equipment or timeframes, so you can understand the sequence and expectations during restoration.

Process

Purpose

Typical Timeframe / Equipment

Assessment & Inspection

Define scope and hazards

Hours to 1 day; thermal camera, moisture meter

Soot & Smoke Cleaning

Remove residues and odor sources

1–7 days; HEPA vacs, chemical sponges, emulsifiers

Water Extraction & Drying

Prevent mold and structural damage

2–10 days; pumps, air movers, dehumidifiers

Deodorization

Neutralize lingering smoke odors

1–5 days; thermal fogger, hydroxyl, activated carbon

This comparison helps set realistic expectations for the restoration timeline and equipment you are likely to see on site.

How Is Smoke and Soot Removed Effectively?

Effective smoke and soot removal starts with identifying the type of residue and isolating impacted areas to prevent spread; technicians then select cleaning methods matched to surface type and soot chemistry. Dry soot on hard surfaces often responds to dry chemical sponges and HEPA vacuuming, while oily or protein-based residues may need specialized solvents and wet cleaning; abrasive methods are reserved for durable, non-finished surfaces. Containment using plastic barriers and negative air pressure with HEPA filtration protects unaffected areas and improves indoor air quality during cleaning. Properly sequenced cleaning reduces the need for demolition and makes later deodorization more effective by removing odor-bearing residues at their source. Recognizing soot types leads to water damage control after firefighting efforts, which is critical to avoid mold.

How Is Water Damage from Firefighting Addressed?

Water used to extinguish fires often causes as much secondary damage as the blaze, so rapid extraction and controlled drying are essential to prevent structural weakening and mold growth. Technicians prioritize removing standing water with pumps and truck-mounted extractors, then establish a documented drying plan that uses air movers and dehumidifiers placed according to moisture mapping. Daily moisture readings and drying logs verify progress and guide when to remove equipment; this documentation supports insurance claims and prevents premature repairs that trap moisture. Follow-up inspections look for hidden moisture in wall cavities and subfloors and include mold prevention measures where needed. A structured drying and monitoring approach reduces long-term repair costs and prepares the site for effective reconstruction.

How Can Personal Belongings Be Restored After Fire Damage?

Contents restoration follows a triage-first approach where items are classified by salvageability, cleaned using material-specific methods, and either returned or stored off-site for specialized processing. The triage categories salvageable, questionable, and unsalvageable help prioritize resources and set realistic expectations for homeowners about what can be restored. Cleaning methods vary by material: ultrasonic or chemical cleaning for hard non-porous items, specialized laundering or dry-cleaning for textiles, freeze-drying and alkaline washes for documents, and controlled lab techniques for electronics. Off-site pack-out and contents cleaning reduce on-site congestion, allow access to industrial-grade deodorization equipment, and protect remaining structures during restoration.

An organized contents workflow preserves as much value as possible and documents each item for insurance purposes while enabling safe, staged reassembly when repairs are complete.

Below is a practical triage checklist to help you understand how restoration teams categorize and handle possessions after a fire.

  1. Salvageable: Items with surface smoke or soot that respond to cleaning and deodorization.

  2. Questionable: Items with suspected deep smoke penetration or partial structural damage needing specialist evaluation.

  3. Unsalvageable: Items destroyed by heat or chemically altered beyond safe restoration.

This triage system informs pack-out decisions and provides clear guidance for claims documentation and restoration prioritization.

What Items Can Be Salvaged and How Are They Cleaned?

Many hard, non-porous items like metal cookware and some glassware are often salvageable with ultrasonic or chemical cleaning that removes soot and neutralizes odors. Textiles and upholstery may require specialized laundering, dry-cleaning, or ozone/hydroxyl treatment depending on smoke exposure and material composition; delicate items undergo conservator-level processes. Documents and photographs benefit from freeze-drying and dehydration to stabilize media before surface cleaning, while electronics require controlled lab-based restoration and testing to avoid power-on risks. Salvage likelihood depends on exposure level, soot type, and thermal damage; restoration professionals document each item's condition and recommended treatment in a pack-out inventory. Understanding salvage methods helps you prioritize what to retrieve and what to entrust to specialists during the pack-out.

What Is the Process for Contents Cleaning and Deodorization?

Contents cleaning and deodorization begin with a documented pack-out inventory, secure transport to a cleaning facility, and sorting by material and contamination level to select appropriate processes. Technicians assign cleaning protocols, ultrasonic baths for metal, controlled laundering for textiles, and solvent or alkaline cleaning for some finishes, and follow with deodorization using thermal fogging, hydroxyl generation, or activated carbon, depending on odor chemistry. Quality checks compare pre- and post-cleaning photographs and perform odor assessments before items are staged for return, and all handling is logged to support insurance claims and content valuation. Final reassembly and delivery include condition reports that note any items deemed beyond recovery. A methodical pack-out and cleaning workflow returns items in usable condition when possible and documents outcomes for claims reconciliation.

How Do I Navigate Fire Damage Insurance Claims in Texas?

Filing a fire damage insurance claim in Texas involves prompt notification, thorough documentation, coordination with adjusters, and clear estimates from restoration providers to support scope and costs. Start by contacting your insurer to open a claim and provide initial photos and summaries while preserving receipts for emergency expenses and temporary housing if necessary. Prepare documents such as inventories, damage photos, contractor estimates, and mitigation receipts; these materials help the adjuster evaluate loss and expedite emergency fund releases if available. Restoration providers can assist by producing detailed scopes of work, documented drying logs, and line-item estimates that align with repair sequencing and help avoid disputes over necessary mitigation.

Being organized and proactive with documentation reduces delays and aligns homeowner, adjuster, and contractor expectations during the settlement process.

The table below clarifies common claim documents, who typically prepares them, and why each matters to your claim, so you can gather materials efficiently.

Document / Step

Who Prepares

Why It Matters / Example

Initial Damage Photos

Homeowner / Responders

Baseline evidence for the claim and emergency fund requests

Scope of Work Estimate

Restoration Contractor

Itemized repair plan that supports adjuster review and billing

Drying Logs / Moisture Reports

Restoration Technician

Verifies mitigation and supports mold-prevention claims

Inventory of Contents

Homeowner / Restoration Team

Item-by-item documentation for replacement or restoration valuation

This EAV-style table shows responsibilities and the value of each document during claims processing.

What Are the Steps to File a Home Insurance Claim After a Fire?

Filing a claim follows a clear sequence: notify your insurer, document damage thoroughly, arrange temporary mitigation, and coordinate inspections and estimates with an adjuster and restoration contractor. Call your insurer to report the loss and ask about emergency coverage and assigned claim numbers, then upload or deliver your photos, video walkthrough, and inventory file to the adjuster or claims portal as instructed. Arrange emergency mitigation board-up, tarp, and water extraction to minimize further loss and preserve receipts for reimbursement consideration. Meet with the adjuster to review the property and the contractor’s scope of work; ensure all mitigation and repair recommendations are documented, and keep copies of every correspondence and invoice. Staying organized and collaborative during these steps increases the chance of a timely, accurate settlement.

How Does The Steam Team Assist With Insurance Claims?

The Steam Team provides documentation support, scope-of-work estimates, and emergency mitigation services that help streamline the insurance process while preserving claim integrity. As a locally owned Austin provider with IICRC-certified technicians and 24/7 emergency response, The Steam Team prepares photographic documentation, drying logs, and itemized repair estimates that align with adjuster expectations and promote transparent communication. The Steam Team can coordinate on-site mitigation quickly to reduce secondary damage and may offer direct-billing options where applicable to simplify homeowner logistics. For assistance with documentation, mitigation, or to request a claims consultation, contact The Steam Team at 512-451-8326 to discuss how they can support your recovery.

This practical assistance helps bridge the gap between emergency actions and the full restoration phase.

What Are the Best Practices to Prevent Future Fire Damage?

Preventing future fire damage focuses on smoke detection, electrical safety, safe storage of flammables, and preparedness planning that reduces risk and shortens response times. Install and maintain smoke alarms on every level and near sleeping areas, consider interconnected or smart alarms that alert across a property, and replace batteries per manufacturer guidance to ensure reliability. Schedule periodic electrical inspections, keep heat-producing appliances well-maintained, and store flammable liquids in approved containers away from ignition sources to minimize accidental starts. Create and rehearse an evacuation plan with family or staff, maintain accessible fire extinguishers, and compile digital copies of important documents to speed recovery if an incident occurs.

These prevention measures lower the likelihood of severe loss and improve readiness, which in turn eases insurance and restoration interactions.

The following list outlines practical, repeatable actions homeowners and businesses can implement today to reduce fire risk and speed recovery.

  • Test and Maintain Smoke Alarms: Check alarms monthly and replace batteries and units according to manufacturer guidance.

  • Plan and Practice Evacuation: Create two escape routes per room and rehearse evacuation with all household members or staff.

  • Inspect Electrical Systems: Schedule inspections and repair damaged cords, overloaded outlets, and faulty appliances promptly.

  • Store Flammables Safely: Keep combustible materials in approved containers and away from heat sources.

Putting these practices into place reduces both the probability and the impact of future fires and makes any necessary restoration more straightforward.

What Fire Safety Measures Should Homeowners and Businesses Implement?

Homeowners and businesses should combine detection, suppression, and maintenance strategies to reduce fire likelihood and the extent of damage when fires occur. Maintain working smoke alarms on every floor, supplement with fire extinguishers appropriate to the probable fuel types, and ensure clear, posted evacuation procedures for employees or visitors in commercial settings. Regularly clear combustible clutter from near HVAC equipment, stoves, and heaters, and enforce safe charging and extension cord practices to prevent electrical ignition sources. For commercial properties, maintain sprinkler systems and inspection records where present to improve early suppression and limit structural loss.

These measures create multiple layers of protection that together reduce both immediate danger and long-term repair needs.

How Can Austin Residents Prepare for Fire Emergencies?

Austin-area residents should account for local climate and community resources when preparing for fire emergencies, including identifying evacuation routes, local fire department guidance, and seasonal risks like dry-weather ignition potential. Keep an emergency kit with essential items and maintain digital backups of key documents, such as insurance policies and inventories to expedite claims if needed. Stay informed about local advisories and contact your local fire department or municipal resources for community-specific guidance on defensible space and evacuation procedures. Local preparation combined with the readiness to call professional restoration support reduces recovery time and mitigates long-term damage.

Staying prepared locally supports faster, safer responses and a more effective restoration pathway after an incident.

Frequently Asked Questions

What should I do if I suspect hidden fire damage in my home?

If you suspect hidden fire damage, it’s crucial to contact a professional fire damage restoration service immediately. Trained technicians can conduct a thorough inspection using specialized tools like thermal imaging and moisture meters to identify hidden smoke, soot, or water damage. These professionals can assess the extent of the damage and recommend appropriate remediation steps. Delaying this process can lead to further deterioration, including mold growth and structural issues, so prompt action is essential for effective recovery.

How long does the fire damage restoration process typically take?

The duration of fire damage restoration varies based on the extent of the damage, the size of the property, and the specific restoration methods employed. Generally, the process can take anywhere from a few days to several weeks. Initial assessments and emergency mitigation may occur within the first few days, while complete restoration, including repairs and reconstruction, can extend the timeline. Factors such as weather conditions, availability of materials, and the complexity of the damage also influence the overall timeline.

Can I stay in my home during the restoration process?

Whether you can stay in your home during restoration depends on the severity of the fire damage and the safety assessment conducted by professionals. If the structure is deemed unsafe due to compromised integrity, smoke, or toxic residues, it’s advisable to find temporary housing. Even if the damage seems minimal, restoration activities can create hazardous conditions, such as dust and fumes. Always prioritize safety and follow the recommendations of your restoration team regarding occupancy during the process.

What types of items are typically unsalvageable after a fire?

Items that are typically considered unsalvageable after a fire include those that have been severely burned, melted, or chemically altered beyond safe restoration. This often includes porous materials like mattresses, upholstered furniture, and certain electronics that may pose safety risks if restored. Additionally, items that have absorbed significant smoke or soot may also be deemed unsalvageable if cleaning efforts cannot restore them to a safe condition. A professional restoration team can help assess the salvageability of your belongings.

How can I prevent mold growth after fire damage?

To prevent mold growth after fire damage, it’s essential to address water damage promptly, as moisture is a key factor in mold development. Ensure that all standing water is extracted quickly, and initiate a thorough drying process using air movers and dehumidifiers. Regular monitoring of moisture levels in affected areas is crucial. Additionally, maintaining proper ventilation and using mold inhibitors during the restoration process can further reduce the risk of mold growth. Consulting with restoration professionals can provide tailored strategies for your specific situation.

What should I include in my fire emergency kit?

Your fire emergency kit should include essential items that can help you respond effectively in the event of a fire. Key components include a flashlight, batteries, a first aid kit, bottled water, non-perishable food, and important documents stored in a waterproof container. Additionally, include a fire extinguisher, a whistle to signal for help, and a list of emergency contacts. Having a well-prepared kit can significantly enhance your safety and readiness during a fire emergency.

How can I choose a reliable fire damage restoration company?


Choosing a reliable fire damage restoration company involves several key steps. Start by checking for certifications, such as IICRC, which indicate adherence to industry standards. Read customer reviews and testimonials to gauge past performance and satisfaction. Ensure the company offers a comprehensive range of services, including emergency response, assessment, and restoration. Additionally, inquire about their experience with insurance claims to facilitate a smoother process. Finally, request a detailed estimate and timeline to understand the scope of work and costs involved.

Conclusion
Recovering from fire damage involves a structured approach that prioritizes safety, thorough documentation, and professional restoration to ensure a successful recovery. By understanding the steps outlined in this guide, homeowners can effectively navigate the complexities of restoration and insurance claims, minimizing further loss and expediting recovery. Engaging with certified professionals not only enhances the restoration process but also provides peace of mind during a challenging time. For immediate assistance and expert guidance, contact The Steam Team today to discuss your fire damage restoration needs.

How to Extend the Life of Your Commercial Carpets

Extend Your Carpet's Life Today

Commercial carpet longevity means keeping carpet fibers, backing, and padding functional and appearance-ready for as long as possible through targeted maintenance, timely restoration, and informed purchasing decisions. Premature carpet failure is usually driven by soil abrasion, concentrated foot traffic, and moisture incidents that degrade fibers and backing; addressing these causes requires a mix of daily routines and periodic professional interventions. This guide explains practical daily maintenance, the role of professional deep cleaning, preventative strategies for wear and moisture, and restoration triage for water, mold, and tough stains, all tailored for facility managers and business owners. Early detection and disciplined upkeep save replacement costs and preserve indoor air quality, while proper environmental controls reduce microscopic soil adhesion and mold risk. You will find step-by-step how-to lists, EAV comparison tables of cleaning methods and protective measures, and clear vendor selection criteria to help you implement a program that extends carpet life. A brief local note: The Steam Team, an Austin-based cleaning and restoration company, provides commercial cleaning, restoration, and IICRC-certified technician services that illustrate how professional programs integrate with daily maintenance. With that context, let’s begin with the everyday actions that prevent most damage.

What Are the Best Daily Commercial Carpet Maintenance Tips?


Daily maintenance minimizes abrasive soil, prevents early wear, and reduces the frequency of deep cleaning by addressing contaminants before they embed. A disciplined program focuses on vacuuming, immediate spot response, entryway matting, and visual inspections that prioritize high-traffic routes and service corridors. Implementing these controls lowers particulate load that abrades the pile and reduces the chance of dye migration from unnoticed spills, which preserves both appearance and warranty compliance. The next section breaks down vacuuming mechanics and spot-treatment steps so staff can apply consistent, effective techniques that feed into scheduled professional maintenance.


Daily actions that keep carpets functional and attractive include:

  • Use commercial-grade vacuums with appropriate filtration and adjustable suction for pile depth at least once per day in medium-traffic areas.

  • Place multi-stage entryway matting to capture tracked-in soil and change or clean mats on a scheduled cycle.

  • Institute immediate blot-and-treat spot protocols for spills, using neutral-pH, eco-friendly solutions and avoiding aggressive rubbing.

  • Perform brief visual inspections each shift to identify stains, seam issues, or wet spots that need escalation.


These practical steps reduce embedded soils and prolong the interval between professional deep-clean cycles, making scheduled extraction and restoration more effective.

How Does Regular Vacuuming Protect Commercial Carpets?


Regular vacuuming removes dry, abrasive soil that acts like sandpaper against carpet fibers and is the single most cost-effective preventive measure facility managers can deploy. Proper vacuuming uses commercial-grade equipment with brush-roll adjustment for pile type and HEPA or high-efficiency filtration to reduce airborne particulates that settle back into the carpet; executed correctly, vacuuming can remove the majority of loose soil before it abrades fibers. Frequency should match traffic: high-traffic aisles require multiple passes per day, medium-traffic areas daily, and low-traffic zones several times per week. Training staff on technique, slow, overlapping strokes, edge cleaning, and scheduled bag/filter maintenance boosts performance and ensures vacuuming contributes to overall lifespan extension rather than merely cosmetic upkeep. Routine vacuuming also primes carpets for deeper interventions by limiting soil load; that connection leads to effective spot-cleaning protocols that stop stains from setting.

What Are Effective Spot Cleaning Techniques for Commercial Carpets?


Effective spot cleaning starts with immediate containment and a sequence that protects fiber dyes and backing while removing the contaminant; the first steps are to blot excess liquid, identify stain type, and apply the correct cleaning chemistry. For protein-based spills (coffee, food), use a neutral enzymatic or protein-friendly solution and blot from the outside in; for oil/grease, use a solvent-based pre-spray followed by emulsification and blotting; avoid aggressive scrubbing that frays tufts or forces stain deeper. Use eco-friendly, neutral-pH cleaners where possible to protect colorfastness and warranty conditions, and escalate to professional intervention if a spot threatens dye migration or if backing appears darkened. Training on a simple decision tree identifies, contains, chooses chemistry, blot, and monitor empowers frontline staff to limit permanent damage while preserving fiber integrity. Consistent spot practices reduce stain escalation and feed into when and how often to schedule professional deep cleaning, which we’ll explore next.

Why Is Professional Deep Cleaning Essential for Commercial Carpet Longevity?


Professional deep cleaning removes embedded soils and residues that routine vacuuming and spot treatments cannot reach, restoring pile loft and slowing fiber abrasion. Deep methods extract contaminants from the pile and backing, reduce allergen load, and can remove sticky residues that trap more dirt, thereby prolonging the effective life of the carpet system. Properly executed professional cleaning follows industry standards (IICRC/CRI principles), uses appropriate chemistry for fiber types, and targets recommended frequencies based on traffic and local conditions. Below is a concise comparison of common professional approaches, their key attributes, and how each benefits carpet longevity.


Cleaning Method

Key Attribute

Benefit for Carpet Longevity

Steam cleaning (hot water extraction)

Deep extraction of embedded soils

Restores pile loft and removes residues that accelerate wear

Dry/low-moisture (encapsulation)

Fast drying, less downtime

Good for light-soil maintenance and frequent scheduling

Bonnet cleaning

Surface agitation for appearance

Interim maintenance for surface soils, not a deep-clean substitute


This comparison shows why a mixed program regular extraction cycles combined with low-moisture interim treatments often delivers the best lifespan outcomes by balancing deep soil removal and operational downtime. As an example of professional standards in practice, The Steam Team uses IICRC-trained technicians and method selection tailored to traffic and downtime constraints; facility managers can request a tailored quote or schedule an assessment to align frequency with business needs. The next subsection outlines specific methods and use cases so you can match objectives to the right professional approach.

What Commercial Carpet Cleaning Methods Extend Carpet Life?


Steam cleaning, also called hot water extraction, is the hyponym that best represents deep cleaning for most commercial carpets because it flushes and extracts soil from pile and backing, reducing abrasive particles that shorten service life. Encapsulation and low-moisture systems polymerize soil and allow rapid vacuum removal, minimizing downtime and supporting more frequent maintenance cycles in operational environments. Bonnet cleaning addresses surface oils and appearance but leaves deeper soils intact; it’s useful for interim appearance management but should not replace periodic extraction. Choosing the right method depends on traffic patterns, fiber composition, and operational constraints: use hot water extraction for heavy-soil conditions, encapsulation for quick turnarounds, and bonnet cleaning only for interim cosmetic care. Matching method to use-case increases cleaning efficacy and protects warranties, which guides recommended professional frequencies discussed next.

How Often Should Commercial Carpets Be Professionally Cleaned in Austin?


Professional cleaning frequency depends on traffic intensity, environmental factors like seasonal pollen or humidity, and the facility’s tolerance for downtime; a simple traffic-based schedule helps standardize planning. For low-traffic office areas, plan extraction at least once per year; medium-traffic spaces benefit from semiannual to quarterly extraction depending on observed soiling; high-traffic corridors and public lobbies often require quarterly or more frequent deep cleaning to prevent pile compression and abrasive wear. Austin’s seasonal pollen and humidity can increase soil load and moisture-related risks during certain months, so adjust schedules around peak seasons and monitor carpets for accelerated soiling between services. Set benchmarks and track visible soil and fiber recovery post-cleaning to refine intervals; this operational rhythm supports a longer carpet service life and reduces premature replacement expenses.

How Can You Protect Commercial Carpets from Wear, Stains, and Moisture?


Protective measures combine physical products, policies, and environmental controls to limit the forces that shorten carpet life. Entryway systems, traffic zoning, runners, and furniture rotation reduce concentrated abrasion while well-defined spill procedures and dehumidification limit moisture-related degradation. Implementing preventive controls removes or reduces causes of damage before they require restoration, and integrating these measures with scheduled cleaning amplifies their value. The following table compares common preventative measures by cost, downtime, and estimated value for lifespan extension so managers can prioritize investments.

Preventative Measure

Attribute (cost/downtime/efficacy)

Value (lifespan extension / soil reduction %)

Entryway mats

Low cost, minimal downtime

Up to 60–80% of tracked-in soil captured

Protective runners

Moderate cost, low downtime

Extends high-traffic area life by 20–40%

Traffic zoning & rotation

Low-cost, operational planning

Reduces concentrated wear and evens out usage

Staff spill training

Minimal cost, training time

Lowers permanent stain incidents and repair needs


This comparison helps prioritize quick wins like matting and training, which often deliver outsized returns relative to cost.


To operationalize prevention, start with clear policies and a simple implementation checklist.

  • Place multi-step matting at all main entrances and maintain mats on a scheduled cycle.

  • Deploy runners in aisles and high-traffic transit areas, replacing or cleaning as part of floor care.

  • Establish staff protocols for immediate spill response and routine visual inspections.

  • Monitor indoor humidity and use dehumidification in wet seasons to reduce backing and adhesive failures.


These measures reduce soil ingress and moisture incidents, making professional cleaning more effective and extending the carpet’s functional life.

What Are the Best Strategies to Prevent Wear in High-Traffic Areas?


Preventing wear in high-traffic zones starts with traffic zoning, durable material selection, and surface protections like runners that absorb abrasion before it reaches carpet fibers. Specify higher-density pile or commercial-grade fibers in primary corridors and complement them with removable runners or modular carpet tiles to allow targeted replacement rather than whole-floor replacement. Rotate furniture and rethink layouts to disperse footfall concentrations when possible; routine interim cleaning (low-moisture encapsulation) reduces surface soil that accelerates fiber collapse. Evaluate ROI by comparing runner and targeted replacement costs to full carpet replacement timelines. Often, small protective investments delay large capital outlays. These tactics, combined with daily maintenance and scheduled deep cleaning, establish a layered defense that preserves appearance and performance.

How Do Moisture and Spills Affect Commercial Carpet Health?


Moisture and spills lead to a cascade of problems: rapid soil migration into backing, adhesive degradation, odors, and mold growth if not addressed quickly; within 24–48 hours microbial growth can begin under warm, humid conditions. Immediate extraction, controlled drying, and humidity management are essential triage steps to prevent structural backing failure and reduce salvage costs. For small spills, rapid blotting and targeted cleaning suffice; for larger wetting events or contamination with gray/black water, emergency extraction and professional restoration are necessary. Monitoring drying progress with moisture meters and maintaining HVAC performance ensures carpets return to target moisture thresholds to prevent residual damage. Understanding the timeline from spill to structural damage helps facilities decide when to escalate to restoration specialists.

How Do You Address Commercial Carpet Damage: Water, Mold, and Stain Restoration?


Restoration combines immediate triage, appropriate cleaning or remediation methods, and verification to ensure the carpet system returns to service without health or structural issues. Early identification and extraction prevent backing delamination and mold colonization, while specialized stain and fiber repair techniques can restore appearance for many incidents. A clear triage table helps facility managers act quickly and decide whether on-site cleaning suffices or if 24/7 emergency restoration is required. Below is a triage reference to speed decision-making during incidents.

Damage Type

Early Signs

Recommended Immediate Action

Fresh water spill

Wet surface, no odor

Extract water, circulate air, dehumidify

Contaminated water (gray/black)

Odor, visible contamination

Isolate area, PPE, call professional restoration

Mold growth

Musty odor, discoloration

Contain area, test, and remediate with specialists


The paragraphs below describe signs and practical next steps for water and mold incidents and when to escalate.

What Are the Signs and Solutions for Water Damage in Commercial Carpets?


Signs of water damage include visible wetting, rapidly darkening backing or seams, persistent musty odors, and elevated moisture readings with probes; these indicators point to hidden saturation that can compromise adhesives and subfloors. Immediate actions are extraction, high-capacity drying with airflow and dehumidification, and monitoring moisture content until target thresholds are met; aim to complete drying within 24–72 hours to avoid mold growth. If contamination is suspected or drying cannot be achieved quickly, involve emergency restoration services that use industry-grade extraction and drying equipment. Document interventions and moisture readings to support insurance and maintenance records and to improve future response planning. Prompt triage reduces the need for full replacement and shortens downtime, leading to how mold remediation is managed when contamination is present.

How Is Mold Remediation Performed on Commercial Carpets?


Mold remediation begins with a scope assessment to identify affected areas, containment to prevent spore spread, and appropriate cleaning or removal depending on carpet system construction and contamination level. Surface mold on low-porosity materials may be cleaned and treated with antimicrobial agents, while extensive mold in padding, adhesives, or seams often requires removal and replacement of the affected components. Post-remediation verification using visual inspection and moisture testing confirms that conditions have returned to acceptable ranges, and follow-up measures focus on fixing the moisture source and improving ventilation. Work by trained remediation teams reduces cross-contamination risk and restores safe occupancy faster than ad hoc approaches.

How to Choose the Right Commercial Carpet Cleaning Service in Austin?


Selecting a vendor requires evaluating certifications, local experience, service scope (cleaning plus restoration), response times, and transparent pricing and guarantees to match your facility’s risk tolerance. Ask for proof of technician training, equipment lists, insurance coverage, and documented case examples of similar projects to your facility type. Prefer providers who integrate cleaning schedules with restoration capabilities, HVAC/duct coordination, and preventive-mat programs to deliver holistic floor system care. The next subsection explains why IICRC certification matters and how those credentials reduce operational risk in commercial settings. When comparing providers, use a checklist that includes certification, local reputation, service range, and emergency response capability:

  1. Verify technician training and adherence to industry standards like IICRC.

  2. Confirm the provider handles both routine cleaning and restoration to streamline escalation.

  3. Check local reputation indicators such as BBB ratings and awards where available.

  4. Request references or case descriptions for similar commercial projects.


This evaluation approach helps you choose a partner whose practices align with your maintenance and lifespan goals.

Why Choose IICRC Certified Technicians for Commercial Carpet Cleaning?


IICRC certification indicates technicians have been trained in standardized procedures for cleaning, water damage restoration, and microbial remediation, which improves the predictability of outcomes and reduces the risk of fiber damage or improper drying. Certified personnel are more likely to follow documented protocols for soil removal, chemical application, and drying targets practices that protect warranties and extend carpet life. Certification also signals ongoing education and adherence to industry best practices, which matter for complex incidents like contaminated water or mold remediation. Prioritizing certified technicians reduces unforeseen repair costs and supports consistent, evidence-based service delivery. Certified teams form part of a risk-managed strategy that ties daily maintenance to professional cleaning and restoration cycles.

What Makes The Steam Team the Trusted Choice for Austin Businesses?


As an example of a qualified local vendor, The Steam Team offers both commercial cleaning and restoration services with IICRC-certified technicians, an A+ rating with the Better Business Bureau, and a variety of facility services including water damage restoration, mold remediation, carpet cleaning, tile and upholstery care, and air duct cleaning. This breadth allows a single provider to coordinate cleaning schedules, emergency response, and environmental controls for more efficient restoration and maintenance workflows. Facility managers seeking local expertise often evaluate these credentials: technician certification, documented service scope, and local reputation when requesting quotes or scheduling an assessment. For businesses in Austin, asking prospective vendors about these specific qualifications helps ensure you select a partner aligned with longevity-focused carpet care. If you want a professional assessment or a tailored maintenance plan, request a quote or schedule an appointment with a qualified local provider that can demonstrate these credentials.

What Are the Most Effective Tools and Accessories to Extend Commercial Carpet Life?


The right tools and accessories, from high-performance vacuums to multi-stage entry mats and environmental monitoring devices, create measurable reductions in soil and moisture-related damage. Investing in commercial vacuums with adjustable suction, dedicated spot-treatment kits, extractors for periodic deep cleaning, and humidity monitors yields operational control that makes maintenance more effective. Combining equipment purchases with service agreements for periodic professional extraction and HVAC/air-duct maintenance integrates sibling services that influence carpet performance and indoor air quality. The following list highlights practical tools and why they matter so you can prioritize procurement and placement.


Essential tools and accessories for carpet longevity include:

  • Commercial upright or backpack vacuums with HEPA or high-efficiency filtration and adjustable brush height.

  • Walk-off matting systems with a multi-stage approach at all major entrances to capture up to 80% of tracked-in debris.

  • Portable extractors and low-moisture encapsulation units for targeted interim cleaning and quick response to spills.

  • Humidity monitors and portable dehumidifiers to control indoor moisture and speed drying after wet events.


Selecting and maintaining these tools reduces cleaning labor, cuts replacement frequency, and supports a comprehensive maintenance program.

How Do Entryway Mats Help Prevent Dirt and Debris Damage?


Entryway mats are a high-impact, low-cost defense that captures the majority of tracked-in soil before it reaches carpeted areas, and a multi-stage matting strategy at exterior and interior thresholds significantly improves capture rates. Materials like textured scraper mats outside and absorbent, low-profile mats inside form a hyponymic sequence of defenses that reduce overall soil load by as much as 60–80% when maintained regularly. Best practice is scheduled cleaning or replacement of mats and ensuring mat length accommodates several strides so footwear makes multiple contacts; this operational detail multiplies the matting’s efficacy. Proper mat selection and maintenance directly lowers vacuuming frequency and extends deep-cleaning intervals.

What Environmental Controls Support Commercial Carpet Longevity?


Environmental controls, such as humidity regulation, HVAC filtration, and duct cleaning, reduce moisture-related failures and airborne particulate deposition that contribute to carpet soiling and mold risk. Maintain indoor relative humidity in a recommended operational band (typically 30–60%) and service HVAC filters on a predictable schedule to minimize dust and biological growth; where wet events occur, use dehumidification and increased airflow to meet drying targets. Air-duct cleaning as part of a coordinated maintenance plan reduces redistribution of particulate matter onto carpets and complements surface cleaning efforts. Monitoring systems that alert facility teams to humidity spikes or HVAC performance drops enable faster triage and reduce the chance of long-term carpet system degradation. Integrating environmental controls with cleaning and restoration forms a systems approach that preserves carpet integrity and indoor air quality over time.

Frequently Asked Questions

What are the benefits of using eco-friendly cleaning solutions for commercial carpets?


Using eco-friendly cleaning solutions for commercial carpets offers several advantages. These products are typically formulated with biodegradable ingredients that are less harmful to the environment and indoor air quality. They reduce the risk of chemical exposure for both staff and customers, making the workplace safer. Additionally, eco-friendly cleaners often maintain the integrity of carpet fibers better than harsh chemicals, which can lead to longer carpet life. By choosing these solutions, businesses can demonstrate their commitment to sustainability while effectively maintaining their carpets.

How can humidity control impact the maintenance of commercial carpets?


Humidity control is crucial for maintaining commercial carpets as excessive moisture can lead to mold growth, odors, and degradation of carpet backing and adhesives. Keeping indoor humidity levels between 30-60% helps prevent these issues, ensuring carpets remain in good condition. Dehumidifiers can be used in high-moisture environments, especially during wet seasons, to manage humidity levels effectively. Regular monitoring of humidity can also help facility managers respond quickly to potential moisture problems, thereby extending the life of the carpets and improving indoor air quality.

What role does staff training play in carpet maintenance?


Staff training is essential for effective carpet maintenance as it empowers employees to recognize and address issues promptly. Training programs should cover daily maintenance tasks, such as proper vacuuming techniques and immediate spill response protocols. Educated staff can prevent minor issues from escalating into major problems, such as permanent stains or mold growth. Additionally, training fosters a culture of care and responsibility, ensuring that everyone understands the importance of maintaining the carpets, which ultimately contributes to the longevity and appearance of the flooring.

How can traffic zoning help in extending carpet life?


Traffic zoning is a strategic approach to managing foot traffic in commercial spaces, which can significantly extend carpet life. By designating specific pathways for high-traffic areas and using protective runners or mats, businesses can reduce wear and tear on carpets. This method helps distribute foot traffic more evenly, minimizing concentrated abrasion in certain areas. Additionally, traffic zoning can inform cleaning schedules, allowing for more frequent maintenance in high-use zones while reducing wear in less-trafficked areas, ultimately preserving the carpet's appearance and functionality.

What are the signs that a commercial carpet needs professional cleaning?


Several signs indicate that a commercial carpet requires professional cleaning. Visible stains, persistent odors, and a dull appearance are primary indicators. Additionally, if carpets feel matted or compressed, or if there is an increase in allergy symptoms among occupants, it may signal that embedded dirt and allergens are present. Regular visual inspections can help identify these issues early. If routine vacuuming and spot cleaning are no longer effective, it’s time to schedule a professional deep cleaning to restore the carpet’s condition and extend its lifespan.

How can businesses assess the effectiveness of their carpet maintenance program?


Businesses can assess the effectiveness of their carpet maintenance program through several methods. Regularly tracking visible soil levels, monitoring the frequency of professional cleanings, and evaluating the carpet's overall appearance can provide insights into maintenance success. Additionally, conducting periodic inspections and gathering feedback from staff about carpet conditions can highlight areas needing improvement. Establishing benchmarks for cleaning frequency based on traffic patterns and environmental factors also helps refine the program, ensuring it meets the needs of the facility while extending carpet life.

Conclusion


Implementing a comprehensive maintenance program for commercial carpets significantly enhances their longevity and appearance, ultimately saving costs associated with premature replacement. By combining daily upkeep, professional cleaning, and preventative measures, facility managers can effectively mitigate wear and moisture-related damage. Understanding the importance of these strategies empowers businesses to maintain a healthier indoor environment and improve overall aesthetics. For tailored solutions and expert assistance, consider reaching out to a qualified local provider today.

How Often Should You Clean Air Ducts in Austin?

Air Duct Cleaning Frequency Guide

Air duct cleaning frequency answers combine industry standards with local environmental realities; NADCA’s baseline and Austin’s unique allergen and humidity profile together determine the right interval. This guide explains recommended schedules, local adjustments driven by cedar pollen, ragweed, seasonal dust events, and humidity-related mold risk, and how those factors translate into practical cleaning timelines for both residential air duct cleaning and commercial duct cleaning in Austin. Readers will learn observable signs that warrant earlier service, the health and efficiency benefits of professional cleaning, transparent cost drivers, and a clear path to request an inspection or personalized quote. The article also covers NADCA and EPA guidance, actionable DIY checks, and why a NADCA-certified provider matters when remediation or mold concerns arise. Throughout, you’ll find localized advice for Austin homes and businesses, plus practical next steps for scheduling service with a trusted local provider.

What Are the General Air Duct Cleaning Recommendations and NADCA Guidelines?


Industry guidance frames cleaning frequency by condition rather than fixed calendar rules: NADCA recommends typical cleaning cycles every 3–5 years as a baseline, while EPA guidance emphasizes condition-based assessment for indoor air quality. These baseline recommendations exist because contamination rates vary widely by occupancy, activity, and environmental exposure, and professionals use inspection to determine whether ducts need service sooner. For Austin air duct cleaning frequency, local factors often compress that baseline toward more frequent inspection and cleaning. The next paragraphs explore NADCA’s specific phrasing and how EPA and industry standards combine into practical scheduling.

What Does NADCA Recommend for Air Duct Cleaning Frequency?


NADCA’s guidance centers on inspection-driven intervals, recommending cleaning every 3–5 years for typical systems while specifying immediate cleaning when visible contamination, active mold, or vermin presence exists. The rationale is that contaminants accumulate at different rates depending on components of the HVAC system supply vents, return vents, duct trunks, registers, and filters, which means a one-size-fits-all interval is unreliable. Technicians follow NADCA procedural standards for containment, agitation, and verification to ensure cleaning is effective and safe. Understanding NADCA’s baseline helps homeowners see why local adjustments for Austin are often necessary.


Residential Air Duct Cleaning and IAQ: A Field Study


A nine-home field study was conducted to investigate the impact of mechanical air duct cleaning (ADC) methods on indoor air quality (IAQ) and system performance. ADC services were provided by the National Air Duct Cleaners Association (NADCA). Only mechanical ADC methods were evaluated. Surface treatments, such as biocides or encapsulants, were not part of the study. Pre- and post-ADC measurements were used to evaluate impacts. These included deposited duct dust measurements, airborne particle and fiber concentrations, microbial bioaerosol and surface sampling, and system performance factors such as temperature, relative humidity air flow rates, and static pressure. Surface sampling in ducts indicated that mechanical ADC is effective in removing adhered dust and dirt. The particle measurement data could not offer a clear indication that indoor levels can be reduced using mechanical ADC because there was an apparent strong influence from outdoor particle mass concentrations. Mechanical ADC did not significantly reduce bioaerosol or microbial density in the houses studied. Measurements of system performance factors suggest that ADC may have a positive effect. Supply air rates increased between 4 and 32% in eight of the houses and return air flow rates increased 14 and 38% in two of the houses.


Evaluating residential air duct cleaning and IAQ: results of a field study conducted in nine single family dwellings., 1997


How Do EPA and Industry Standards Influence Cleaning Intervals?


The EPA frames air duct cleaning as part of broader indoor air quality services rather than issuing fixed timing rules, encouraging homeowners to consider cleaning when contamination affects indoor air or system performance. Industry standards and NADCA protocols complement EPA direction by providing procedural steps for inspection, testing, and certified cleaning techniques that technicians use to verify results. Together, these standards form a decision pathway: inspect, identify contaminants (dust, mold, pet dander), evaluate access and HVAC maintenance history, then schedule cleaning if contamination exceeds acceptable thresholds. This combined approach reduces unnecessary service while ensuring polluted systems receive timely intervention.

Why Do Austin Homes and Businesses Need More Frequent Air Duct Cleaning?


Austin’s climate and seasonal allergen profile often accelerate duct contamination compared with many other regions, making more frequent inspection and cleaning a prudent strategy for indoor air quality. High seasonal pollen events, particularly cedar and ragweed, deposit airborne particulates through returns and accumulate in duct trunks and registers, while periodic wind-driven dust events add fine particulate load to systems. Additionally, local humidity spikes and occasional flooding or moisture intrusion create conditions that favor microbial growth in ductwork and plenums, increasing mold risk. The following subsections break down allergens, humidity, and behavioral triggers that warrant tighter cleaning intervals in Austin.

How Does Austin’s Allergen Profile Affect Air Duct Contamination?


Austin’s cedar season and late-summer ragweed peaks inject abundant allergenic particles into indoor air, which then collect on filters, inside ducts, and at supply vents, reducing indoor air quality and exacerbating allergy symptoms. These types of airborne allergens, cedar pollen, grass pollens, and ragweed, have distinct seasonal timelines and particle sizes that influence where they deposit within the HVAC system. Residents who track local pollen calendars can pair peak seasons with pre- and post-season inspections to reduce recirculation of allergens. Proactive cleaning timed around high-pollen windows helps lower indoor allergen loads and offers measurable symptom relief for sensitive occupants.

What Role Does Austin’s High Humidity Play in Mold Growth in Air Ducts?


Austin’s intermittent high humidity increases the probability of condensation on duct surfaces and in plenums, creating microenvironments where mold and bacterial colonies can establish. Condensation tends to occur on metal duct trunks and in poorly insulated runs, particularly where cool return air meets warm, humid attic or crawlspace conditions; these components, duct trunks and flex ducts, are common mold hotspots. When occupants detect persistent musty odors or visible microbial growth at registers, mold remediation (not just cleaning) may be needed; testing and containment per NADCA standards guide that decision. Addressing humidity sources and insulating vulnerable duct runs reduces recurrence after remediation.

How Do Pets, Smokers, and Home Renovations Increase Cleaning Frequency?


Household activities and events raise contamination rates significantly; pet dander and hair shed into the return airstream, smoking deposits sticky residues inside ducts, and remodeling generates dense construction dust that infiltrates the system. These behaviors create accumulations that degrade indoor air quality and obstruct airflow, and each is a trigger for earlier cleaning, often within 1–2 years or immediately after renovation. For homes with multiple pets or indoor smoking, scheduling inspections more frequently helps prevent long-term buildup and potential odor issues. Planning a cleaning shortly after renovations ensures plaster, drywall dust, and adhesives don’t become long-term contaminants.

What Are the Clear Signs That Your Air Ducts Need Cleaning in Austin?


Visible dust, persistent musty odors, unexplained allergy spikes, and declining HVAC performance are the primary observable signals that ducts require professional attention; these signs link directly to specific causes and recommended actions. Homeowners can perform simple diagnostic checks, flashlight inspections at registers, monitoring odor persistence after HVAC cycles, and tracking sudden HVAC efficiency losses to determine whether to call a pro. The following subsections explain what to look for, how to interpret common odors, and when allergy or performance symptoms indicate cleaning is needed. An EAV table below maps signs to causes and next steps for clarity.


Different signs indicate particular problems and require targeted responses.


Sign Observed

Probable Cause

Recommended Next Step

Thick dust is visible at the registers

High particulate deposition from pollen, pets, or dust storms

Schedule inspection and professional cleaning; upgrade filters temporarily

Persistent musty or “dirty sock” odor

Microbial growth due to moisture or condensation

Request microbial assessment and possible mold remediation following NADCA protocols

Sudden allergy spike indoors

Increased allergen recirculation (cedar, ragweed, pet dander)

Clean ducts, replace filters, and clean around pollen season

Reduced airflow and higher utility bills

Duct clogs or collapsed flex ducts reduce HVAC efficiency

Inspect duct trunks and registers, clear obstructions, and evaluate for repairs


This mapping helps owners prioritize actions: visible buildup and odors usually require prompt professional intervention, while isolated dust at a single register may first be addressed with filters and spot cleaning.

What Are the Benefits of Professional Air Duct Cleaning for Austin Residents and Businesses?


Professional air duct cleaning improves indoor air quality, reduces allergen recirculation, and can restore HVAC efficiency benefits that are particularly relevant in Austin’s allergenic and humid environment. Mechanistically, cleaning removes accumulated particulates and biological contaminants from supply vents, return vents, and duct trunks, which lowers airborne particulate concentrations and reduces exposure for occupants. From a maintenance perspective, removing obstructive deposits reduces blower workload and can lead to measurable energy performance improvements over time. The following subsections examine air quality, efficiency, and allergen reduction benefits with practical outcomes.

How Does Air Duct Cleaning Improve Indoor Air Quality and Health?


Cleaning removes settled particulates and biofilm that otherwise re-entrain into indoor air during HVAC cycles, directly lowering exposure to allergens and irritants associated with cedar pollen, ragweed, and pet dander. Reduced particulate load often correlates with fewer allergy flare-ups and improved comfort for sensitive individuals, although complete elimination of symptoms depends on multiple factors, including filtration and source control. Professionals use containment and agitation methods to dislodge deposits from duct trunks and registers, followed by high-efficiency capture to prevent redistribution. Improved IAQ supports occupant health and complements other interventions like HEPA filtration and humidity control.

How Can Cleaning Enhance HVAC Efficiency and Reduce Energy Costs?


When ducts are free of heavy deposits, airflow improves, and the HVAC system achieves design airflow rates with less blower energy, translating to reduced runtime and potentially lower energy consumption. Industry estimates vary, but targeted cleaning and addressing restrictive obstructions can reduce strain on compressors and blowers, contributing to modest operational savings over the following seasons. These maintenance savings come from the mechanical principle that airflow resistance decreases when components like flex ducts and registers are cleared, improving heat transfer and reducing cycle frequency. Routine cleaning combined with filter maintenance helps extend system service life and stabilize efficiency gains.

How Does Cleaning Reduce Allergens and Irritants Specific to Austin’s Environment?


Targeted cleaning reduces the reservoir of local allergens, cedar pollen, ragweed, and windblown dust contained within ductwork, which lessens the amount of allergen recirculation during HVAC operation. While cleaning cannot remove outdoor pollutant sources or eliminate all exposures, removing built-up pollen and dander from duct trunks and registers provides a meaningful drop in indoor particulate counts. Cleaning is most effective when paired with source-control measures such as sealing entry points, improving filtration, and scheduling cleanings around high-pollen seasons for maximum impact on occupant symptoms.

Why Choose The Steam Team for NADCA Certified Air Duct Cleaning in Austin?


Choosing a provider with local expertise and NADCA-certified technicians helps ensure procedures follow industry best practices for safety, containment, and verification. The Steam Team positions itself as a local Austin service provider that adheres to those standards. The company background emphasizes lead generation and serving as an information hub for cleaning and restoration in Austin and Central Texas, and the business reports employing NADCA-certified air duct cleaning technicians and offering a service guarantee, elements that matter when addressing microbial risks or complex contamination. For readers wanting both technical rigor and local knowledge, the next subsections unpack what local experience and certification translate to in practice.

What Does 42 Years of Austin Experience Mean for Your Air Duct Cleaning?


Long-term local experience brings accumulated knowledge about Austin-specific issues, seasonal allergen cycles, humidity patterns, and common construction types that help technicians anticipate problem areas and recommend optimal timing for cleaning and maintenance. Experienced teams can identify neighborhood- or building-type tendencies (for example, certain attic configurations that encourage duct condensation) and tailor interventions to reduce recurrence. That local perspective shortens diagnostic time and improves remediation success, especially when combined with NADCA protocols. Practical advantages include quicker identification of mold-prone runs and more efficient scheduling around pollen and renovation cycles.

How Does NADCA Certification Ensure Professional and Safe Cleaning?


NADCA certification indicates that technicians have training in standardized inspection, containment, and cleaning methods designed to minimize cross-contamination and verify results; this reduces risk to occupants during treatment. Certified technicians follow protocols for agitation, negative-pressure containment, and post-cleaning verification that target components such as supply vents, return vents, and duct trunks to achieve thorough cleaning. Certification also signals adherence to inspection and quality measures that help customers understand what to expect from service and how outcomes are measured. Choosing a certified team supports both safety and performance outcomes for indoor air quality projects.

What Awards and Local Testimonials Support The Steam Team’s Reputation?


Local recognition and customer feedback are cited as trust indicators reflecting quality and consistent service delivery in Austin and Central Texas, and The Steam Team’s reported local awards help prospective customers evaluate reputation. Testimonials and local awards emphasize responsiveness, comprehensive service offerings, and a service guarantee that reassures homeowners and commercial clients. When selecting a provider, potential customers should look for evidence of consistent local performance and documented procedural rigor elements that inform reliable expectations for outcomes and satisfaction.

How Much Does Air Duct Cleaning Cost in Austin and What Should You Expect?


Air duct cleaning cost in Austin varies with system size, contamination level, presence of mold, accessibility, and whether additional services (like mold remediation) are required; a realistic range depends on these drivers, and providers typically offer personalized quotes after inspection. Transparent cost conversations focus on the primary price influencers: system complexity, contamination severity, and required containment measures, so customers understand why estimates differ. The table below compares common cost drivers and their typical impact to clarify price variability and what to expect when requesting a personalized estimate.

Cost Driver

How It Affects Price

Typical Impact

System size (number of vents/duct runs)

Larger systems require more labor and equipment time

Moderate to High

Contamination level (heavy dust, mold, smoke residue)

Requires deeper cleaning, testing, or remediation

High

Accessibility and duct type

Difficult access or extensive flex ducts increase labo costsr

Moderate

Additional services (mold remediation, repairs)

Adds specialized containment and treatment steps

High

Commercial vs residential scope

Commercial systems are larger and may need off-hours work

Moderate to High

What Factors Influence Air Duct Cleaning Prices in Austin?


Prices depend on system size, contamination severity, mold presence, accessibility issues, and whether the job is residential or commercial; each factor alters labor, containment, and equipment needs. For instance, mold remediation adds testing and specialized treatments that significantly increase cost compared with routine particulate cleaning, while inaccessible duct runs or compromised registers require extra diagnostic time and potential repair. Commercial duct cleaning often involves larger trunk lines and extended service windows, which increases logistical complexity. Understanding these drivers empowers customers to evaluate quotes and prioritize services that address the root causes of poor indoor air quality.

How Can You Get a Personalized Quote from The Steam Team?


To obtain an accurate estimate, provide details about home or building size, number of HVAC units, visible symptoms (odors, dust), recent renovations, and any known mold history; a professional will then inspect the system and deliver a tailored quote. The typical process includes a remote screening followed by an on-site inspection where technicians assess supply vents, return vents, duct trunks, filter condition, and accessibility before producing a detailed estimate. Expect the inspector to recommend targeted services and explain trade-offs between basic cleaning and more involved remediation when required. Customers seeking transparency should ask providers for written scopes and verification steps aligned with NADCA standards.

Frequently Asked Questions

What Are the Health Benefits of Regular Air Duct Cleaning?


Regular air duct cleaning significantly improves indoor air quality, which can lead to better health outcomes for residents. By removing dust, allergens, and microbial contaminants, cleaning helps reduce respiratory issues, allergy symptoms, and other health problems associated with poor air quality. This is particularly important in areas like Austin, where high pollen counts and humidity can exacerbate these issues. Improved air quality not only enhances comfort but also supports overall well-being, especially for sensitive individuals.

Can I Perform Air Duct Cleaning Myself?


While some basic maintenance, like changing filters, can be done by homeowners, professional air duct cleaning is recommended for thoroughness and safety. DIY methods may not effectively remove deep-seated contaminants or mold, and improper techniques can lead to cross-contamination or damage to the HVAC system. Certified professionals use specialized equipment and follow NADCA guidelines to ensure a comprehensive clean, which is crucial for maintaining air quality and system efficiency.

How Do I Know If My Air Ducts Are Contaminated?


Signs of contamination in air ducts include visible dust buildup at vents, persistent musty odors, unexplained allergy flare-ups, and reduced HVAC performance. If you notice any of these symptoms, it may indicate that your ducts require professional cleaning. Regular inspections can help identify issues before they escalate, ensuring that your indoor air quality remains high and your HVAC system operates efficiently.

What Should I Expect During a Professional Air Duct Cleaning?


During a professional air duct cleaning, technicians will first inspect your system to assess its condition. They will then use specialized equipment to remove dust, debris, and contaminants from the ducts. This process typically involves agitation and vacuuming to ensure thorough cleaning. Afterward, technicians will verify the results and may provide documentation of the work performed. Expect clear communication about the process and any recommendations for future maintenance.

Are There Any Risks Associated with Air Duct Cleaning?


When performed by certified professionals, air duct cleaning is generally safe and beneficial. However, improper cleaning techniques can lead to issues such as duct damage or cross-contamination. It’s essential to choose a NADCA-certified provider to minimize these risks. Additionally, if mold is present, remediation may be necessary before cleaning to ensure that spores are not released into the air during the process.

How Can I Maintain Clean Air Ducts Between Professional Cleanings?


To maintain clean air ducts between professional cleanings, regularly change your HVAC filters, use high-efficiency filters, and schedule routine inspections. Keeping humidity levels in check and addressing any water leaks can also help prevent mold growth. Additionally, minimizing indoor pollutants such as smoke and pet dander can reduce the frequency of necessary cleanings. These proactive measures contribute to better indoor air quality and extend the time between professional services.

How Often Should Air Ducts Be Cleaned in Austin and Texas?


NADCA recommends a baseline of every 3–5 years, but Austin homes commonly need more frequent attention, often around every 2 years due to high local pollen and periodic humidity that accelerate contamination. Quick triggers for earlier cleaning include recent renovations, indoor smoking, heavy pet presence, persistent odors, or visible microbial growth.

  • If you notice persistent allergens or odors, schedule an inspection.

  • Use filter upgrades and pre-/post-season cleanings around peak pollen windows as preventive measures.

Is Air Duct Cleaning Worth the Cost for Austin Homes and Businesses?


Air duct cleaning is worth the cost when it addresses demonstrable issues visible contamination, odor, allergy exacerbation, or reduced HVAC performance, because it restores airflow and reduces particulate recirculation, delivering health and efficiency benefits. Typical efficiency gains and symptom relief depend on initial conditions, but targeted cleaning combined with filtration and humidity control often yields measurable improvements.

  • Prioritize cleaning when symptoms or performance indicators are present.

  • Combine cleaning with filtration upgrades forthe best ROI.

How Long Does a Typical Air Duct Cleaning Take in Austin?


Residential jobs commonly take 2–4 hours, depending on system size and contamination, while commercial cleanings and jobs requiring remediation can take a day or longer; time varies with access, number of units, and scope of containment required. Technicians usually explain timeframes during the inspection and include scheduling notes for off-hours commercial work.

  • Expect straightforward residential cleanings to fit within a half-day window.

  • Add time for mold remediation, testing, or repairs.

What Are the NADCA Standards for Air Duct Cleaning?


NADCA standards require inspection, documented cleaning procedures, containment to prevent cross-contamination, agitation and debris removal, and post-cleaning verification to confirm results; these steps ensure both thoroughness and occupant safety. Key elements include system inspection, use of vacuum and agitation tools, source capture, and customer-facing verification steps.

  • Ask providers to describe their inspection and verification process.

  • Ensure technicians document before-and-after conditions and follow containment protocols.

How Can You Schedule Your Austin Air Duct Cleaning with The Steam Team Today?


Scheduling a service begins with a clear description of the system and observed issues, followed by an inspection and a personalized quote that outlines scope, timing, and verification steps. The Steam Team offers a straightforward workflow designed to align NADCA-certified practices with local needs. The company’s practices emphasize inspection-driven estimates, clear explanations of required remediation if mold is found, and a service guarantee to address post-service concerns. The next subsections detail the request and scheduling flow and how customer satisfaction is handled.

What Is the Process to Request a Quote or Book an Appointment?


Start by describing building size, number of HVAC units, known symptoms (odors, allergy spikes), and any recent renovations; a service representative or technician will perform an initial screening and arrange an on-site inspection when necessary. During inspection, expect assessment of supply vents, return vents, filters, and duct accessibility; following that, you'll receive an itemized estimate with recommended services and scheduling options. Clear communication about expected outcomes and verification steps helps set accurate expectations before work begins.

  • Provide photos of vents or affected areas when possible to speed screening.

  • Confirm scheduling windows and any access requirements during booking.

How Does The Steam Team Ensure Customer Satisfaction and Service Guarantee?


The Steam Team emphasizes a service guarantee and NADCA-certified processes to ensure outcomes are measurable and concerns are addressable; technicians document findings and cleaning verification to provide customers with clear before-and-after information. If expectations are not met, customers are encouraged to contact the provider to review results and implement corrective steps under the guarantee. Transparent scopes, documentation, and certified procedures form the backbone of the satisfaction process and provide reassurance when remediation or additional work is needed.

  • Ask for written verification of what was cleaned and any follow-up recommendations.

  • Use the guarantee to resolve any post-service concerns quickly.

  1. Next steps: schedule an inspection if you notice signs outlined above or if it has been more than the NADCA baseline interval for your property type.

  2. Preventive tip: Pair duct cleaning with improved filtration and humidity control to maximize benefits and reduce recurrence of contaminants.

Conclusion


Regular air duct cleaning is essential for maintaining optimal indoor air quality and HVAC efficiency, especially in Austin's allergen-rich environment. By addressing contamination from pollen, dust, and humidity, homeowners can significantly reduce allergy symptoms and improve overall health. Scheduling inspections and cleanings based on local conditions ensures that your air ducts remain in top shape. Contact The Steam Team today to explore our expert air duct cleaning services tailored to your needs.

Essential Tips for Fire Damage Assessment and Restoration

Master Fire Damage Assessment

A fire damage assessment is the structured process of evaluating a property after combustion to establish safety, quantify losses, and define remediation priorities. This assessment identifies direct flame damage, smoke and soot contamination, water impacts from firefighting, heat-related material weakening, and any structural compromise that could endanger occupants or responders. Accurate assessment protects people, preserves evidence for insurance claims, and reduces secondary damage such as mold by guiding timely mitigation. In this guide, you will learn immediate safety steps, how to recognize distinct damage types, a step-by-step assessment workflow with advanced detection tools, and practical documentation tactics that support claim success. The guidance is tailored for Austin and Central Texas property owners and includes practical checklists and EAV (entity–attribute–value) tables for quick reference. For homeowners and businesses who prefer professional help, The Steam Team, an Austin-based restoration provider with IICRC-certified technicians and 24/7 emergency response, can perform assessments and provide quotes to begin restoration and insurance coordination.

What Are the First Safety Steps After a Fire?


Immediately after a fire, prioritize life safety and hazard containment before any assessment or re-entry is attempted. Confirm the fire department has declared the scene safe for re-entry and shut off utilities where possible to reduce the risk of electrocution, gas leaks, or rekindling. Personal safety requires appropriate PPE and restraint: avoid dusty or smoky areas until respirators and eye protection are available, and keep children and pets away from the scene. Securing the property preserves evidence and reduces theft or vandalism risks, which is important for both recovery and insurance claims. The next paragraphs outline how to secure openings properly and when to call emergency services and restoration professionals.

How Do You Secure the Property and Use Personal Protective Equipment?


Securing the property begins with documenting the condition of doors, windows, and locks before making any changes; this protects claim integrity and provides a baseline for contractors and adjusters. Homeowners should use basic PPE for short, cautious entries: a P100 or N95 respirator, nitrile gloves, and protective eyewear; however, PPE for homeowners is limited and does not replace professional respiratory protection for heavy soot or structural instability. Avoid disturbing soot-covered surfaces and do not attempt structural shoring or electrical resets; instead, photograph conditions and limit access to one pathway to contain contamination. Following these precautions helps preserve evidence and reduces the chance of personal injury while waiting for trained restoration teams to begin a formal assessment.

When Should You Call Emergency Services and Fire Damage Professionals?


Call emergency services immediately if there are any active smoldering areas, visible structural collapse, gas odors, or injuries requiring medical attention; the fire department must clear life-safety hazards before assessment. Contact restoration professionals with emergency response capability when water intrusion from firefighting, heavy smoke saturation, or unsecured openings creates immediate secondary-damage risk. Restoration teams provide board-up, water extraction, temporary climate control, and initial contamination containment that limit ongoing losses and stabilize conditions for a full assessment. Rapid response reduces the chance of mold growth and can preserve more contents for salvage, which is often critical for successful insurance outcomes.

What Types of Fire Damage Should You Identify During Assessment?


A comprehensive assessment separates damage into distinct categories: direct flame damage, smoke, soot, firefighting water, and heat effects because each type requires different remediation strategies and impacts salvageability. Identifying these damage types early determines priorities for stabilization, contents handling, and specialist referrals. Accurate categorization also guides documentation for insurers and informs whether immediate actions (like drying or dehumidification) are needed to stop secondary damage. The table below compares common damage types by indicators, risks, and typical remediation actions to help homeowners and adjusters scan damage quickly.


This table summarizes the primary damage categories, common indicators, and typical remediation actions.

Damage Type

Common Indicators

Typical Remediation Actions

Direct flame damage

Charred framing, open burn holes, lost material

Structural shoring, selective demolition, and rebuild of affected elements

Smoke damage

Surface staining, pervasive odor, discolored finishes

Content cleaning, smoke-specific cleaning agents, and deodorization

Soot contamination

Dry vs. wet soot residues, soiling of textiles, and HVAC

HEPA vacuuming, dry-cleaning, and HVAC duct cleaning

Water damage (firefighting)

Wet insulation, buckled flooring, and moisture readings

Water extraction, moisture mapping, controlled drying

Heat damage

Warped metals, delamination, weakened fasteners

Material testing, structural evaluation, targeted replacement


This comparison helps clarify why a multi-disciplinary assessment is necessary: each damage type-driven action reduces health risks and restores habitability more efficiently.

How to Recognize Direct Flame Damage and Charring?


Direct flame damage is visible as burning and loss of material where combustion contacted surfaces; charring depth in wood and framing indicates how much structural capacity remains. Assess charring by measuring burned depth on load-bearing members and checking for through-burns or compromised connections; deeper charring or scorched connections often require replacement or engineered repair. Metal elements may show localized melting or reduced cross-section, while masonry can exhibit spalling or cracking from extreme heat. Early structural evaluation and shoring decisions prevent collapse and protect crews; when in doubt, a structural engineer referral is prudent to define safe repair thresholds.

What Are the Signs of Smoke and Soot Damage?


Smoke damage includes visible staining, smeared residues on painted surfaces, and persistent smoke odor that penetrates porous materials such as textiles, insulation, and wood. Different soot chemistries, dry, powdery soot versus sticky, wet soot, determine cleaning methods; wet soot typically results from higher heat and smoldering combustion and requires solvent-based strategies, while dry soot can be removed with dry-cleaning or HEPA vacuuming. HVAC systems commonly spread soot and odor throughout a building, so duct inspection and cleaning are essential to prevent recontamination during restoration. Recognizing soot type early improves salvage decisions and reduces time and cost in the cleaning phase.

How Does Water Damage from Firefighting Affect the Property?


Water used to extinguish fires creates secondary moisture intrusion that promotes structural swelling, material delamination, and elevated mold risk if not addressed quickly. Moisture mapping with meters and hygrometers establishes drying goals and shows hidden wet pockets inside walls, ceilings, and subfloors that require targeted drying or controlled demolition. Immediate water extraction and dehumidification reduce the likelihood of microbial growth; within 24–48 hours, untreated wet materials become susceptible to mold colonization. Coordinating water mitigation with the fire damage plan prevents compounding losses and speeds restoration timelines.

What Are the Indicators of Heat Damage and Structural Compromise?


Heat damage can be invisible at a surface level yet significant: fasteners may have lost strength, adhesives can delaminate, and rebar in concrete can spall under high temperatures. Look for warped metal framing, bowed joists, cracking in masonry, and loosened mechanical connections as signs that heat has degraded component integrity. These indicators suggest a need for deeper investigation, such as uncovering concealed connections or laboratory testing of materials to determine repair versus replacement. Because delayed failures are possible, schedule follow-up inspections after initial stabilization to monitor any progressive compromise.

What Is the Step-by-Step Fire Damage Assessment Process?


A methodical assessment follows defined stages: initial safety and visual survey, detailed systems and structural evaluation, contents salvageability review, advanced diagnostics for hidden damage, and final reporting that supports remediation and insurance claims. This structured workflow ensures safety, prioritizes actions to stop secondary damage, and produces the documentation adjusters require to establish scope and cost. The numbered checklist below maps a practical assessment flow that restoration professionals and informed homeowners can follow to ensure no critical steps are missed. Each numbered step is actionable and framed to match common insurance expectations.

  1. Initial safety check and scene stabilization.

  2. Visual documentation and photographic inventory.

  3. Structural and systems evaluation (electrical, plumbing, HVAC).

  4. Contents assessment and salvage recommendations.

  5. Advanced diagnostics (thermal imaging, moisture mapping).

  6. Written assessment report and recommended scope of work.


This sequence provides a clear path from hazard control to documented scope, helping homeowners and businesses move rapidly from assessment to mitigation.

What Should You Look for in the Initial Visual Inspection?


The initial visual inspection defines immediate hazards and documents visible damage for claims and crew planning; it establishes safety flags, priority areas, and evidence preservation steps. Inspectors look for unstable framing, active moisture, exposed wiring, and concentrated soot or smoke migration paths while photographing each area with context and detail shots. Photo best practices include capturing wide context views, close-up detail shots, and including a scale reference or timestamp when possible; these images form the visual backbone of an assessment report. Proper documentation during this phase speeds adjuster review and helps avoid disputes over pre-mitigation conditions.


Below is an EAV-style checklist to help homeowners and adjusters scan the most critical visual cues during an initial walk-through.

Area / Item

Attribute to Inspect

What to Look For / Example

Entryways

Security and condition

Broken locks, board-up needs, documented before any changes

Structural members

Charring, deformation

Measure char depth on studs and joists; note sagging

Ceilings & walls

Soot patterns, staining

Determine the smoke path and porous material penetration

Flooring

Buckling, saturation

Identify wet areas requiring immediate extraction

Utilities

Visible wiring, gas lines

Note exposed conductors or gas odors; do not operate systems


Use this checklist to prioritize actions: safety hazards first, then documentation and stabilization.

How Do You Assess the Structural Integrity of Foundation, Walls, and Roof?


Structural assessment begins with checking the vertical and lateral load paths for signs of failure, cracked foundations, buckled studs, and displaced roof assemblies are immediate concerns. Inspectors test for rigidity, listen for unusual sounds under load, and measure differential movement where possible; if structural continuity is compromised, temporary shoring or bracing may be required. A structural engineer should evaluate complex failures, large-span roof systems, or when foundational elements show significant cracking. Documenting these evaluations and any recommended engineer involvement is crucial for insurance scopes and ensures repairs restore the original load capacity.

How Are Electrical, Plumbing, and HVAC Systems Evaluated?


Non-contact inspections identify obvious hazards: melted insulation, discolored panels, or water-soaked junction boxes indicate immediate electrical safety risks that require licensed electricians before power restoration. Plumbing lines exposed to heat may crack or leak; visible signs include warped pipes and dislodged fittings. HVAC systems often transport soot and odors; inspectors check filters, ductwork, and air handling units for contamination and recommend professional HVAC cleaning when necessary to avoid recontamination during restoration. Where specialists are required, document findings and recommended licensed referrals to ensure systems are restored safely and meet code requirements.

How Do You Determine Contents Salvageability?


Contents are classified by material, exposure type, and sentimental or monetary value: salvageable in place, salvageable after professional cleaning (pack-out or on-site), or non-salvageable. Porous materials heavily penetrated by wet soot, fuels, or chemical residues are often unsalvageable, while solid wood or metal items may be repaired or refinished. The assessor should tag items, photograph serial numbers, and provide estimated salvage methods (dry-cleaning, ultrasonic cleaning, or refinishing) to inform owner decisions and insurance line items. A clear contents inventory with recommended disposition streamlines pack-out and reduces disputes during claims processing.

What Advanced Tools Are Used to Detect Hidden Fire Damage?


Advanced diagnostics expand the assessment beyond visible signs: thermal imaging cameras reveal hidden hotspots and residual heat paths, moisture meters and hygrometers map water intrusion and drying goals, and borescopes inspect concealed cavities without full demolition. Drones and site-mapping tools are useful for large commercial roofs or inaccessible exterior damage, enabling high-resolution imagery and thermal overlays for scope development. Applying these tools changes the remediation scope by exposing hidden damage that would otherwise cause rework and surprises; combining thermal and moisture data provides a more accurate, evidence-based remediation plan.

How Do You Document Fire Damage for Insurance Claims?


Effective documentation follows a logical structure: comprehensive photos and videos, a detailed inventory and itemized written record, and a clear assessment report describing cause, scope, and recommended remediation. Well-organized documentation reduces disputes and accelerates adjuster review by presenting consistent, time-stamped evidence and professional recommendations. The EAV table below shows recommended photographic and documentary examples keyed to common damaged items to make claim submission straightforward for homeowners and adjusters. Restoration professionals often support this phase by producing insurance-grade reports and coordinating with adjusters.


This table links damaged entities to recommended documentation types and examples to guide photo and record collection.

Damaged Item

Recommended Documentation

Example / Notes

Structural elements

Wide context photo + close-up details

Include scale, note char depth, or cracks

Appliances & electronics

Serial number, model photo, damage close-up

Capture power/connect points and corrosion

Textiles & soft goods

Before/after packing photos, contamination notes

Note the soot type and recommended cleaning method

HVAC & ducts

Duct photos, filter condition, contamination map

Include system ID and operation status

Contents inventory

Item description, make/model, condition, salvageability

Use spreadsheet rows with reference photos

What Is the Best Way to Collect Photography and Video Evidence?


Collect media systematically: start with wide-angle context shots, then take mid-range images, and finally close-ups of serial numbers, labels, and damage details; this multi-scale approach captures how individual losses relate to the whole structure. Preserve original file metadata and use a consistent folder and filename convention with date/time stamps so adjusters can follow chronology. Video walkthroughs with narration that describes visible hazards and locations add clarity and help remote reviewers understand access constraints. Organizing media immediately after the inspection prevents data loss and supports timely claim submission.

How Do You Create Detailed Inventory and Written Records?


Create an itemized inventory with fields for item description, make/model, serial number, estimated pre-loss condition, visible damage, and recommended disposition (salvage, clean, replace). Use simple spreadsheet templates or inventory software, and photograph each item with its inventory row to link images to records. Maintain copies for the owner, contractor, and adjuster, and track the chain-of-custody for any packed-out items to avoid disputes. Clear inventories expedite settlement and help prioritize pack-out versus on-site cleaning decisions.

How Should You Work with Insurance Adjusters During Claims?


Prepare for the adjuster visit by assembling photographic evidence, inventories, and the written assessment report; be present during inspections to point out hidden concerns and provide documentation context. Ask for a copy of the adjuster’s scope and compare it to the restoration assessment, requesting clarifications in writing when the scope differs. If disagreements arise, request a peer review or a second opinion and document all communications; restoration professionals often coordinate directly with adjusters to present technical justification for remediation tasks. Professional documentation and cooperative communication usually shorten claim timelines and reduce unexpected denials.

Why Is Professional Fire Damage Assessment Important?


Professional assessment reduces safety risks, uncovers hidden damage, and produces insurance-grade documentation that supports accurate scope development and prevents secondary loss. Certified technicians apply industry standards and structured diagnostics such as moisture mapping and thermal surveys to create remediation plans that address both visible and concealed damage. This thorough approach minimizes scope drift during remediation and helps owners avoid repeat interventions that increase cost and downtime. The next subsection explains how IICRC certification and specialized equipment contribute directly to these outcomes.

What Expertise Do IICRC Certified Technicians Bring?


IICRC-certified technicians follow recognized standards for inspection, cleaning, and drying, which align assessment methods with accepted industry practice and insurer expectations. Certification indicates training in moisture control, soot removal protocols, and contents restoration techniques that improve salvage rates and reduce health risks. Certified crews document procedures and measurements systematically, producing reports that adjusters accept more readily because they reference established standards. That technical rigor increases confidence that the recommended mitigation will achieve safe, verifiable outcomes.

What Specialized Equipment and Techniques Are Used?


Specialized equipment thermal imaging cameras, calibrated moisture meters, HEPA filtration vacuums, and hydroxyl or ozone odor-control systems, enables technicians to detect hidden damage, set drying goals, and remove airborne contaminants safely. Thermal imaging locates residual heat and hidden combustion paths, moisture mapping defines drying targets, and containment plus HEPA filtration controls cross-contamination during cleaning. Each tool delivers diagnostic data that shapes remediation scope and clarifies costs; using these techniques together creates an evidence-based plan that reduces the chance of missed damage and unnecessary rebuilds.

How Does Professional Assessment Prevent Secondary Damage Like Mold?


Professional assessments set drying targets and monitor moisture levels to ensure rapid, measurable dehydration of wet building materials; maintaining relative humidity and material moisture within thresholds prevents mold colonization. Restorative drying within the first 24–48 hours after water exposure dramatically lowers the likelihood of microbial growth, and ongoing monitoring confirms whether goals are met. Integrating moisture control with soot and odor remediation reduces the timeline and avoids overlapping contamination issues. When water from firefighting is present, this combined approach is essential to prevent mold, protect contents, and restore indoor air quality.

What Are the Next Steps After Assessment with The Steam Team?


After a formal assessment, the Steam Team provides a clear, documented plan that outlines emergency stabilization, mitigation steps, contents handling, and reconstruction phases while coordinating with insurers and adjusters as requested. The Steam Team serves Austin and the surrounding Central Texas area and offers 24/7 emergency response, along with IICRC-certified technicians to begin necessary stabilization quickly. Clients receive a written estimate and scope based on the assessment findings and can request a quote for restoration work to move from evaluation to active remediation. The section below details how to request a quote and what to expect during the comprehensive restoration workflow with The Steam Team.

How Can You Request a Fire Damage Restoration Quote?


To request a quote, contact The Steam Team by phone at 512-451-8326 and provide the assessment date, property address, and a brief overview of visible damage to prioritize response. Photographs and the initial inventory spreadsheet accelerate estimate preparation and improve accuracy for remote estimates before scheduling an on-site walkthrough. Expect the Steam Team to offer emergency stabilization tasks when needed and to coordinate with your insurance adjuster upon authorization to proceed; they can also schedule an in-person estimate to finalize scope and timelines. Clear documentation and early communication of the assessment findings help produce a timely, insurance-ready quote.

What Does The Steam Team’s Comprehensive Restoration Process Involve?


The Steam Team’s restoration workflow begins with emergency stabilization (board-up, tarping, water extraction) to secure the property and limit further damage, followed by controlled demolition where necessary to access hidden damage. Contents are evaluated and either cleaned on-site, packed out for specialized cleaning, or documented for replacement; drying and dehumidification follow to meet moisture goals before reconstruction begins. Reconstruction and repair restore structural and cosmetic elements, and final verification includes safety checks, odor control, and a final inspection to confirm that remediation goals were met. Throughout the process, the Steam Team coordinates with insurance adjusters and provides documentation to support claims and help return occupants to safe, restored spaces.

  1. Emergency Stabilization: Board up and secure the site to prevent further loss.

  2. Mitigation: Water removal, drying, and smoke/soot cleaning to stop secondary damage.

  3. Contents Handling: Pack-out, specialized cleaning, or salvage decisions documented.

  4. Reconstruction: Repairs and rebuild with quality checks and inspections.


These phases create a predictable path from assessment through completion, and The Steam Team’s local presence in Austin supports timely mobilization and insurance coordination for property owners.

Frequently Asked Questions

What Should I Do If I Suspect Hidden Fire Damage?


If you suspect hidden fire damage, it's crucial to act quickly. Engage a professional restoration service that uses advanced diagnostic tools like thermal imaging and moisture meters to identify concealed damage. These tools can reveal hotspots and moisture pockets that are not visible to the naked eye. Early detection is vital to prevent further deterioration and secondary damage, such as mold growth. Document any findings and communicate them to your insurance adjuster to ensure comprehensive coverage for repairs.

How Can I Prepare for a Fire Damage Assessment?


Preparation for a fire damage assessment involves several steps. First, ensure the area is safe and that the fire department has cleared it for re-entry. Gather any relevant documentation, such as insurance policies and previous property assessments. Take initial photographs of the damage for your records. If possible, create a list of damaged items, noting their condition and value. This preparation will help streamline the assessment process and provide valuable information to restoration professionals and insurance adjusters.

What Are the Long-Term Effects of Fire Damage on Property?


Long-term effects of fire damage can include structural instability, persistent odors, and health risks from smoke and soot residues. If not addressed promptly, fire damage can lead to mold growth due to moisture intrusion from firefighting efforts. Additionally, materials weakened by heat may compromise the integrity of the building, leading to costly repairs down the line. Regular inspections and maintenance after a fire are essential to ensure that any lingering issues are identified and resolved before they escalate.

How Do I Choose a Fire Damage Restoration Company?


When selecting a fire damage restoration company, look for certifications such as IICRC, which indicates adherence to industry standards. Check for reviews and testimonials from previous clients to gauge their reputation. Ensure they offer a comprehensive range of services, including emergency response, assessment, and reconstruction. It's also beneficial to choose a local company familiar with the specific challenges of your area, as they will be more equipped to handle local regulations and insurance processes effectively.

What Is the Role of Insurance in Fire Damage Restoration?


Insurance plays a critical role in fire damage restoration by providing financial support for repairs and recovery. Homeowners should review their policies to understand coverage limits, deductibles, and specific provisions related to fire damage. After a fire, it's essential to document all damage thoroughly and communicate with your insurance adjuster to facilitate the claims process. A well-documented assessment can help ensure that you receive the compensation needed to restore your property to its pre-loss condition.

Can I Handle Fire Damage Cleanup Myself?


While some minor cleanup tasks may seem manageable, it is generally not advisable to handle fire damage cleanup yourself. Fire damage can pose serious health risks due to toxic soot and smoke residues, and structural instability may be present. Professional restoration services have the expertise, equipment, and protective gear necessary to safely assess and remediate fire damage. Attempting to clean up without proper training can lead to further damage and complicate insurance claims, so it's best to leave it to the experts.

What Are the Common Misconceptions About Fire Damage?


One common misconception is that fire damage is only related to visible flames. In reality, smoke and soot can cause extensive damage even in areas not directly affected by fire. Another misconception is that all items can be salvaged; however, some materials may be irreparably damaged by heat or chemicals. Additionally, many people believe that insurance will cover all costs, but coverage can vary significantly based on policy details. Understanding these misconceptions can help homeowners make informed decisions during the recovery process.

Conclusion


Conducting a thorough fire damage assessment is essential for ensuring safety, preserving property, and facilitating effective insurance claims. By understanding the types of damage and employing advanced diagnostic tools, homeowners can mitigate risks and streamline restoration efforts. Engaging professional services like The Steam Team not only enhances recovery outcomes but also provides peace of mind during a challenging time. Reach out today to explore how we can assist you in restoring your property to its pre-loss condition.

Essential Tips for Effective Residential Water Damage Repair

Protect & Restore Your Home

Water damage can stop a household in its tracks, threatening structure, contents, and indoor air quality within hours. This guide explains how water intrusion occurs in Austin homes, how evidence-based restoration works, and what homeowners should do immediately to reduce loss and prevent mold. You will learn to recognize contamination categories, follow a practical restoration workflow, document losses for insurance, and apply prevention strategies that fit Central Texas homes. The article covers common causes and signs, a step-by-step restoration process, emergency decision triggers, an insurance documentation checklist, seasonal prevention tasks, and how to evaluate local providers. Throughout, we reference professional practices such as moisture mapping, structural drying, and contents restoration, so you know when to act and when to call for qualified help. This resource uses targeted guidance for Austin homeowners and mentions local vendor support only where it helps readers request rapid service or claims assistance.

What Are the Common Causes and Signs of Water Damage in Austin Homes?


Water damage in Austin most often results from predictable domestic failures and seasonal storm events, and it harms wood, drywall, and insulation quickly. The mechanism is simple: water contacts porous materials and increases moisture content above safe equilibrium, which promotes biological growth and structural weakening. Recognizing early signs short-circuits escalation and protects health and property value. Below, we outline common causes, visible signs, and immediate homeowner actions that limit damage and help with later documentation.


The following table maps common causes to observable signs and recommended immediate homeowner actions. Use this to triage a moisture event and choose whether emergency mitigation is required.

Cause

How it Occurs

Signs to Watch For & Immediate Action

Burst or leaking pipe

Mechanical failure or freezing stress on plumbing

Wet carpet, pooling water, loss of water pressure. Action: shut main water valve, document with photos, move possessions to a dry area.

Appliance failure (washer, water heater, dishwasher)

Hose or fitting rupture; internal valve failure

Puddles near the appliance, warped baseboards, damp flooring. Action: turn off appliance power, turn off the water supply, and photograph the leak source.

Roof/attic leak

Storm-driven water through shingles or flashing failure

Ceiling stains, peeling paint, attic dampness. Action: contain drips, place buckets, and photograph the ceiling and attic.

Storm/flash flood

Overland flow into low openings or foundation cracks

Standing water, muddy residues, strong musty odor. Action: Avoid contact with standing water, document the scene from a safe area.

Sewage backup

Blockage in the sewer lateral or municipal overflow

Black water, foul sewage odor, visible solids. Action: evacuate contaminated area, avoid contact, document, and call professionals.


This table clarifies cause, mechanism, and first steps so homeowners can act deliberately. Understanding these signals leads naturally to the restoration steps professionals use for assessment, extraction, and drying.

Which Types of Water Damage Should Homeowners Know About?


Water incidents are classified by contamination level and source because cleanup protocols and health risk vary by category. Category 1 is clean water from a supply line; Category 2 (gray water) carries chemical or biological contaminants from appliances; Category 3 (black water) includes sewage or floodwater and is hazardous. The classification directs remediation urgency and personal protective measures.

  1. Category 1 (Clean Water): Supply line leaks or rain intrusion with low contamination risk; can often be mitigated when addressed within 24–48 hours.

  2. Category 2 (Gray Water): Appliance discharge or toilet overflow with some contaminants; requires more thorough cleaning and may need professional treatment.

  3. Category 3 (Black Water): Sewage, floodwater, or standing contaminated water; requires full containment, disinfection, and contents handling by specialists.


Knowing these categories helps homeowners choose safe mitigation and informs insurance and contractor decisions. Recognizing the contamination level also prepares you for the required protective equipment and documentation.

How Can You Identify Early Signs of Water Damage and Mold Growth?


Early detection hinges on observable and measurable changes in the home environment that signal moisture intrusion and microbial risk. Look for discoloration, bulging drywall, peeling paint, musty odors, warped flooring, and elevated indoor humidity readings; these are red flags indicating active moisture. Simple DIY checks include visual inspection at seams, using a moisture meter if available, and observing HVAC drip pans and appliance connections.


If you spot staining or a musty odor, initiate immediate drying and documentation steps within 24–48 hours to reduce mold risk. Professional moisture mapping and thermal imaging are recommended when hidden cavities or structural elements are involved, because these tools locate trapped moisture that visual checks miss.

How Does the Water Damage Restoration Process Work for Austin Homeowners?


A structured restoration workflow shortens recovery time and reduces secondary damage by following assessment, emergency extraction, structural drying, decontamination, and repair. The process uses specialized tools moisture meters, thermal imaging cameras, air movers, and dehumidifiers, to measure, remove, and control moisture. Each step has distinct expected outcomes and timeframes that set homeowner expectations and aid insurance documentation.


The table below summarizes core restoration steps, typical tools or methods used, and expected timeframe/outcome to help homeowners understand what professionals will perform.

Restoration Phase

Typical Tools / Methods

Typical Time/Outcome

Assessment & documentation

Moisture meters, thermal imaging, and inventory lists

1–3 hours initial; scope defined for remediation and claims

Emergency water removal (extraction)

Truck-mounted pumps, wet vacs, submersible pumps

Hours to a day for standing water; rapid removal reduces secondary damage

Structural drying & dehumidification

Air movers, low-grain refrigerant dehumidifiers, and moisture monitoring

2–7 days, depending on materials; target moisture levels restored

Cleaning & disinfection

Antimicrobial cleaners, HEPA filtration for air

1–3 days for surface cleaning and deodorization

Repair & reconstruction

Carpentry, drywall replacement, finish work

Days to weeks, depending on scope; restores pre-loss condition


This comparison shows when a homeowner should expect each milestone and what equipment drives the result. Knowing the steps makes it easier to document progress for insurance and to coordinate vendor actions.

What Are the Key Steps: Assessment, Emergency Water Removal, and Structural Drying?


Assessment identifies wet materials and maps moisture so interventions target the right areas. Technicians use moisture meters and thermal imaging to define the scope and create a drying plan with measurable moisture targets. After assessment, emergency water removal focuses on extracting standing water quickly to prevent staining and microbial growth using pumps and wet vacuums.


Structural drying follows extraction and relies on controlled airflow and dehumidification to return wood and wall cavities to safe moisture content. Professionals monitor moisture daily and adjust equipment to reach manufacturer-recommended targets, which validates successful drying and supports insurance claims. These measurement-driven steps reduce the chance of hidden moisture and future mold.

How Is Mold Remediation and Contents Restoration Handled After Water Damage?


Mold mitigation addresses contaminated materials and prevents regrowth by controlling moisture and applying containment and removal practices aligned with industry standards. Remediation starts with source control and drying, followed by selective removal of irreparably damaged porous materials. Contents restoration often involves pack-out, specialized cleaning, and storage to salvage personal property where possible. Contents restoration includes inventory creation, off-site cleaning using validated methods, and reassembly at the home. Decisions about repair versus replacement rely on contamination category, material porosity, and cost-benefit considerations. IICRC-guided approaches and professional mold mitigation reduce health risks and support clear documentation for claims. After explaining the restoration workflow, homeowners often want local help fast; the next section covers when to call emergency services and what to expect when a crew arrives for mitigation.

When and How Should You Contact Emergency Water Removal and Flood Cleanup Services in Austin?


Call emergency water removal when standing water, sewage, or structural compromise is present because immediate action limits damage and health risk. Professionals triage based on contamination level and structural risk, and use extraction and drying equipment to stabilize conditions for repairs. Quick documentation at first contact helps preserve claim eligibility and speeds coordination with adjusters.

  1. Standing water inside living spaces: Evacuate wet areas and call emergency removal to prevent structural and mold damage.

  2. Sewage or black water intrusion: Avoid contact and call professionals with hazardous cleanup protocols.

  3. Active roof, ceiling, or structural leaks: Containment and drying by pros reduces collapse risk.


These triggers prioritize safety and loss reduction and lead to expected arrival and response details, which prepare homeowners for what crews will do first.

How Quickly Can Water Damage Companies Respond in Austin?


Response windows vary with event severity, vendor resources, and local demand, but 24/7 availability is common among emergency providers. Typical response promises range from one to four hours for urgent, life-safety events and from several hours to a day for less critical mitigation. Weather and storm surges can extend response times, and providers may prioritize high-risk situations first.


Homeowners can speed response by documenting damage clearly, turning off utilities if safe, and providing accessible entry points. Rapid on-site assessment shortens the timeline to extraction and drying, which directly reduces restoration cost and the risk of mold growth.

What Makes Professional Emergency Water Removal Essential for Flood Cleanup?


Professional teams bring equipment, training, and containment protocols that DIY cleanup cannot match, and these factors influence both health outcomes and insurance acceptance. Pros remove water quickly, control contamination, and document actions with equipment readings that insurers rely on. They also use air filtration and controlled drying strategies that reduce mold risk and prevent structural weakening.

  1. Safety: Professionals mitigate electrical and contamination hazards that homeowners might miss.

  2. Thoroughness: Specialized equipment reaches hidden cavities and wall assemblies to prevent trapped moisture.

  3. Documentation: Measured drying logs and inventories support claims and reconstruction planning.


These advantages explain why professional intervention is often the fastest route to full property recovery and claim resolution.

How Can Austin Homeowners Navigate Water Damage Insurance Claims Effectively?


A focused documentation workflow improves claim outcomes because insurers evaluate evidence of prompt mitigation and scope of loss. Start by photographing the scene, creating an inventory of damaged items, and saving receipts for emergency mitigation expenses. Communication with your adjuster should be timely and factual, with mitigation reports from contractors appended to your claim file.


The following table lists documentation types, why each matters, and who typically provides the item. Use this as a checklist to gather paperwork that supports coverage and speeds settlement.

Documentation Type

Why it Matters

Action: Sample Language & Who Provides It

Photographs & videos

Show the extent and source of damage

"Photos taken on [date] show water entry at [location]." - Homeowner

Contractor mitigation report

Demonstrates prompt professional action

"Emergency extraction and drying begun on [date]; equipment logs attached." - Restoration contractor

Inventory of damaged contents

Quantifies personal property loss

"List with descriptions, purchase dates, and estimated values." - Homeowner

Receipts for emergency services

Validates mitigation expenses

"Invoice for extraction and drying services." - Restoration contractor/homeowner

Adjuster communications

Records insurer decisions and scope notes

"Adjuster noted visible ceiling damage and approved temporary repairs." - Insurer/adjuster


This table clarifies which documents matter and who supplies each piece of evidence. Presenting this organized package reduces disputes and helps adjusters process claims faster.

Insurance Claims Data for Flood Damage Assessment


Surface water floods in Switzerland: what insurance claim records tell us about the damage in space and time


Surface water floods in Switzerland: what insurance claim records tell us about the damage in space and time, V Prasuhn, 2017


What Documentation and Steps Are Needed for Texas Water Damage Claims?


Begin by documenting the scene comprehensively and by completing mitigation to limit damages while preserving evidence. Provide dated photos, a detailed contents inventory, contractor mitigation reports, and receipts for emergency work. Notify your insurer promptly and keep records of all communications.

  1. Photograph all affected areas and contents immediately and from multiple angles.

  2. Retain receipts for any temporary repairs or emergency mitigation to prevent further loss.

  3. Request a written mitigation report from the restoration provider showing equipment and moisture readings.


These actions produce the factual record adjusters need and show that you took reasonable steps to reduce loss. A qualified restoration vendor can assist by supplying mitigation reports and measured drying logs that insurers accept.

Does Homeowners Insurance Typically Cover Water Damage Restoration Costs?


Policy coverage depends on the loss source and specific endorsements in the homeowner’s policy; sudden pipe bursts are commonly covered, while flooding from surface water typically requires a separate flood policy. Deductibles, limits, and exclusions influence net recovery, and categories of water contamination affect what insurers will pay for cleanup versus replacement. If coverage is unclear, provide organized documentation, mitigation reports, and itemized inventories to the adjuster to clarify what is payable. When disputes arise, additional documentation or an independent evaluation can help resolve coverage questions.


Because insurance interaction can be complex, some homeowners choose a restoration partner who helps coordinate documentation and adjuster communications. The next section explains when and how a qualified vendor can support those tasks and gives a brief example of local vendor assistance.


During claims handling, vendors that provide documented mitigation reports, measured drying logs, and contents inventories can improve clarity and speed. For example, a local provider may perform emergency water removal, document equipment hours and moisture readings, and deliver a pack-out inventory to support your claim. The Steam Team is one local restoration firm that offers emergency water removal, structural drying, and contents restoration, and can supply mitigation documentation to assist with adjuster coordination. Homeowners seeking immediate help can call to request a quote or schedule a rapid response.

What Are the Best Prevention Tips to Avoid Water Damage and Mold in Austin Homes?


Preventing water damage combines seasonal maintenance, smart device installation, and attention to drainage and humidity control. Routine roof inspections, gutter cleaning, grading away from foundations, and appliance hose replacement are high-impact actions. Smart devices like leak sensors and automatic shut-off valves detect or stop leaks early and reduce loss magnitude.

  • Quarterly checks of hoses, visible plumbing joints, and appliance connections.

  • Seasonal tasks such as gutter clearing and roof inspections before storm season.

  • Install water sensors near water heaters, under sinks, and near washing machines.


These steps lower risk and provide early warnings that reduce both restoration scope and insurance losses, and they set a proactive tone for household maintenance.

How Can Regular Maintenance and Smart Home Devices Help Prevent Water Damage?


A regular maintenance schedule couples visual inspection with targeted upgrades to reduce failure points and shorten detection time when leaks occur. Quarterly checks of hoses and seals, plus annual roof and attic inspections, identify vulnerabilities before they fail. Smart sensors and automatic shut-off systems detect leaks and can stop water flow before damage spreads, which reduces drying needs and replacement expenses.

  1. Inspect appliance hoses and HVAC drain lines quarterly.

  2. Test water sensors regularly and replace batteries as needed.

  3. Consider automatic shut-off valves where feasible for high-risk areas.


Combining routine maintenance with sensor technology improves resilience and reduces the chance that a small leak becomes a major claim.

What Are Effective Mold Prevention Techniques After Water Exposure?


Mold prevention centers on removing moisture within the 24–48 hour window and maintaining low indoor humidity thereafter. Immediate extraction and structural drying are essential, followed by surface cleaning with appropriate antimicrobial products for non-porous materials. Porous materials saturated with contaminated water often need replacement to eliminate mold risk. Set drying targets and verify them with moisture measurements; aim for the manufacturer or industry-recommended equilibrium moisture content for wood and drywall. Timely action prevents mold colonization and reduces the need for costly remediation.

Why Choose The Steam Team for Water Damage Restoration in Austin, TX?


Selecting a restoration provider with documented credentials, local knowledge, and emergency responsiveness helps homeowners recover faster and with clearer claims outcomes. The Steam Team brings local service capabilities for emergency water removal, structural drying, contents restoration, and related recovery services. Customers benefit from measured drying logs, inventories, and mitigation reports that support insurer review and reconstruction planning.

  • IICRC-certified technicians ensure restoration follows recognized standards.

  • A+ rating with the Better Business Bureau signals strong customer service processes.

  • Local awards and recognitions demonstrate community-level experience and trust.


These credentials indicate that the provider follows best practices and focuses on measurable outcomes such as verified moisture reduction and contents recovery. For homeowners seeking prompt assistance, The Steam Team offers 24/7 emergency response and can be contacted to request a quote or schedule an appointment by phone.

What Certifications, Awards, and Experience Set The Steam Team Apart?


The Steam Team’s verified trust signals include IICRC-certified technicians and an A+ rating with the Better Business Bureau, which reflect adherence to industry standards and customer care processes. In addition, local recognitions indicate sustained community presence and project experience in Central Texas. These credentials translate into standardized protocols for assessment, drying verification, and contents restoration that benefit homeowners and insurers alike.


Having certified technicians means documented procedures and measurable targets are part of every mitigation, which reduces disputes during claims and improves restoration outcomes. That operational consistency helps homeowners recover more quickly and with clearer evidence of work performed.

How Does The Steam Team’s 24/7 Service and Local Expertise Benefit Homeowners?


Rapid, local response reduces the period when moisture can cause secondary damage, and crews familiar with Austin building types and local weather patterns can prioritize interventions that matter most. The Steam Team’s emergency availability supports immediate extraction and drying, while local knowledge helps with practical containment and contents handling. When time is critical, a nearby team that provides measured drying logs and inventory lists helps homeowners and adjusters move from mitigation to reconstruction.


Homeowners needing emergency restoration can request a quote or schedule a rapid response by phone to begin mitigation and documentation promptly.

Frequently Asked Questions

What should I do immediately after discovering water damage in my home?


Upon discovering water damage, your first step should be to ensure safety by turning off the main water supply and electricity if necessary. Next, document the damage with photographs and notes for insurance purposes. Move any valuable items to a dry area to prevent further loss. If the damage is significant, contact a professional water damage restoration service immediately to assess the situation and begin mitigation efforts. Quick action can significantly reduce the extent of the damage and associated costs.

How can I prevent mold growth after water damage?


To prevent mold growth after water damage, it is crucial to act quickly. Aim to dry out affected areas within 24 to 48 hours. Use dehumidifiers and fans to enhance airflow and reduce moisture levels. Clean and disinfect surfaces with appropriate antimicrobial solutions, especially in wet areas. If porous materials like carpets or drywall are saturated, consider replacing them to eliminate mold risk. Regularly monitor humidity levels in your home to maintain a dry environment.

What are the long-term effects of untreated water damage?


Untreated water damage can lead to severe long-term consequences, including structural damage to your home, compromised indoor air quality, and significant mold growth. Over time, moisture can weaken wooden structures, leading to costly repairs. Additionally, mold can pose health risks, causing respiratory issues and allergic reactions. The longer water damage remains unaddressed, the more extensive and expensive the repairs will be, making prompt action essential for preserving your home’s integrity and safety.

How do I choose the right water damage restoration company?


When selecting a water damage restoration company, consider their certifications, experience, and customer reviews. Look for companies that are IICRC-certified, as this indicates adherence to industry standards. Check their response time and availability, especially for emergency services. Ask for references and read online reviews to gauge customer satisfaction. Additionally, ensure they provide a clear outline of their restoration process and documentation practices, which are crucial for insurance claims.

Are there any specific insurance considerations for water damage in Austin?


In Austin, homeowners should be aware that standard homeowners' insurance may not cover all types of water damage. For instance, sudden pipe bursts are typically covered, while flooding from surface water may require a separate flood insurance policy. Review your policy carefully to understand coverage limits, deductibles, and exclusions. Document all damage thoroughly and communicate promptly with your insurance adjuster to ensure a smooth claims process. Consulting with a restoration professional can also help clarify coverage details.

What are the signs that I need professional help for water damage?


Signs that you need professional help for water damage include persistent dampness, visible mold growth, musty odors, and structural issues like sagging ceilings or walls. If you notice water pooling in your home or if the damage is extensive, such as from a flood or sewage backup, it’s crucial to call professionals immediately. Additionally, if you are unsure about the extent of the damage or how to proceed, seeking expert assistance can prevent further complications and ensure proper restoration.

How can I effectively document water damage for insurance claims?


To effectively document water damage for insurance claims, start by taking clear photographs and videos of the affected areas from multiple angles. Create a detailed inventory of damaged items, including descriptions, purchase dates, and estimated values. Keep receipts for any emergency repairs or mitigation services. Additionally, obtain a written report from your restoration contractor detailing the damage and the steps taken for mitigation. This organized documentation will support your claim and help expedite the settlement process.

Conclusion


Understanding the intricacies of water damage restoration empowers Austin homeowners to protect their properties effectively and minimize losses. By recognizing common causes, implementing preventive measures, and knowing when to seek professional help, you can safeguard your home from future incidents. For tailored support and rapid response, consider reaching out to local restoration experts who can guide you through the process. Explore our resources to learn more about effective water damage solutions today.

Essential Smoke Damage Cleanup Techniques You Need to Know

Master Smoke Damage Cleanup

Smoke damage occurs when combustion byproducts soot, acidic residues, and volatile organic compounds (VOCs), settle on surfaces and into porous materials, degrading air quality and causing corrosion and lingering odors. This guide explains the full smoke damage cleanup workflow, from immediate safety actions to advanced deodorization and insurance navigation, so homeowners and property managers can act quickly and confidently. You will learn how to assess hazards, choose the right soot removal method, remove persistent smoke odor, restore contents including electronics and documents, and coordinate with insurers and restoration professionals when damage exceeds DIY limits. Practical checklists, EAV comparison tables, and decision criteria are included to help you distinguish dry, wet, and specialized cleaning approaches and identify when to escalate to professional services. Before diving into technical steps, note that local restoration providers, including Austin-area specialists such as The Steam Team, which offers 24/7 emergency response and IICRC-certified technicians, can perform emergency assessments and full remediation when needed, particularly for HVAC contamination, heavy soot, or extensive odor infiltration.

What Are the Immediate Safety and Assessment Steps After Smoke Damage?


Immediate safety and assessment steps focus on protecting occupants and preventing secondary damage by stopping smoke sources, securing the structure, and documenting conditions. Rapid evacuation removes people from poor indoor air and structural hazards, while initial ventilation and temporary mitigation reduce soot migration and moisture-related problems introduced by firefighting. Early documentation with photos and notes preserves evidence for insurance, and a prompt professional assessment clarifies structural risks, HVAC contamination, and the scope of cleanup. These steps minimize health risks, limit progressive material degradation, and create a clear starting point for restoration decisions and claims. Next, review recommended PPE and re-entry precautions that let you safely begin limited inspections or mitigation without worsening contamination.

How Do You Ensure Safety and Use Personal Protective Equipment?


Personal protective equipment (PPE) reduces inhalation and contact exposure to soot particles and VOCs during any re-entry or cleaning activity. At minimum, use an N95 or higher-rated respirator for dusty or soot-laden work, chemical-resistant gloves for cleaning agents, and eye protection to prevent irritation from particles or splashes. For concentrated soot, elevated particulate levels, or when using solvents and fogging equipment, upgrade to respirators with P100 cartridges and full-face protection; consider disposable coveralls to prevent cross-contamination in clean areas. Proper donning and doffing, bagging contaminated clothing, and changing filters frequently are essential to avoid exposing unaffected areas. These PPE practices enable limited homeowner mitigation while identifying conditions that require licensed restoration technicians with specialized containment and negative-pressure systems.

What Is Involved in a Thorough Smoke Damage Inspection and Structural Assessment?


A thorough smoke damage inspection evaluates structural integrity, soot penetration, moisture from firefighting, and HVAC system contamination to form an accurate scope of work. Inspectors look for compromised structural members, soot staining inside wall cavities, and moisture pockets that can cause mold growth if not dried; instruments like moisture meters and air quality monitors guide decisions without invasive damage. A proper inspection includes a contents inventory with photos, identification of salvageable items versus those needing pack-out, and preliminary mitigation actions such as targeted ventilation or temporary tarping. Clear documentation produced during inspection supports both remediation planning and insurance claims. After inspection, the next priority is selecting appropriate soot removal techniques matched to the residue type and surface.

  • The immediate steps you should take after smoke exposure include evacuation, safety checks, documentation, containment, and contacting professionals.

  • Each step is designed to protect occupants and preserve evidence for restoration and insurance processes.

  1. Evacuate occupants to safe outdoor air and avoid re-entry until air is tested or cleared.

  2. Ventilate the property where safe by opening doors and windows to encourage fresh airflow.

  3. Document conditions with photos and videos of affected rooms, contents, and any visible structural damage.

  4. Secure the property by boarding openings and limiting access to prevent theft and further damage.

  5. Contact emergency responders and a restoration professional for an immediate assessment and mitigation plan.


These five priority steps create a foundation for safe, effective cleanup and provide the documentation insurers require to begin claim review.


After this checklist, if you need a rapid on-site assessment or emergency mitigation, a local restoration provider can mobilize trained crews and equipment to stabilize conditions and limit secondary damage.

How Do You Effectively Remove Soot Using Proven Techniques?


Soot removal succeeds by matching the cleaning category to soot type and surface: dry cleaning lifts loose particulate, wet cleaning emulsifies adhered residues, and specialized solvent or chemical methods target protein or oily soot. Effective removal reduces corrosion, staining, and odor carriers while protecting surface finishes; selecting the proper approach prevents driving soot deeper into substrates or causing staining from inappropriate wetting. Key tools include HEPA vacuums for particulate capture, chemical sponges for dry-lift, alkaline cleaners for resilient residues, and controlled agitation for upholstery and carpets. Safety and containment during cleaning prevent cross-contamination and reduce airborne particulate levels, which in turn protect occupants and HVAC components. With method selection in hand, the next subsection compares dry, wet, and specialized approaches in practical detail and when to choose each.


Before the comparison table, here is a brief primer on common equipment and materials used in soot removal:

  • HEPA vacuum units capture fine soot particles without reintroducing them to the air.

  • Chemical dry sponges lift non-greasy, dry soot from painted and delicate surfaces.

  • Alkaline or solvent-based cleaners break down oily/protein residues on hard surfaces.


This equipment mix forms the core toolkit for effective soot remediation and highlights why trained technicians are often necessary for complex soot types.

Cleaning Method

Best For / Materials

Pros & Safety Notes

Dry Cleaning (HEPA vacuum, dry sponges)

Light, dry soot on painted walls, ceilings, and delicate finishes

Low risk of staining, minimal water usage, good for preliminary lifts; avoid rubbing into surfaces

Wet Cleaning (detergent, alkaline cleaners)

Heavier deposits on washable surfaces like trim, masonry, and floors

Effective for adhered soot; requires controlled rinsing and rapid drying to prevent moisture damage

Specialized Solvent/Chemical Cleaning

Protein soot, fuel/oily soot, greasy residues on metals, and some fabrics

Targets bonded residues that resist water; requires trained use of solvents and ventilation due to VOCs


This comparison shows that starting with dry methods and escalating to wet or specialized treatments preserves finishes and limits secondary damage when performed correctly.

What Are the Differences Between Dry, Wet, and Specialized Soot Cleaning Methods?


Dry cleaning uses mechanical removal and absorption to lift loose soot without wetting surfaces, making it ideal for fragile finishes and initial cleanup phases. It works by vacuuming with HEPA filtration and applying chemical sponges that pull particulates off without smearing; this reduces airborne re-suspension and prepares surfaces for any following wet work. Wet cleaning involves controlled application of detergents or alkaline cleaners to break bonds between soot and substrate, followed by careful rinsing and immediate drying to avoid moisture-driven issues; wet methods are more effective on washable surfaces but risk staining if misapplied. Specialized cleaning uses solvent-based agents and professional techniques to dissolve protein and oily soot that resist water-based cleaners; these methods require ventilation and PPE and are often best left to certified restoration crews. Understanding these differences helps determine whether a DIY approach is safe or if professional intervention is required.

How Do You Identify and Treat Different Types of Soot Residue?


Identifying soot type begins with simple tactile and visual cues: dry soot is powdery and easily wiped, oily/fuel soot feels greasy and smears, while protein soot often leaves faint yellow-brown stains and strong odors despite appearing less dusty. Once identified, match treatment: dry soot responds to HEPA vacuum and dry sponges; oily soot typically requires solvent or alkaline cleaners applied by professionals to avoid spreading; protein soot may need specialized detergents and oxidation-focused deodorization. If soot is embedded within drywall, insulation, or HVAC ducts, removal or replacement may be necessary to eliminate odor sources and restore air quality. Correct identification guides safe, effective cleanup and indicates when advanced equipment or replacement is the prudent option.

What Are the Best Methods to Eliminate Smoke Odor Permanently?


Permanent smoke odor elimination requires targeting odor molecules bound deep within porous materials and HVAC systems rather than masking them; this often involves a combination of mechanical cleaning, source removal, and advanced deodorization technologies. Thermal fogging, hydroxyl generators, and ozone systems are principal tools for neutralizing odor at a molecular level, while activated charcoal and thorough duct cleaning act as adjuncts to absorb and filter residual VOCs. Choosing the right approach depends on occupancy constraints, material types, and safety rules. For example, ozone requires unoccupied spaces and strict re-entry protocols, while hydroxyl units can be used in occupied environments under guidance. Combining targeted deodorization with content restoration and HVAC cleaning achieves the most reliable, long-term odor removal.


The following subsection explains how thermal fogging and ozone work and when to use each.


Before the deodorization table, consider these practical air- and odor-control steps:

  • Remove and launder all washable fabrics to reduce the odor load before deploying odor technologies.

  • Replace HVAC filters and run air scrubbers with HEPA filtration while deodorization proceeds.

  • Coordinate deodorization with content pack-out and structural cleaning to avoid re-contamination.


These preparatory steps improve the effectiveness of advanced deodorization methods and speed recovery.

Deodorization Method

Mechanism

Effectiveness / Safety / When to Use

Thermal Fogging

Dispenses heated deodorant fog that penetrates porous materials and neutralizes odor molecules

Highly effective for widespread odor when applied by professionals; safe for post-cleaning environments, but requires controlled application

Ozone Treatment

Oxidizes odor molecules through high O3 concentration

Very effective on textiles and structural odor,s but requires vacant, sealed spaces and strict re-entry protocols due to respiratory hazards

Hydroxyl Generators

Produces hydroxyl radicals that oxidize organic odor compounds in occupied or adjacent areas when used correctly

Effective and safer for occupied buildings; slower than ozone, but useful in homes and commercial spaces

Activated Charcoal & Ventilation

Adsorbs VOCs while exchanging indoor/outdoor air

Useful adjunct for persistent low-level odors and during post-treatment airing; safe and continuous


This table clarifies that combining mechanical cleaning with the right chemical or oxidative approach produces the most permanent results while aligning method selection with occupancy and safety constraints.

How Do Advanced Deodorization Techniques Like Thermal Fogging and Ozone Treatment Work?


Thermal fogging disperses heated, solvent-based deodorants as a fog of tiny droplets that penetrate porous materials and chemically neutralize odor carriers rather than masking them; technicians use calibrated foggers to deliver the correct particle size and concentration for deep penetration. Ozone generators produce ozone molecules that oxidize organic compounds responsible for smoke smell; ozone is highly effective but creates a temporary respiratory hazard, so spaces must be vacated and sealed during treatment and ventilated thoroughly afterward. Hydroxyl generators create hydroxyl radicals that safely oxidize odors in occupied or adjacent areas under controlled application, making them a preferred option when rapid re-occupancy is necessary. Each technology has trade-offs between speed, safety, and material compatibility, which is why restoration professionals often combine methods for the best results.

How Can HVAC Systems Be Cleaned to Remove Lingering Smoke Smell?


Cleaning HVAC systems focuses on eliminating soot and odor sources inside ducts, coils, plenums, and filters to stop re-circulation of contaminated air; technicians inspect and access ductwork, clean or replace filters, and use agitation and HEPA vacuuming to remove deposits. In some cases, duct cleaning combined with coil cleaning and application of approved antimicrobial or deodorizing agents is necessary to restore system performance and indoor air quality. Portable air scrubbers with HEPA filtration and negative pressure contain and remove airborne soot during structural cleaning, reducing HVAC re-contamination. Regularly replacing filters and running high-MERV or HEPA-grade filtration during and after remediation prevents redeposition and supports long-term odor reduction.

  • HVAC cleaning priorities include filtration replacement, duct and coil cleaning, and running HEPA air scrubbers during remediation.

  • Proper HVAC remediation prevents ongoing odor recirculation and supports occupant health.


These HVAC-focused steps lead into how content restoration is triaged and handled to salvage what can be saved.

How Is Contents Restoration Handled After Smoke Damage?


Contents restoration begins with triage and inventorying to separate salvageable items from those beyond economical recovery, then prioritizes cleaning methods by material porosity and contamination level. Non-porous items like glass, metal, and hard plastics are usually cleanable with surface detergents and polishing, while porous materials such as upholstery, carpets, and textiles require specialized cleaning, deodorization, or replacement depending on smoke penetration. Electronics and documents need immediate stabilization: electronics require careful surface cleaning and professional drying to prevent corrosion, while documents may be stabilized via freeze-drying or controlled drying to prevent further deterioration. A systematic contents pack-out to an off-site facility often yields better restoration outcomes, where controlled cleaning, ultrasonic methods, and factory-grade deodorization can be applied.


Intro to contents table: This table helps prioritize restoration actions and sets realistic salvage expectations by item type and damage characteristics.

Item Type

Porosity / Damage Type

Recommended Restoration Method / Salvage Likelihood

Glass, Metal, Hard Plastics

Non-porous, surface soot

Surface cleaning, polishing; high salvage likelihood

Upholstery, Carpets, Textiles

Porous, deep-soot penetration

Professional deep-cleaning, possible replacement; moderate salvage likelihood depending on odor and staining

Electronics

Sensitive, corrosion-prone

Surface cleaning, controlled drying, professional electronics servicing; salvage depends on exposure and time to mitigation

Documents & Photos

Porous, water/soot-stained

Stabilization, freeze-drying, specialized document restoration; salvage likelihood varies widely

Which Items Can Be Salvaged and How Are Electronics and Documents Cleaned?


Salvageability is judged by material porosity, value, and extent of soot/heat/water exposure; rigid non-porous objects typically clean well, while porous items often retain odor or staining that limits restoration success. Electronics require rapid stabilization to prevent corrosion: power should remain off until devices are inspected, and professionals use controlled disassembly, cleaning, and drying methods to mitigate damage. Documents and photos may be salvageable through vacuum freeze-drying or dehumidification and specialized chemical baths to remove soot, with early intervention improving outcomes. When dealing with valuable or sensitive items, professional pack-out and off-site restoration increase chances of recovery and protect belongings during structural repair.

What Are the Best Practices for Cleaning Porous vs. Non-Porous Materials?


Cleaning practices differ because porous materials absorb smoke residues, while non-porous surfaces mostly retain surface contaminants. For porous materials, pre-testing, controlled agitation, enzyme- or alkaline-based deep-cleaning, and multiple deodorization cycles are often necessary; when odor persists or structural integrity is compromised, replacement may be more economical. For non-porous materials, mechanical cleaning, mild detergents, and polishing commonly restore appearance and reduce odor load. Test-spotting and staged cleaning, starting with non-invasive dry methods, then escalating to wet or solvent treatments as needed, preserves finishes and reduces the risk of permanent damage. These material-specific approaches feed directly into insurance documentation and claim strategies covered next.

How Do You Navigate Insurance Claims for Smoke Damage Cleanup?


Navigating insurance claims after smoke damage centers on thorough documentation, timely mitigation, and clear communication with adjusters; these steps help secure fair coverage and speed resolution. Insurers expect photo and video records of damage, itemized contents lists, receipts for emergency mitigation, and restoration scopes/estimates from qualified contractors to substantiate claims. A stepwise claims process includes filing a notice of loss, providing documentation and damage inventories, obtaining contractor estimates, and coordinating inspections with adjusters; keeping organized records and copies of all communications reduces disputes. Working with a preferred restoration vendor can streamline this process because experienced vendors prepare scopes and documentation formatted for insurers and can often liaise directly with adjusters. Below is a quick documentation checklist you can use immediately after an incident.

  1. Photographs and videos of affected areas and damaged contents, taken before any disposal.

  2. Itemized inventory of damaged personal property with estimated values and proof of ownership where available.

  3. Receipts for emergency mitigation, temporary housing, and any immediate repairs required to secure the property.

  4. Copies of contractor scopes, estimates, and written reports from restoration professionals and inspectors.


Keeping these records organized and accessible substantially improves claim processing and the accuracy of final settlements.

What Documentation and Steps Are Needed to File a Smoke Damage Claim?


When filing a smoke damage claim, begin by notifying your insurer and providing visual documentation, an itemized contents list, and receipts for immediate mitigation work; early notice prevents delays and demonstrates proactive loss control. Prepare a room-by-room inventory with purchase dates and approximate values where possible, and retain items until an adjuster documents them unless they pose a health risk. Keep detailed logs of mitigation activities that were performed, when, and what materials were used, since insurers often reimburse reasonable emergency measures that prevent further damage. Finally, obtain a professional scope of work and estimate to accompany the claim; detailed scopes reduce back-and-forth with adjusters and clarify necessary repairs. After documenting steps, consider how a preferred vendor can help with claims coordination and documentation.

How Does Working with a Preferred Restoration Vendor Like The Steam Team Help?


Partnering with an experienced, local restoration vendor streamlines mitigation, documentation, and repair because these vendors coordinate mitigation quickly, generate insurer-ready estimates, and apply industry-standard protocols during cleanup. The Steam Team, an Austin-based restoration company founded in 1983 with decades of experience, provides 24/7 emergency services, IICRC-certified technicians, and local knowledge that helps prioritize actions to limit secondary damage in Central Texas homes and businesses. Using a vendor familiar with insurance expectations can shorten claim cycles by delivering thorough scopes of work, standardized reports, and documented mitigation receipts that insurers recognize. Contacting a qualified restoration provider to support claims documentation can reduce delays and improve recovery outcomes.

When Should You Attempt DIY Smoke Damage Cleanup and When to Call Professionals?


Deciding between DIY cleanup and professional restoration hinges on damage extent, soot type, HVAC involvement, and health risks: small, surface-level dusting and airing may be safe for homeowners, whereas pervasive soot, HVAC contamination, or occupant health symptoms indicate professional intervention. DIY measures can be effective for minor smoke episodes: targeted ventilation, HEPA vacuuming of loose soot, laundering fabrics, and surface cleaning of non-porous items reduce odor and visible deposits. However, when smoke penetrates walls, insulation, ductwork, or electronics, professionals with containment, industrial filtration, and deodorization equipment are necessary to prevent recontamination and to fully restore indoor air quality.


The following decision checklist clarifies common red flags that require a certified restoration response.

  • Persistent smoke odor throughout the property after basic ventilation and cleaning.

  • Visible soot in HVAC returns or widespread deposits inside ductwork and mechanical systems.

  • Health symptoms among occupants such as coughing, wheezing, or eye irritation following re-entry.

  • Structural concerns or moisture intrusion from firefighting that creates a mold risk.

What Are Safe and Effective Home Remedies for Minor Smoke Damage?


For minor smoke exposure, begin with safe actions: ventilate by opening windows and running fans outward to exchange air, and use HEPA-filter vacuums to remove loose soot from surfaces while wearing PPE to avoid inhalation. Wash washable fabrics and curtains promptly and dry them in a clean environment; wipe non-porous surfaces with mild detergent solutions and avoid aggressive rubbing that can embed soot. Use activated charcoal or baking soda in bowls for temporary odor adsorption, and run portable air purifiers with HEPA filtration to reduce airborne particulate and VOC levels. These measures help with low-level smoke incidents but are limited against embedded odors, extensive soot, or HVAC contamination conditions that require professional equipment and techniques.

What Signs Indicate the Need for Professional Smoke Damage Restoration Services?


Recognize these definitive signs that professional restoration is required: persistent, pervasive smoke odor despite cleaning; soot visible inside HVAC ducts or on inaccessible surfaces; electronics showing malfunctions after exposure; or occupants experiencing respiratory symptoms linked to indoor air. Structural damage, extensive water from firefighting, and evidence of soot deep within wall cavities are additional conditions that necessitate certified remediation to safely restore the property and prevent secondary issues like corrosion or mold.

  • Persistent odor and HVAC contamination are primary indicators to hire professionals.

  • Early professional mitigation reduces long-term replacement costs and health risks.


This final guidance connects back to the initial safety and mitigation steps and reinforces that early, correct decisions reduce damage and speed recovery.

Frequently Asked Questions

What are the long-term effects of smoke damage on property?


Long-term effects of smoke damage can include persistent odors, corrosion of materials, and degradation of indoor air quality. Smoke residues can penetrate porous materials, leading to ongoing health risks for occupants. If not properly addressed, smoke damage can result in structural issues, mold growth due to moisture retention, and the need for extensive repairs or replacements. Regular inspections and timely remediation are crucial to mitigate these long-term impacts and ensure a safe living environment.

How can I prevent smoke damage in my home?


Preventing smoke damage involves several proactive measures. Install smoke detectors and maintain them regularly to ensure they function correctly. Create and practice a fire escape plan to minimize risks during a fire. Additionally, avoid using candles or open flames near flammable materials, and ensure that your kitchen is equipped with a fire extinguisher. Regularly inspect and maintain heating appliances to prevent malfunctions that could lead to smoke production. These steps can significantly reduce the likelihood of smoke damage.

What should I do if I suspect smoke damage in my home?


If you suspect smoke damage, first ensure the area is safe and ventilate the space by opening windows and doors. Document any visible damage with photos and notes for insurance purposes. Avoid cleaning the area until you assess the extent of the damage, as improper cleaning can worsen the situation. Contact a professional restoration service to conduct a thorough inspection and provide guidance on the necessary cleanup and restoration steps. Early intervention is key to minimizing damage.

Are there specific cleaning products recommended for smoke damage?


Yes, specific cleaning products are recommended for smoke damage. Alkaline cleaners are effective for removing oily soot, while enzyme-based cleaners can help break down organic residues. Chemical sponges are useful for dry cleaning surfaces without causing further damage. Always choose products that are safe for the materials you are cleaning and follow the manufacturer's instructions. For extensive damage, it is advisable to consult with professionals who have access to specialized cleaning agents and equipment.

How can I tell if my HVAC system has been affected by smoke damage?


Signs that your HVAC system may have been affected by smoke damage include persistent odors when the system is running, visible soot around vents, and reduced airflow. If you notice respiratory issues among occupants or if the system has not been serviced after a fire incident, it is crucial to have it inspected. A professional can assess the system, clean the ducts, and replace filters to ensure that contaminated air is not recirculated throughout your home.

What are the costs associated with professional smoke damage restoration?


The costs of professional smoke damage restoration can vary widely based on the extent of the damage, the size of the affected area, and the specific services required. Factors such as soot removal, deodorization, and HVAC cleaning can all contribute to the overall cost. On average, homeowners can expect to pay anywhere from a few hundred to several thousand dollars. It is advisable to obtain multiple estimates from certified restoration companies to understand the potential costs involved.

Conclusion


Effective smoke damage cleanup is essential for restoring safety and air quality in affected properties, ensuring that both structural integrity and occupant health are prioritized. By understanding the comprehensive steps involved, from immediate safety measures to advanced deodorization techniques, homeowners can confidently navigate the restoration process. Engaging with professional restoration services not only streamlines cleanup but also enhances the likelihood of successful insurance claims. For expert assistance and to explore our range of restoration solutions, contact us today.

Essential Reasons for Timely Water Damage Repair - Act Now!

Essential Water Damage Repair in Austin

Water damage occurs the moment water intrudes into building materials, and when left unaddressed, it rapidly degrades structure, drives mold growth, and raises health and financial risks. This article explains why acting quickly after a flood, burst pipe, or storm-related intrusion matters, outlining immediate hazards, health consequences, cost escalation, the professional restoration workflow, and prevention steps tailored to Austin and Central Texas conditions. Readers will learn how moisture attacks wood, drywall, insulation, and foundations; how mold and bacterial contaminants develop; and which mitigation steps reduce exposure and restore habitability. The guide maps the restoration process step-by-step, extraction, drying, remediation, contents care, and reconstruction, and shows how response time changes outcomes. Practical checklists, comparative EAV tables, and clear lists help homeowners and property managers prioritize actions and document damage for insurance. Practical, local considerations and certified-expert options are included to help you decide when to call professionals and what to expect from emergency water damage restoration.

What Are the Immediate Risks of Delaying Water Damage Repair?


Immediate risks begin as soon as water contacts building materials and escalate with time; the three primary early threats are structural weakening, biological growth, and electrical or safety hazards. Water saturates porous materials, reducing tensile strength in wood and drywall, and can compromise fasteners and adhesives within hours to days, which increases collapse risk in affected areas. Simultaneously, wet surfaces create ideal conditions for mold and bacterial colonization that can begin within 24–48 hours, increasing contamination and complicating cleanup. Finally, standing water and moisture accelerate corrosion of electrical systems and create slip, trip, and contamination hazards that make occupied spaces unsafe. The next subsections examine how different materials fail and how quickly mold takes hold, offering specific mitigation actions to halt progressive deterioration.

How Does Water Damage Threaten Structural Integrity?


Water undermines structural elements by penetrating and saturating materials, which reduces load-bearing capacity and accelerates decay in wood, gypsum, and insulation. Wood framing and joists absorb moisture, which causes swelling, warping, and eventual rot if not dried; fasteners corrode, and connections weaken, creating hidden failures that become apparent later during reconstruction. Drywall and insulation quickly lose stiffness and thermal performance, often requiring removal once saturation and contamination exceed safe-drying thresholds, which increases project scope. Foundations and slabs can experience hydrostatic pressure and soil movement after prolonged exposure, potentially leading to cracks and settlement; early mitigation focuses on removing water and lowering moisture content to prevent long-term shifts. Understanding these material-specific failure modes guides targeted mitigation tactics such as temporary shoring, controlled drying, and selective demolition to preserve as much of the original structure as possible.

When Does Mold Begin to Grow After Water Exposure?


Mold growth typically begins within 24–48 hours on damp, nutrient-rich surfaces when temperature and humidity are favorable, and spores find organic material to colonize. Warm, dark environments and porous substrates like wood, paper-faced drywall, and insulation accelerate colonization and biofilm formation, turning localized moisture into broader contamination if left untreated. Early drying, HVAC isolation, and containment can arrest spore germination and limit spread; once visible growth appears, remediation requires removal or specialized cleaning depending on material and contamination class. Prompt actions such as extracting standing water and deploying air movers and dehumidifiers reduce the window for mold establishment and cut the eventual complexity and cost of remediation. The next section examines how timely restoration reduces health hazards associated with mold and bacteria in the home.


The Institute of Inspection, Cleaning and Restoration Certification (IICRC) provides essential frameworks for understanding and managing water damage, including how to classify water intrusion and establish drying goals.

IICRC Water Damage Classification for Structural Drying


The Institute of Inspection, Cleaning and Restoration Certification (IICRC) categorizes free water into three classes based on the estimated evaporation rate and the percentage of the structure's surface area that is affected. Understanding these categories is crucial for establishing appropriate in-place structural drying goals.


Establishing In-Place Structural Drying Goals: A Scientific Approach, 2015


How Does Timely Water Damage Restoration Prevent Long-Term Health Hazards?


Timely restoration reduces exposure to biological contaminants by removing moisture and contaminated materials before spores and pathogens amplify to hazardous levels. Drying and remediation interrupt the chain of events that leads from humidity to mold proliferation and bacterial growth, lowering airborne spore counts and limiting reservoirs of contamination in HVAC systems, carpets, and contents. Professional containment strategies and HEPA-grade filtration capture airborne particulates during cleanup, reducing respiratory exposures for occupants and workers alike and protecting vulnerable populations such as children, the elderly, and immunocompromised individuals. Table-based mapping of common contaminants to health impacts clarifies what to prioritize during mitigation and when to pursue specialized remediation or medical consultation. The following subsection lists common health issues tied to mold and bacteria and then explains how professional remediation reduces those risks.

What Common Health Issues Arise from Mold and Bacteria?


Exposure to mold and waterborne bacteria commonly causes respiratory irritation, allergic responses, and exacerbation of asthma or chronic lung conditions in sensitive individuals. Symptoms can include coughing, nasal congestion, wheezing, eye irritation, and chronic sinus issues; those with compromised immune systems are at higher risk of opportunistic infections from certain pathogens present in contaminated water. Prolonged exposure to high indoor mold concentrations has been associated with persistent respiratory problems and reduced indoor air quality, which can impair daily functioning and increase healthcare interactions. Early mitigation lowers airborne and surface contamination, which in turn reduces symptom persistence and the chance of chronic issues developing in at-risk occupants. The next subsection explains specific professional remediation steps that protect occupants and limit re-exposure.


Research into indoor fungi and water damage highlights the critical need for adherence to established guidelines to protect occupants from adverse health effects.

Health Effects and Guidelines for Indoor Mold and Water Damage


Cedric holds a current IICRC certification for water damage restoration and applied microbial remediation and has also been involved in research on indoor fungi, mould remediation, cleaning, and indoor air. This paper reviews current research on health effects and accepted guidelines for the management of indoor mould and water damage in the built environment.


Literature review of current research on health effects and accepted guidelines for the management of indoor mould and water damage in the built environment, CD Cheong, 2013


How Does Professional Mold Remediation Protect Your Home and Family?


Professional mold remediation protects occupants by combining containment, negative-pressure airflow, HEPA filtration, and methodical removal of contaminated materials to prevent cross-contamination. Remediation teams assess contamination levels, seal affected zones, and use negative air machines with HEPA filtration to keep spores from migrating to clean areas while technicians remove or clean affected components per industry standards. Specialized cleaning agents and antimicrobial treatments reduce surface-bound organisms, and post-remediation verification, including visual inspection and moisture readings, confirms that conditions are safe for reoccupation. When remediation follows rapid extraction and drying, the combined approach minimizes long-term occupant exposure and preserves as much of the home’s value and finishes as possible while preparing the property for reconstruction. The next section outlines how delaying these steps increases overall restoration costs.


Adhering to professional standards is paramount for ensuring that mold remediation is conducted safely and effectively, minimizing risks to both property and occupants.

IICRC Professional Mold Remediation Standards


The Institute of Inspection, Cleaning and Restoration Certification (IICRC) administers the process and establishes policies, procedures, and guidelines to ensure that mold remediation is performed safely and effectively. This guide provides a comprehensive overview of mold remediation issues.


Reference Guide for Professional Mold Remediation, 2003


What Are the Financial Consequences of Delayed Water Damage Repair?


Delaying repair multiplies costs by expanding the damage footprint, increasing demolition needs, and adding mold remediation and contents replacement to the bill. Immediate mitigation limits expenses to extraction and drying, while waiting 48 hours or more often requires removal of finishes, replacement of building materials, and more extensive labor hours. Insurers may categorize damage differently based on contamination class and mitigation timeliness, which affects coverage decisions and out-of-pocket expenses for homeowners; well-documented, prompt mitigation helps align expectations during the claims process.


Early mitigation narrows the scope of reconstruction and preserves finishes, lowering both direct repair costs and indirect costs such as temporary relocation or business interruption. Quick action preserves contents through proper pack-out and cleaning, which reduces replacement expenses and shortens downtime for occupants and businesses. The final subsection offers a stepwise approach to how delays amplify costs and what homeowners should document when filing claims in Austin.

Response Time

Impact Area

Typical Outcome

Immediate (0–24 hours)

Structural materials & contents

Mostly salvageable finishes; focused extraction and drying; limited demolition

Short delay (24–72 hours)

Mold & microbial growth

Increased likelihood of mold remediation, partial demolition, and higher labor hours

Extended delay (1 week+)

Structural integrity & reconstruction

Widespread demolition, structural repairs, and contents replacement, the highest cost and downtime


This table shows how faster responses preserve materials and reduce downstream reconstruction. Prioritizing immediate mitigation constrains project scope, while extended delays compound labor and replacement costs, underscoring the financial importance of rapid action.

How Does Waiting Increase Water Damage Restoration Costs?


Waiting increases restoration costs primarily by converting repairable items into replaceable ones and enlarging the zone of required remediation or demolition. Small, localized water incidents may be addressed with extraction and drying, but as moisture migrates into cavities and assemblies, remediation expands to include insulation, drywall, subflooring, and even structural members. Secondary damages such as mold colonization or corrosion require specialized remediation and longer project timelines, raising labor and project management costs and often necessitating contents replacement or advanced reconstruction. Quick mitigation limits these multipliers, preserving finishes and reducing the scope of reconstruction, which in turn shortens overall project duration and total expense.

What Should You Know About Water Damage Insurance Claims in Austin?


Filing an insurance claim promptly requires organized documentation, immediate mitigation steps, and clear communication with adjusters to expedite coverage decisions and reduce disputes. Homeowners should photograph damage with timestamps, retain receipts for emergency mitigation work, and request written estimates from qualified restoration professionals to support claims.


Restoration companies frequently assist by providing detailed scope-of-loss reports, moisture mapping, and coordinated communication with insurance adjusters to streamline claim handling and avoid coverage delays. Maintaining these records and initiating mitigation quickly increases the probability that insurers will view the loss as properly managed, which can reduce contention and speed settlement; the next section maps the restoration workflow where rapid professional involvement matters most.

What Is the Water Damage Restoration Process and Why Is Speed Essential?


The professional restoration process unfolds in defined phases: emergency mitigation, structural drying, remediation/contents restoration, and reconstruction, and each phase relies on prompt initiation to prevent secondary damage. Emergency mitigation focuses on removing standing water and stabilizing the property to stop ongoing damage, followed immediately by controlled drying and dehumidification using industry-grade equipment and moisture monitoring. Remediation addresses contamination and mold via containment and specialized cleaning, while contents restoration and reconstruction return the property to pre-loss condition with coordinated scheduling to minimize downtime.


Prompt emergency response is especially critical because early extraction and drying reduce the time during which biological growth and material degradation occur; this trims remediation needs and limits reconstruction scope. The following subsection explains extraction and drying tools and monitoring protocols, while the subsequent subsection covers reconstruction’s role in full recovery and continuity benefits.

Phase

Typical Timeframe

Primary Goal

Extraction & Mitigation

Hours to 1 day

Remove standing water, secure utilities, protect contents

Drying & Monitoring

2–7 days (variable)

Reduce material moisture to acceptable levels; prevent mold

Remediation & Contents Care

1–10 days

Remove contaminated materials; clean and restore personal property

Reconstruction & Repair

Days to months

Rebuild affected areas to pre-loss condition; ensure code compliance


This process table demonstrates how each phase has time-sensitive objectives: delays in early phases amplify the workload and cost in later phases, which is why rapid, coordinated action is essential for effective restoration.

How Does Emergency Water Extraction and Structural Drying Work?


Emergency extraction and structural drying use high-capacity pumps, portable extractors, air movers, and commercial dehumidifiers to remove standing water and evaporate bound moisture from materials. Extraction equipment eliminates bulk water rapidly, while air movers increase evaporation rates and dehumidifiers remove moisture from the air to prevent re-saturation; technicians use moisture meters and thermal imaging to map wet zones and guide drying strategies. Continuous monitoring documents progress and ensures that moisture levels return to safe baselines before reconstruction begins, preventing concealed wet pockets that later drive mold or structural problems. Proper sequencing, extraction, containment, targeted drying, and documented verification are what reduce rework and preserve materials for restoration rather than replacement.

What Role Does Full-Service Reconstruction Play in Recovery?


Full-service reconstruction completes recovery by repairing structural components, replacing finishes, and restoring systems to meet building standards and occupant needs, often coordinating with mitigation teams to streamline schedules. A single provider that manages mitigation through reconstruction can preserve institutional knowledge about the loss, expedite material procurement, and maintain quality control across trades to reduce coordination gaps. Reconstruction also addresses concealed damage uncovered during mitigation, integrates code-required repairs, and documents work for insurance reconciliation, which helps close claims efficiently. Choosing a provider that offers seamless continuity from extraction through rebuild shortens project timelines and reduces the administrative burden on homeowners and property managers.


After describing the restoration workflow and timelines, it is helpful to note how rapid professional deployment maps to these phases in practice.

Why Choose a Certified Local Expert for Emergency Water Damage Services in Austin?


Choosing a certified local expert matters because technicians familiar with Austin’s building stock, climate-driven risks, and common roofing and drainage patterns can act faster and make remediation choices that suit regional conditions. Certifications indicate adherence to industry methods and training: IICRC-aligned practices guide proper mitigation and drying protocols that reduce rework and encourage reliable outcomes. Local credentials, award recognition, and a strong business rating offer third-party signals that help homeowners evaluate providers; these credibility markers, combined with 24/7 availability, reduce decision friction during an emergency. The next subsections describe how rapid local response minimizes loss and which certifications and ratings are relevant when comparing providers.

How Does The Steam Team’s 24/7 Emergency Response Minimize Damage?


Rapid dispatch shortens exposure time and prevents moisture from migrating into concealed assemblies, which reduces the need for demolition and speeds recovery to pre-loss condition. The Steam Team’s 24/7 emergency water damage restoration capability enables early extraction, targeted drying, and immediate containment steps that constrain mold growth and preserve finishes and contents. Prompt documentation and coordination with homeowners and insurers also accelerate claims processing, while local familiarity with Austin construction types informs targeted mitigation that prevents common regional failure modes. Early intervention by a responsive team, therefore, converts a potentially large reconstruction project into a more manageable restoration scope.

What Certifications and Awards Ensure Professional Water Damage Repair?


Industry certifications and independent ratings serve as objective trust signals that a provider follows accepted practices and maintains quality systems. IICRC certification demonstrates technician training in restoration standards and protocols, which improves the likelihood that drying, remediation, and contents restoration are performed according to recognized methods. Independent business ratings and local award acknowledgments provide additional evidence of reliable service and customer satisfaction in the community, which helps homeowners choose a partner for time-sensitive restoration work. When evaluating providers, ask about certifications, verification of procedures, and references to ensure that the team you select applies current standards and proven methodologies.

How Can Homeowners Prevent Water Damage and Protect Their Property?


Preventing water damage combines seasonal maintenance, infrastructure checks, and readiness measures that reduce the probability and impact of water intrusion events. Regular inspections of gutters, roof penetrations, HVAC condensate lines, and plumbing fixtures catch small failures before they escalate into significant leaks. Installing or monitoring drainage improvements around foundations and using smart sensors for early leak detection can alert homeowners to problems while they are still manageable. The following subsections list common local causes of damage and provide a maintenance schedule to lower future risk and limit restoration needs.

What Are Common Causes of Water Damage in Austin Homes?


In Austin, common causes of water damage include severe storms and flash flooding, burst or leaking pipes, clogged gutters and downspouts, and HVAC condensation failures. Stormwater infiltration can overwhelm grading and drainage systems, entering basements, crawlspaces, and low-lying rooms; plumbing failures range from pinhole leaks that silently soak assemblies to sudden pipe bursts that cause immediate standing water. Clogged gutters allow roof runoff to back up under shingles and into soffits, while neglected HVAC coils and drain lines create slow leaks that undermine ceilings and insulation over time. Addressing these failure modes through routine inspection and timely repair reduces the chance of emergency restoration.

How Does Regular Inspection and Maintenance Reduce Future Risks?


A consistent inspection schedule and preventive maintenance program catch deterioration early and reduce both frequency and severity of water events, preserving property value and lowering insurance exposure. Quarterly checks of gutter systems, seasonal roof inspections before rainy periods, annual plumbing system reviews, and routine HVAC service prevent common failure points and allow homeowners to replace worn components proactively. Simple homeowner actions clearing gutters, monitoring crawlspace moisture, and watching for unexplained increases in water bills, provide early warning signs that prompt professional evaluation. Implementing these measures creates a pattern of care that limits the need for emergency restoration and keeps downtime and repair costs to a minimum.

  • Regular maintenance reduces the incidence and severity of water events by detecting issues early.

  • Seasonal inspections align resources with Austin’s weather patterns and protect vulnerable building elements.

  • Proactive repairs and monitoring preserve finishes and mitigate potential mold and structural damage.

Inspection Area

Recommended Frequency

Preventive Action

Gutters & Downspouts

Before the rainy season/quarterly

Clean debris; verify proper drainage away from the foundation

Roof & Flashings

Annually and after storms

Inspect for damaged shingles or penetrations; seal as needed

Plumbing & Valves

Annually

Check for leaks, corrosion, and pressure issues; service or replace aging components

  1. Inspect gutters and downspouts at least twice a year to prevent overflow and foundation seepage.

  2. Schedule seasonal HVAC maintenance to prevent condensate leaks and maintain proper airflow.

  3. Monitor crawlspaces and basements with periodic visual checks and moisture meters if possible.


These checklist items help homeowners create a practical, repeatable prevention plan that reduces the likelihood and impact of water intrusion events and supports faster recovery when incidents occur.

Frequently Asked Questions

What steps should I take immediately after discovering water damage?


Upon discovering water damage, the first step is to ensure safety by turning off electricity in affected areas and avoiding contact with standing water. Next, document the damage with photos for insurance purposes. If possible, remove any valuable items from the area to prevent further loss. Begin the drying process by using fans and dehumidifiers, and if the damage is extensive, contact a professional restoration service immediately to mitigate further risks and initiate the restoration process.

How can I identify hidden water damage in my home?


Hidden water damage can often be detected through signs such as water stains on walls or ceilings, a musty odor, or visible mold growth. Additionally, check for warped or buckled flooring and soft spots in walls or ceilings. Using moisture meters can help identify damp areas behind walls or under floors. Regular inspections of plumbing fixtures and appliances can also help catch leaks before they cause significant damage.

What should I do if my insurance claim for water damage is denied?


If your insurance claim for water damage is denied, first review the denial letter to understand the reasons. Common issues include a lack of documentation or failure to meet policy requirements. Gather all relevant evidence, including photos, repair estimates, and any communication with your insurer. You can appeal the decision by providing additional information or seeking assistance from a public adjuster who can advocate on your behalf to negotiate with the insurance company.

How can I prevent mold growth after water damage?


To prevent mold growth after water damage, it is crucial to dry the affected area within 24-48 hours. Use dehumidifiers and fans to reduce moisture levels and ensure proper ventilation. Remove any wet materials that cannot be dried, such as carpets or insulation. Regularly inspect areas prone to moisture, such as bathrooms and basements, and consider using mold-resistant products during repairs. If mold is already present, professional remediation may be necessary to ensure complete removal.

What are the long-term effects of water damage on property value?


Long-term effects of water damage on property value can be significant. Properties with a history of water damage may face decreased marketability and lower appraisals. Structural issues, mold growth, and health concerns can deter potential buyers, leading to prolonged vacancies or reduced sale prices. Additionally, if repairs are not properly documented, it may complicate future transactions. Regular maintenance and prompt repairs can help mitigate these risks and preserve property value over time.

Are there specific local regulations for water damage restoration in Austin?


Yes, Austin has specific regulations and guidelines for water damage restoration that align with state and federal standards. Restoration companies must adhere to the Texas Department of Insurance regulations and follow IICRC standards for water damage restoration. Additionally, local building codes may dictate specific requirements for repairs and renovations following water damage. Homeowners should ensure that any restoration work is performed by licensed professionals familiar with these regulations to avoid potential legal issues.

Conclusion


Timely water damage repair is essential for preserving structural integrity, preventing mold growth, and minimizing health risks. By understanding the immediate dangers and the restoration process, homeowners can make informed decisions that protect their property and well-being. Don't wait for damage to escalate; take proactive steps to mitigate risks and ensure a safe living environment. Contact a certified local expert today to explore your options for effective water damage restoration.

Essential Post Water Damage Safety Precautions You Must Know

Essential Safety Tips Post-Water Damage

Water damage occurs when unwanted water intrudes into a building and creates immediate risks to health, electrical systems, and structural integrity, and quick, safe actions reduce those risks and long-term costs. This guide explains exactly what to do in the first 24 hours, how to protect family members during cleanup, the fastest ways to prevent mold, how to spot structural problems, the health hazards tied to different contamination levels, and when professional restoration is the safest option. You will learn prioritized, practical steps for stopping water sources, shutting utilities safely, documenting damage for insurance, and using personal protective equipment during cleanup. The article also maps drying timelines, compares drying methods, and summarizes contamination categories so you can make informed decisions about DIY mitigation versus calling trained responders. Read on for step-by-step checklists, EAV comparison tables, safety-first lists, and clear guidance that targets common queries like electrical safety, water damage home, mold prevention tips after a flood, and emergency water cleanup safety.

What Are the Immediate Safety Steps to Take After Water Damage?


Immediate safety steps after water intrusion are actions that stop additional damage, reduce health and electrical risks, and create a safe baseline for recovery; these steps prioritize stopping the source, isolating hazards, documenting loss, and containing wet areas. Acting quickly minimizes mold risk and structural worsening, and the first decisions determine whether you can safely begin cleanup or should wait for professionals. The practical priorities in the first minutes to hours are straightforward and can be followed by most homeowners; the next paragraphs explain how to stop the water source, why to cut utilities, and how to document and contain the scene for insurance and safety. Follow these prioritized actions to reduce overall damage and keep occupants safe while preparing for the next mitigation steps.


Follow these immediate actions in order; they address the most urgent threats and create a safer environment for occupants and responders.

  1. Shut off the water source if safe: turn off the appliance valve or the home’s main shutoff to stop ongoing flooding.

  2. Cut the electricity only if water is not near the breaker and you can do so safely; otherwise, evacuate and wait for an electrician.

  3. Evacuate occupants if there are visible structural failures, strong sewage smells, or electrical sparking.

  4. Photograph and document damage before moving items; record dates, times, and conditions for insurance.


These rapid steps stabilize the scene and make subsequent drying and remediation safer; the following table summarizes actions, the risks they address, and timing notes for quick reference.


Immediate action comparison: what to do, what risk it reduces, and when to act.

Action

Risk addressed

When / Safety note

Shut off the water at the main valve

Continued flooding and progressive structural damage

Do immediately if the valve is accessible and the area is safe

Turn off the electricity at the main breaker

Electrical shock, short circuits, fire

Only if the breaker area is dry and you can access it safely; otherwise, evacuate

Photograph and document damage

Insurance evidence and mitigation planning

As soon as it’s safe, take wide and close-up photos before moving items

Contain and remove valuables

Prevent irreparable loss and secondary damage

Move items to a dry area if safe; avoid moving items that risk collapse


This quick-reference table helps homeowners prioritize actions under stress; after stabilizing the scene, the next critical step is stopping the water source safely.

How Do You Safely Stop the Water Source and Prevent Further Damage?


Stopping the water source begins by identifying whether the leak is from a visible appliance, a fixture, or the main supply, and then using the closest shutoff valve if it is safe to do so. Locate appliance shutoffs (under sinks, near water heaters), then the building’s main shutoff (often in a utility area or near the water meter), and close valves firmly while wearing gloves and boots to reduce contamination risks. If the source is a burst pipe within a wall or ceiling, minimize movement under the wet area and call a plumber or emergency restoration team if you cannot access the valve safely. Temporary containment using towels, buckets, and redirects reduces spread while you arrange repair or professional extraction; this prepares the property for fast drying and reduces mold risk. These containment measures lead directly to the next urgent consideration: electrical and gas safety, since utilities intersect with wet environments and change the evacuation calculus.

Why Is Turning Off Electricity and Gas Critical After Water Damage?


Electricity and gas present immediate, life-threatening hazards when they interact with water; water can conduct electricity, leading to shock risk, and wet systems can produce shorts or fires that worsen damage. If water is near outlets, junction boxes, or the electrical panel, do not touch switches or attempt local fixes. Evacuate and call a qualified electrician or utility company to de-energize circuits safely. Turning off the main breaker is appropriate only if you can reach the panel without standing in water and without exposing yourself to live contacts; gas should only be shut off by trained technicians unless you know the location of the main gas valve and can do so safely. When in doubt, evacuate, keep people away from the wet area, and wait for professionals to cut utilities; prioritizing human safety prevents tragic outcomes and informs the timeline for restoration. After utilities are stabilized, the focus shifts to personal safety during any cleanup, which includes proper PPE and evacuation criteria.

How Can You Protect Yourself and Your Family During Water Damage Cleanup?


Protecting people during cleanup means reducing exposure to contaminants, avoiding electrical and structural hazards, and using appropriate personal protective equipment to limit infection or respiratory risks. Clear household roles, keep children and pets away from affected zones, and establish a clean staging area where dry supplies and first-aid items are stored. The health risks vary by water contamination category, so tailor PPE to the scenario; the next subsections explain recommended PPE and when evacuation is necessary. Maintaining hygiene after handling wet materials, washing hands, laundering clothing separately, and disinfecting exposed skin reduces secondary exposure and protects vulnerable household members.


Use the following PPE guidance and evacuation indicators to decide whether to proceed with DIY cleanup or to pause and seek professional assistance.

  • Nitrile or heavy-duty rubber gloves for handling contaminated materials and preventing skin exposure.

  • Waterproof boots with good traction to prevent slips and avoid skin contact with contaminated water.

  • N95 or higher respirators when airborne mold or contaminated aerosols are possible.

  • Eye protection and long sleeves to prevent splashes to the mucous membranes.


These PPE items help reduce immediate exposure; the next section explains how to choose PPE by contamination level and what to do with contaminated equipment after use.

What Personal Protective Equipment Is Recommended for Water Damage Cleanup?


PPE selection follows the contamination level: for clean water, basic gloves and boots may suffice, while gray or black water requires respirators, disposable coveralls, and more rigorous hygiene practices to avoid pathogens. Proper fit for respirators and the use of disposable or easily sanitized boots and gloves reduces cross-contamination between wet and dry areas; always remove PPE carefully and wash hands immediately after. Disposable PPE should be bagged and sealed for proper disposal; reusable items must be disinfected with appropriate products and allowed to dry fully before reuse. Procurement options include safety suppliers and local hardware stores, but prioritize certified respirators and impermeable gloves when facing sewage or chemical-contaminated water.


Understanding PPE needs naturally leads to recognizing when conditions meet thresholds for evacuation and professional intervention to protect household health.

When Should You Evacuate Due to Structural or Contamination Risks?


Evacuate immediately if you observe sparking electrical fixtures, rapidly advancing water, visible structural collapse, or strong sewage and chemical odors; these signs indicate risks beyond safe DIY response. Evacuation steps include shutting utilities if safe, taking essential documents and medications, and moving to a clean location; notify household members and keep a log of actions for insurers. If occupants include young children, elderly people, or anyone with respiratory vulnerabilities, err on the side of evacuation sooner, because contaminated water and mold spores pose higher risks to those groups. Once evacuated, secure the property at safe distances and contact emergency restoration providers or emergency services as appropriate.


Knowing evacuation thresholds informs whether to attempt immediate drying or to wait for trained teams with containment and remediation expertise.

What Are the Best Mold Prevention Practices After Flood or Water Damage?


Preventing mold hinges on controlling moisture quickly drying wet materials within the critical 24–48 hour window, removing saturated porous items, and maintaining airflow and reduced relative humidity with dehumidification and air movement. Mold colonization often becomes visible within 24–72 hours under favorable conditions, so early mitigation interrupts growth and reduces health impacts and remediation costs. Effective prevention combines prompt removal of wet carpets and drywall as needed, continuous air movement with fans and air movers, and the use of dehumidifiers to bring relative humidity below 60 percent; monitoring moisture is essential to verify success. The following table compares common drying methods, their best-use scenarios, and expected effectiveness and timeframes.


Drying method comparison: choose the right approach for the situation and timeline.

Drying method

Best for

Timeframe / Effectiveness

Air movers + dehumidifier

Open, carpeted, and wood-floored areas

24–72 hours when used continuously

Structural drying (walls, cavities)

Behind-wall moisture and insulation

48–120 hours with targeted equipment

Ventilation (windows, natural airflow)

Mild moisture with low humidity and no contamination

Short-term; limited in humid climates

HVAC-assisted drying

When HVAC is safe to run and uncontaminated

Effective if ducts are clean and containment is used


This comparison helps homeowners select the right drying strategy based on location and contamination; the next sections describe mold growth timelines and specific techniques to stop colonization.

How Quickly Does Mold Grow and How Can You Stop It?


Mold can begin to colonize moist materials within 24–48 hours, with visible growth commonly appearing in the second to third day if moisture and organic material are present. Stopping mold growth requires interrupting moisture availability by drying or removing wet porous materials, increasing airflow, and maintaining low indoor humidity; these steps deprive mold of the conditions it needs to reproduce. For items soaked by clean water, thorough drying may salvage them, but porous materials exposed to gray or black water should be removed and discarded due to contamination and health risks. When mold growth is extensive, widespread, or involves HVAC systems, professional remediation is recommended to contain spores and remediate without spreading contamination.


These containment and removal steps lead naturally to the equipment and ventilation choices that optimize drying and prevent recurrence.

What Are Effective Drying and Ventilation Techniques to Prevent Mold?


Effective drying combines continuous air movement, dehumidification, and targeted structural drying; use professional-grade air movers positioned to create cross-flow and dehumidifiers sized to the affected volume for the fastest results. Moisture detection tools, moisture meters, and thermal imaging identify hidden damp pockets in walls, floors, and ceilings, so drying is focused where needed; sensors can monitor progress until materials reach safe moisture content. In basements or attics, isolate the area and control HVAC usage to prevent spreading spores; in humid climates, running dehumidifiers continuously and sealing off external moisture sources improves outcomes. Proper monitoring and a systematic drying plan reduce mold risk and provide documentation useful for insurance claims and any later remediation steps. Having addressed mold and moisture, homeowners also need to assess structural impacts to protect safety and value; the next section covers clear signs of instability and safe handling of valuables.

How Do You Assess and Manage Structural Damage Safely After Water Intrusion?


Assessing structural damage after water intrusion involves identifying visible signs of instability, avoiding entry into compromised areas, and deciding whether temporary bracing or professional structural assessment is required to prevent collapse. Early visual indicators sagging floors, bulging walls, large cracks, and doors that no longer fit their frames, signal that load-bearing elements may be compromised and that occupants should keep clear until an expert evaluates the site. When moving valuables and furniture, prioritize irreplaceable items and documents, use proper lifting techniques, and avoid moving heavy items that could exacerbate structural stress; documenting photographs before moving items helps with claims. The following bulleted checklist highlights immediate structural red flags that warrant urgent professional inspection.


Structural warning signs if you see any of these, restrict access and call professionals.

  • Sagging or bulging ceilings and floors that feel soft underfoot.

  • Large diagonal or stair-step cracks in foundations or load-bearing walls.

  • Doors and windows that bind or no longer close properly after drying.

  • Exposed or saturated insulation and drywall showing severe deformation.


These red flags guide decisions about safe entry and whether to proceed with salvage actions or wait for trained contractors.

What Signs Indicate Structural Instability After Water Damage?


Structural instability shows as deformation of building elements, such as sagging floors, bowed walls, cracking at seams, and separation of trim from framing, and these signs indicate compromised load paths and potential collapse risk. Visible movement or new cracks near load-bearing points, rapidly spreading splitting or bulging drywall, and strong, unusual creaking when walking indicate urgent risk and the need to evacuate and secure the area. Temporary shoring or bracing may prevent further collapse, but should be performed by qualified professionals who understand load distribution and building codes. Documenting each observation with timestamps and photos aids later assessment by engineers and supports insurance communications. Understanding structural risks informs safe salvage priorities, which the next section addresses through practical handling and packing guidance.

How Should You Handle Moving Valuables and Furniture to Minimize Risk?


When moving valuables after water damage, prioritize small, irreplaceable items, documents, medications, and electronics. Place them in waterproof containers, and photograph each item before and after transportation to preserve a documented chain of custody. Use two-person lifts and appropriate equipment (dollies, straps) for heavy items to prevent injury and avoid bending walls or floors that may be weakened; lift with knees, not back, to reduce strain. Cover items with clean plastic sheeting during transit to prevent cross-contamination, and avoid moving items from structurally unsound areas until an expert deems it safe. If the salvage involves large-scale pack-outs or storage, consider professional pack-out services that document and inventory items to streamline insurance recovery. Packing and inventory practices transition naturally to the health risks associated with different water contamination categories and recommended sanitation protocols.

What Health Risks Are Associated with Contaminated Water After Flooding?


Health risks from contaminated water vary by category, clean, gray, and black water, with black water (sewage, floodwaters with runoff) posing the highest risk due to pathogens and chemical contaminants that can cause gastrointestinal illness, skin infections, and respiratory problems. Recognizing the contamination category determines PPE and sanitation protocols; exposure to black water requires hazmat-level precautions and likely professional cleanup, while clean water incidents may be safely handled with standard PPE and disinfection. The table below summarizes water categories, common contaminants, and recommended protective measures to help homeowners triage risk and choose appropriate actions.


Water contamination categories include contaminants, associated health risks, and PPE guidance.

Water Category

Typical contaminants

Health risks / Recommended PPE

Clean water

Supply leaks, rainwater

Low pathogen risk; gloves and boots recommended

Gray water

Appliance discharge, sink overflow

Bacterial load possible; gloves, boots, and respirator for aerosols

Black water

Sewage, flood runoff, and chemical contamination

High pathogen/chemical risk; respirator, full PPE, and professional remediation advised


This summary helps homeowners assess exposure risks and select the correct PPE and cleanup protocols; the next subsections detail contaminants and safe sanitation steps.

What Types of Contaminated Water Pose the Greatest Health Hazards?


Black water, containing sewage, industrial runoff, or floodwater mixed with soil and chemicals, poses the greatest health hazards because it often contains bacteria, viruses, parasites, and toxic substances that can cause serious illness on contact or ingestion. Gray water from dishwashers or washing machines has lower but non-negligible contamination, with bacterial growth and detergent residues that can irritate skin and mucous membranes. Clean water incidents carry the least immediate pathogen risk but can become contaminated quickly if left standing; all categories can foster mold growth that affects respiratory health. Vulnerable populations children, the elderly, pregnant people, and immunocompromised individuals, face a higher risk and should avoid exposure to contaminated water altogether. Recognizing the contamination type directly influences the cleaning, disinfection, and disposal steps that follow to protect health.

How Can You Safely Clean and Sanitize Areas Exposed to Contaminated Water?


Cleaning and sanitizing contaminated areas follows a three-step protocol: remove gross contamination and porous materials, clean surfaces with detergent to remove soils, then apply an EPA-registered disinfectant with the manufacturer’s required contact time, and finally dry thoroughly while monitoring moisture levels. Porous items soaked by gray or black water, carpet padding, upholstered furniture, and certain drywall should be removed and discarded because pathogens can infiltrate and persist; bagging and sealing these materials prevents cross-contamination. Disinfection requires correct dilution and contact time; always follow product instructions and ventilate treated areas when safe to do so. When contamination includes hazardous chemicals or extensive sewage, professional hazmat-level cleaning is recommended to protect occupants and ensure proper disposal.


These sanitation principles point directly to when professionals should be engaged, since complex contamination and structural involvement exceed DIY safety thresholds.

When and Why Should You Call Professional Water Damage Restoration Services?


Call professional water damage restoration services when flooding is extensive, contamination is black water or unknown, structural elements are affected, or when HVAC and insulation are involved, because professionals apply protocols that protect health, stabilize structures, and document work for insurance. Professionals offer calibrated moisture detection, industrial extraction equipment, targeted structural drying, and containment practices that prevent cross-contamination and secondary damage; their work shortens drying timelines and reduces mold and structural risk. Using trained, certified technicians also supports insurance documentation through detailed scopes of work and evidence collection, easing claims processes and improving outcomes. For urgent or complex incidents, consider immediate professional intervention to reduce long-term repair costs, protect occupant health, and ensure mitigation follows industry standards. Professional teams bring specific benefits that DIY efforts cannot match; the following subsection explains certification advantages and what to expect from certified technicians.

What Are the Benefits of Using IICRC Certified Technicians for Restoration?


IICRC-certified technicians follow established standards that ensure consistent, safety-focused restoration standards that defining proper drying protocols, contamination handling, and documentation practices to minimize risk and improve repair outcomes. Certified teams employ moisture meters, thermal imaging, professional-grade air movers and dehumidifiers, and calibrated instruments to measure progress and certify that materials have reached safe moisture content. Certification indicates technicians are trained in recognized procedures that support thorough drying, mold prevention, and safe sewage cleanup, which helps homeowners and insurers trust the remediation approach. The consistent methods and documentation produced by certified professionals streamline communication with adjusters and can reduce disputes during claims settlement. Knowing these benefits makes it easier to decide when a call for professional help is the right safety-first choice; the next subsection describes how a local provider supports emergency needs.

How Does The Steam Team Support Emergency Water Damage Safety in Austin?


The Steam Team provides local emergency water damage restoration support in Austin with 24/7 emergency response, IICRC-certified technicians, and services including emergency water removal, flood damage restoration, structural and material drying, mold mitigation and sanitation, and sewage and hazard cleanup. Their teams deploy professional extraction equipment, moisture detection tools, and targeted drying plans to stop mold growth and stabilize structures while documenting work to assist with insurance claims. For urgent situations, the Steam Team emphasizes rapid response to reduce secondary damage and offers local knowledge of Austin conditions to prioritize effective drying strategies. If you need emergency assistance, the Steam Team is reachable by phone at 512-451-8326 and can provide guidance on immediate safety steps and next-stage mitigation.


This local, certified support is the safe escalation when conditions exceed DIY capabilities and when documentation and insurance support are required for recovery.

Health Hazards and Prevention After Water Damage: Mold and Recovery


During remediation and demolition work, the airborne concentrations of such microbes and their by-products can rise significantly and result in an exposure risk. Symptoms reported by unprotected workers and volunteers may relate to reactions of the airways, skin, mucous membranes, or internal organs. Dampness-related fungi are primarily associated with allergies, respiratory symptoms or diseases such as dermatitis, rhinosinusitis, bronchitis, and asthma, as well as changes of the immunological system. Also, cognitive, endocrine, or rheumatological changes have been reported. Based on the consensus among experts at a recent scientific conference and a literature review, it is generally recommended to avoid and minimize unnecessary fungal exposure and use appropriate personal protective equipment (PPE) in disaster response and recovery work. Mycologists recommend addressing any moisture or water intrusion rapidly, since significant mold growth can occur within 48 h. Systematic source removal, cleaning with “soap and water,” and “bulk removal” followed by high-efficiency particulate air vacuuming is recommended in most cases; use of “biocides” should be avoided in occupied areas. Public health agencies recommend use of adequate respiratory, skin, and eye protection. Workers can be protected against these diseases by use of dust control measures and appropriate personal protective equipment. At a minimum, a facial dust mask such as the National Institute for Occupational Safety and Health (NIOSH)-approved N95 respirator shoul

Mold Prevention and Health Effects After Floods and Water Damage


Extensive water damage after major hurricanes and floods increases the likelihood of mold contamination in buildings. This report provides information on how to limit exposure to mold and how to identify and prevent mold-related health effects. Where uncertainties in scientific knowledge exist, practical applications designed to be protective of a person's health are presented. Evidence is included about assessing exposure, clean-up and prevention, personal protective equipment, health effects, and public health strategies and recommendations. The recommendations assume that, in the aftermath of major hurricanes or floods, "

Frequently Asked Questions

What should I do if I suspect mold growth after water damage?


If you suspect mold growth after water damage, it's crucial to act quickly. First, identify and eliminate the source of moisture, as mold thrives in damp environments. Inspect areas that were affected by water, especially hidden spots like behind walls or under carpets. If you see visible mold, it's best to avoid disturbing it, as this can release spores into the air. Consider hiring a professional mold remediation service, especially if the affected area is large or if you have health concerns. They can safely remove the mold and prevent future growth.

How can I document water damage for insurance claims?


Documenting water damage for insurance claims involves taking detailed photographs and videos of the affected areas before any cleanup begins. Capture wide shots to show the extent of the damage and close-ups of specific issues, such as mold or structural damage. Make sure to note the date and time of the incident, as well as any actions taken immediately after the damage occurred. Keep receipts for any emergency repairs or mitigation efforts, as these can support your claim. Finally, create a written account of the events leading to the damage for your insurance adjuster.

What are the long-term effects of water damage on a home?


Long-term effects of water damage can be severe and include structural issues, mold growth, and compromised indoor air quality. If not addressed promptly, water can weaken the foundation, walls, and ceilings, leading to costly repairs. Mold can develop within 24-48 hours, posing health risks to occupants, especially those with respiratory issues. Additionally, persistent moisture can lead to wood rot and damage to electrical systems. Regular inspections and maintenance are essential to prevent these long-term consequences and ensure the safety and integrity of your home.

How can I prevent future water damage in my home?


Preventing future water damage involves several proactive measures. Start by regularly inspecting your home for leaks, especially around appliances, pipes, and the roof. Ensure gutters and downspouts are clear and direct water away from the foundation. Consider installing a sump pump in basements prone to flooding and use water alarms to detect leaks early. Additionally, maintain proper ventilation in areas like bathrooms and kitchens to reduce humidity. Finally, consider waterproofing your basement and using sealants on walls to create a barrier against moisture intrusion.

What should I do if I experience a sewage backup?


If you experience a sewage backup, prioritize safety by evacuating the area and avoiding contact with the contaminated water. Sewage can contain harmful pathogens that pose serious health risks. Turn off electricity in the affected area if it is safe to do so, and contact a professional sewage cleanup service immediately. They have the necessary equipment and expertise to handle hazardous materials safely. Document the damage for insurance purposes, but do not attempt to clean it up yourself, as improper handling can lead to further contamination and health issues.

Are there any health risks associated with mold exposure after water damage?


Yes, mold exposure after water damage can lead to various health risks, particularly for sensitive individuals. Common symptoms include respiratory issues, allergic reactions, skin irritation, and sinus problems. Prolonged exposure can exacerbate asthma and other chronic respiratory conditions. Vulnerable populations, such as children, the elderly, and those with weakened immune systems, are at higher risk. If you suspect mold growth, it’s essential to address it promptly and consider professional remediation to ensure a safe living environment.

Conclusion


Implementing effective safety practices after water damage is crucial for protecting your home and health. By following the outlined steps, you can minimize risks, prevent mold growth, and ensure a safer environment for your family. For comprehensive support and expert assistance, consider reaching out to professional restoration services. Take proactive measures today to safeguard your property and well-being.

Essential Fire Restoration Steps to Follow After Damage

Essential Steps for Fire Recovery

A home or business fire is a sudden, disorienting event that threatens safety, possessions, and structural integrity; fire damage restoration is the organized process of stabilizing a property, removing hazards, cleaning smoke and soot, and rebuilding so occupants can safely return. This guide explains the key phases of fire damage restoration immediate safety and securing steps, detailed assessment of structural, smoke/soot, and water impacts, the cleanup and contents-restoration workflow, insurance navigation, common timelines, and mold prevention, and practical prevention tips tailored to Austin and Central Texas. Provide useful information about cleaning and restoration services, build trust, and lead potential clients to request a quote or schedule an appointment. If you need immediate assistance after a fire, call 512-451-8326 to request emergency response or a quote; expert teams are available 24/7 to help secure your property and begin mitigation. The sections below map an ordered recovery path and technical details so you can make informed decisions quickly and confidently.

What Are the Immediate Steps to Take After a House Fire?


Immediate actions after a fire prioritize life-safety, stabilization to prevent secondary damage, and documentation for insurance and restoration planning. Start by following directions from emergency responders and avoid re-entering the structure until it is declared safe by authorities; this prevents exposure to structural collapse, lingering smoke, and unseen hazards. Next, prioritize controlling utilities and securing openings to limit weather, vandalism, and animals from compounding losses; short-term stabilization is central to reducing overall restoration cost and scope. The final early step is to document visible damage with photos and notes. If it is safe, then contact both your insurer and a restoration provider to coordinate emergency mitigation and an initial scope.


This ordered checklist explains what to do first and why each action matters before professionals arrive.

  1. Ensure personal safety and follow official instructions: Wait for the fire department to clear the scene and heed evacuation or re-entry guidance.

  2. Shut off utilities or confirm they are disconnected: Gas, electricity, and water should remain off until inspected by professionals.

  3. Photograph and document visible damage when safe: Capture exterior and interior conditions to support immediate claims.

  4. Contact emergency restoration and your insurer: Notify both so mitigation and claims work can begin without delay.

  5. Secure openings with board-up or tarps as needed: Temporary protection prevents weather and trespasser damage.


These ordered steps reduce immediate risk and prepare the property for professional assessment and mitigation, which is the next priority.

How Do You Ensure Safety and Secure Your Property After Fire Damage?


Safety and property security start with confirming that the fire department has extinguished all active flames and declared the structure safe for limited access, because unseen hot spots and weakened framing can cause delayed collapse. If allowed a brief entry, avoid touching electrical panels, do not operate appliances, and wear protective gear respirators, gloves, and eye protection, because soot and ash contain hazardous particulates. For short-term protection, board-up services and tarping limit exposure to rain and wind; these actions also reduce the risk of theft, vandalism, and wildlife entry. Contact professionals to perform a formal check for gas leaks, electrical hazards, and hidden embers so stabilization can be completed and reliable next steps planned.


Securing the site reduces exposure and allows restoration teams to begin mitigation safely, which leads to decisions about professional intervention and scope.

When and Why Should You Contact Professional Fire Damage Restoration Experts?


Call restoration experts as soon as the scene is safe because early mitigation, water extraction, drying, board-up, and soot stabilization prevent costly secondary damage such as mold growth and progressive material deterioration. Certified restoration teams bring specialized equipment, air scrubbers with HEPA filtration, industrial dehumidifiers, thermal imaging for hidden moisture, and controlled demolition tools that home remedies cannot substitute- and they follow industry standards to document work for insurers. In urgent cases, a 24/7 emergency response capability ensures mitigation begins without delay; rapid response shortens drying timelines and improves the likelihood of salvaging contents. Engaging professionals early also supports a clearer insurance workflow and faster overall recovery.


Prompt professional involvement reduces long-term loss and forms the foundation for claims documentation and reconstruction planning.

How Is Fire Damage Assessed for Effective Restoration?


Fire damage assessment is the systematic evaluation that determines which parts of a property are structurally unsafe, which materials are contaminated by smoke and soot, and where firefighting water introduced moisture that risks mold and continued deterioration. Assessors inspect load-bearing elements, examine smoke penetration into porous materials, perform moisture mapping with meters and thermal imaging cameras, and evaluate HVAC and ductwork to prevent re-soiling. Accurate assessment defines the mitigation priority: stabilizing the structure, removing water, cleaning soot, and salvaging contents. Understanding the different damage types, structural, smoke/soot, and water, helps owners set expectations for scope, timelines, and costs.


Below is a compact comparison to clarify how professionals distinguish damage types and immediate risks.

Damage Type

Assessment Attribute

Typical Indicator/Result

Structural damage

Load-bearing integrity

Sagging beams, cracked foundations, unsafe framing

Smoke & soot penetration

Material porosity and residue type

Black/gray residues, discoloration, odor transfer to fabrics

Water/moisture intrusion

Moisture readings and thermal anomalies

Elevated RH, wet insulation, hidden saturation behind walls


This comparison helps homeowners understand why repair approaches differ and why a layered restoration plan is necessary for full recovery.

What Are the Key Signs of Structural Damage After a Fire?


Structural damage after a fire appears as visible deformation, such as warped or sagging floors and ceilings, cracked masonry, or exposed, charred framing that compromises load paths; these signs indicate that a structural engineer or licensed contractor must evaluate safety. Inspectors look for misaligned doors and windows, new cracks in foundations or load-bearing walls, and areas where fire or thermal shock has caused rapid material weakening. Temporary shoring and targeted demolition may be required immediately to stabilize these elements before full reconstruction. If you observe any of these indicators, restrict access to the affected zones and arrange for professional evaluation to avoid catastrophic failure during cleanup.


Recognizing these signs early prioritizes safety and guides the scope of stabilization and longer-term reconstruction.

How Do Professionals Evaluate Smoke, Soot, and Water Damage?


Technicians identify smoke and soot types, wet versus dry smoke, because residue chemistry drives the selection of cleaning agents and methods; wet smoke often requires different solvents and more aggressive surface restoration than dry smoke. Professionals sample surfaces, test HVAC systems and ductwork for contamination, and use moisture meters and thermal imaging to locate hidden water intrusion from firefighting. Air quality is measured using particle counters and odor detection to design deodorization strategies such as air scrubbing with HEPA filtration and specialized thermal or chemical deodorization when needed. These evaluations inform whether contents can be cleaned on-site or require off-site pack-out and specialized restoration.


A precise technical assessment ensures cleaning methods and equipment match the contamination, improving salvage rates and indoor air quality.

Post-Fire Damage Assessment: Evaluating Heat, Smoke, and Soot Impact


The physical and/or operational damage from the heat and/or residual smoke in the aftermath of a fire in a building is largely a safety/engineering determination. Additionally, once the immediate toxic gases and particulates have dissipated, residual combustion deposits on surfac

What Are the Essential Steps in the Fire Damage Cleanup and Restoration Process?


The cleanup and restoration workflow follows distinct phases: emergency mitigation, water extraction and drying, smoke/soot cleaning and odor control, contents restoration, and structural repair/reconstruction. Each phase uses specific equipment and certified techniques, air movers and dehumidifiers during drying, HEPA vacuums and controlled cleaning chemistries for soot, ultrasonic and freeze-drying for delicate content, so sequencing and documentation are critical to success. This phased approach minimizes cross-contamination, prevents mold after water intrusion, and allows accurate cost and timeline projections for rebuilding. The steps below outline the typical sequence so owners can follow progress and ask targeted questions of providers.

  1. Mitigation and stabilization: Board-up, tarping, and temporary shoring to prevent further exposure.

  2. Water extraction and drying: Remove standing water, set up dehumidification, and monitor moisture.

  3. Cleaning and deodorization: Remove soot, clean surfaces, and apply odor-control technologies.

  4. Contents restoration and pack-out: Inventory, triage, and clean salvageable items on-site or off-site.

  5. Reconstruction and finishing: Structural repairs, systems replacement, and final inspections.


These steps connect mitigation through reconstruction to return the property to pre-loss condition, while controlling costs and health risks during the process.


Introductory table comparing phases, typical tasks, and expected durations follows to set clear expectations.

Phase

Typical Tasks

Typical Duration

Mitigation

Board-up, tarping, emergency debris removal

1–3 days

Drying & Water Extraction

Pumps, extractors, air movers, dehumidifiers, and monitoring

3–14 days (varies by moisture)

Cleaning & Deodorization

HEPA vacuuming, surface cleaning, air scrubbing, and deodorization

3–10 days

Contents Restoration

Inventory, ultrasonic/textile cleaning, pack-out services

Days to weeks

Reconstruction

Demolition, framing, systems replacement, finishing

Weeks to months


This phase table illustrates typical durations, but remember that severity, insurance approvals, and permitting influence actual timelines.

How Is Water Extraction and Drying Performed After Firefighting Efforts?


After firefighting, thorough water extraction is essential to prevent mold and hidden structural damage; technicians use weighted extractors, pumps, and portable extractors to remove standing and trapped water quickly. Once bulk water is removed, drying equipment, high-capacity air movers, and industrial dehumidifiers create airflow and moisture-removal gradients while technicians map moisture levels with meters and thermal imaging for targeted drying. Teams document progress with daily moisture readings and photos until materials reach safe thresholds; this record supports insurance claims and confirms that mold risk has been mitigated. Prompt drying within the first 24–72 hours is critical to preventing microbial growth and preserving as much structure and contents as possible.


Consistent monitoring and adaptive drying strategies reduce restoration time and long-term material loss.

What Are the Best Methods for Smoke and Soot Removal and Odor Elimination?


Soot removal requires matching cleaning chemistry and technique to the residue type and substrate: dry chemical sponges and HEPA vacuums for light, dry soot; solvent-based cleaning and abrasive methods for heavy, oily residues from wet smoke. Air scrubbing with HEPA filtration removes airborne particulates during cleaning, while targeted deodorization uses thermal fogging, hydroxyl generators, or activated carbon filtration, depending on odor source and material absorption. Specialty surfaces such as upholstery, draperies, and HVAC components require specific approaches, encapsulation, professional wet-cleaning, or ductwork restoration to prevent re-soiling. Proper sequencing (cleaning before HVAC restart) ensures particulates are not redistributed and that indoor air quality is restored for occupants.


Choosing the right combination of mechanical filtration, chemical cleaning, and deodorization improves salvage outcomes and occupant health.

How Is Contents Restoration Handled for Fire and Smoke-Damaged Items?


Contents restoration begins with a documented inventory and triage: items are categorized as cleanable, salvageable with specialty restoration, or non-salvageable, which guides pack-out plans and insurance documentation. Restoration techniques include ultrasonic cleaning for metal and jewelry, freeze-drying for moisture-damaged documents, and specialized textile cleaning or dry-cleaning for fabrics; electronics undergo corrosion-inhibiting treatments and evaluation by qualified technicians. Secure off-site facilities allow controlled, thorough restoration when on-site conditions are too contaminated for safe cleaning, and detailed chain-of-custody records support claims. Owners should expect an itemized inventory and condition report that pairs with photographic documentation for adjuster review.


A disciplined contents process increases recovery rates and provides transparent claims support for damaged personal property.

What Does Structural Repair and Reconstruction Involve After Fire Damage?


Structural repair and reconstruction start with selective demolition of irreparably damaged materials while preserving sound structure, followed by structural repairs, framing, roof and wall systems, and replacement of mechanical, electrical, and plumbing systems as required. Reconstruction requires permits, coordination with licensed contractors and possibly structural engineers, and phased inspections to ensure code compliance and occupant safety. Finish work restores aesthetics and function drywall, paint, flooring, and cabinetry, while final quality checks confirm systems, airtightness, and odor elimination. Throughout reconstruction, clear documentation and staged approvals help keep timelines and budgets aligned with the scope developed in earlier phases.


Coordinated reconstruction restores habitability and value while maintaining records needed for final insurance settlement.

How Can You Navigate Insurance Claims After Fire Damage?


Navigating insurance after a fire requires prompt documentation, clear organization of damaged property inventories, and coordinated communication with adjusters to ensure scope and estimates reflect true restoration needs. Begin by submitting initial photos and a basic inventory, then retain copies of any emergency mitigation receipts and contractor estimates. Restoration companies can support this process by providing professional scopes of work, itemized estimates, and documented mitigation activities that match industry standards. Understanding policy limits, endorsements, and claim deadlines reduces surprises and expedites funds for necessary repairs.


This checklist-style approach clarifies who provides what documentation and how to present it to your carrier.

  • Gather immediate evidence: photographs, videos, and a preliminary contents list.

  • Save receipts for emergency mitigation and temporary housing if applicable.

  • Obtain professional restoration estimates and scopes that align with industry standards.

  • Coordinate scheduling for adjuster visits and provide clear documentation during inspections.


Following these steps helps reduce friction with carriers and supports more accurate claim settlements.


Before the next section, the table below explains typical documents, who prepares them, and why they are required.

Document/Deliverable

Who Prepares It

Why It's Needed

Photo & video evidence

Homeowner / on-scene personnel

Establishes pre-scope condition and visible loss

Contents inventory

Homeowner with restoration support

Itemizes damaged property for valuation and recovery

Mitigation receipts & logs

Restoration company/contractor

Proves emergency actions and supports interim costs

Detailed scope & estimate

Restoration company

Provides a technical basis for repair costs and adjuster review


Document organization and professional back-up accelerate adjuster review and reduce disputes over scope and pricing.

What Documentation Is Needed for Fire Damage Insurance Claims?


Essential documentation includes dated photos and videos of damage, an itemized contents inventory with approximate pre-loss values where possible, receipts for emergency mitigation and temporary protective measures, and restoration estimates that break down tasks and materials. Keep originals and copies organized by room and category, and log any conversations with insurers or contractors, including dates and names. Professional restoration companies often supply daily mitigation logs, moisture monitoring records, and technical scopes that are especially useful for complex claims involving hidden damage or extensive reconstruction. Accurate, chronological documentation reduces ambiguity and speeds approval for necessary work.


Well-prepared documentation forms the backbone of a straightforward claims process and supports a fair settlement.

How Does Working with Insurance Adjusters Support Your Restoration Process?


An adjuster’s inspection determines the carrier’s initial scope and payout; being present during inspections and providing clear, chronological documentation helps align expectations and identify items needing supplemental review. Restoration professionals can meet with adjusters to explain technical findings, moisture mapping, smoke penetration, structural concerns, and provide certified estimates that translate technical work into entailed costs. If additional damage is discovered during remediation, supplement requests with supporting evidence and professional explanationsto facilitate approval. Maintaining transparent communication and detailed records minimizes delays and ensures the restoration work proceeds on an approved basis.


A cooperative approach between homeowners, restoration firms, and adjusters speeds resolution and reduces the need for rework.

How Does The Steam Team Assist with Insurance Claims and Customer Support?


The Steam Team assists homeowners by documenting mitigation work, preparing detailed scopes and estimates for adjuster review, and coordinating directly with carriers to streamline preferred-vendor processes; they offer 24/7 emergency response and technical support during the claims lifecycle. Their technicians follow industry-standard protocols and provide photo documentation, daily monitoring records, and contents inventories to back up each phase of mitigation and restoration. As an Austin-based restoration provider, The Steam Team can help coordinate pack-outs, specialized cleaning, and reconstruction planning while communicating status updates to property owners and adjusters. For emergency response or to request a quote and schedule restoration services, contact 512-451-8326 for immediate assistance.


This support role reduces administrative burden on owners and helps align restoration activities with insurer expectations.

What Are Common Questions About Fire Damage Restoration?


Homeowners commonly ask about timelines, whether professional restoration is necessary, and how to prevent mold after firefighting. Answers depend on severity, water involvement, and structural impact, but industry practices give reliable ranges and preventive steps. Small, localized cleanups are often completed in days to a few weeks, whereas full reconstruction after major structural damage can take months. Professional restoration reduces health risks and long-term costs by addressing hidden soot, HVAC contamination, and moisture that DIY methods often miss. Preventing mold hinges on timely water extraction and dehumidification: starting drying efforts within 24–48 hours and monitoring moisture until safe thresholds are reached.


Below are concise answers that guide expectations and prompt appropriate action.

  1. How long does restoration take? Small jobs: days–a few weeks; large rebuilds: weeks–months, depending on approvals and scope.

  2. Is professional restoration necessary? For structural, heavy smoke, or water-involved fires, professional services minimize health and property risks.

  3. How to prevent mold after fire? Begin drying immediately, use industrial dehumidification, and apply antimicrobial treatments where needed.


These concise answers help homeowners decide when to call professionals and what to expect during recovery.

How Long Does Fire Damage Restoration Typically Take?


Restoration timelines vary by severity: limited surface smoke and minor water intrusion can be stabilized and cleaned in a few days to a couple of weeks, while projects involving structural repairs, full contents pack-out, and reconstruction extend to weeks or months. Permitting, insurance approvals, specialist lead times, and material availability all influence the schedule; clear, documented scopes and timely adjuster inspections shorten delays. Daily moisture logs and progress photos help confirm when drying and cleaning objectives are met so reconstruction can begin. Expect realistic phases rather than a single duration. Ask your provider for a projected schedule and milestones.


Understanding these factors enables better planning for temporary housing, business continuity, and phased restoration payments.

Is Professional Fire Damage Restoration Necessary?


Professional restoration is necessary when safety, structural integrity, or health risks are present: soot and smoke residues contain hazardous particulates, water can hide behind materials causing mold, and electrical or structural damage may not be visible to untrained eyes. Certified technicians use equipment and protocols that restore indoor air quality, remove embedded contaminants, and document work to support insurance claims capabilities often beyond DIY scope. Even for seemingly minor fires, a professional assessment identifies hidden risks that could otherwise lead to recurring odors, compromised systems, or costly rework. Investing in certified restoration helps protect occupants’ health and preserves property value through proper remediation.


When in doubt, an expert inspection clarifies the necessary level of intervention and prevents downstream problems.

How Can Mold Be Prevented After Fire and Water Damage?


Mold prevention after fire depends on prompt moisture removal and careful drying: start extraction and drying equipment within 24–48 hours when safe, maintain continuous airflow, and monitor moisture readings until materials return to acceptable thresholds. Use antimicrobial treatments on vulnerable porous materials and control relative humidity to limit microbial growth; if insulation or drywall is saturated and cannot be dried to safe levels, removal reduces mold risk. Regular monitoring and follow-up inspections confirm that remediation was effective and that no secondary colonization occurs. Early, documented drying and treatment are the most effective measures to prevent mold-related damage after firefighting.


A disciplined drying and monitoring regimen protects indoor air quality and preserves remaining materials.

What Fire Prevention Tips Can Help Avoid Future Damage?


Effective prevention reduces ignition sources and improves readiness; focus on smoke detectors, electrical safety, safe appliance use, and defensible space in warm, dry climates like Austin and Central Texas. Regular maintenance of heating and cooking systems, routine inspection of electrical circuits, and removal of combustible debris from around structures reduce the chance of accidental fires. Prepare and rehearse evacuation plans with household members or staff, and ensure business sites have clearly marked exits and functioning suppression where applicable. These measures lower the likelihood of fires and shorten response times if incidents occur.


The actionable guidance below delivers practical prevention tasks that property owners can implement immediately.

  • Install and maintain smoke detectors and alarms: Test monthly and replace batteries as needed.

  • Perform routine electrical and appliance inspections: Address frayed cords, overloaded circuits, and malfunctioning devices.

  • Create evacuation and emergency plans: Practice routes and assembly points with family or employees.

  • Maintain defensible space and safe landscaping: Trim vegetation and remove combustible materials near structures.


Implementing these steps reduces ignition sources and improves occupant safety while complementing community emergency response.

What Are the Best Practices for Fire Safety in Residential and Commercial Properties?


Best practices include layered protections: functional smoke alarms, working fire extinguishers in accessible locations, clear egress routes, and staff or family training on emergency response; businesses should add written fire safety plans and periodic drills. Maintain suppression systems and alarms according to manufacturer and code guidelines, and ensure emergency lighting and exit signage are operative in commercial spaces. Keep records of inspections and maintenance to demonstrate due diligence and facilitate rapid corrective action. These proactive practices reduce injury risk, limit property loss, and enhance resale or tenant confidence.


Routine prevention and readiness measures are the most effective way to limit the scope and impact of fire incidents.

How Can Regular Maintenance Reduce Fire Risks in Austin Homes and Businesses?


In Austin and Central Texas, seasonal maintenance cleaning dryer vents, servicing HVAC systems, trimming dry vegetation, and ensuring safe barbecue and outdoor equipment use address common local ignition sources tied to climate and lifestyle. Older electrical systems benefit from professional inspection to catch degraded insulation and overloaded circuits that pose ignition risks. Scheduling routine inspections and addressing issues promptly reduces the chance of accidental fires and lowers insurance exposure. Combine maintenance with updated safety plans to keep properties resilient through dry seasons and heat spikes.


Consistent maintenance habits significantly reduce fire likelihood and improve long-term safety for both homes and businesses.

Frequently Asked Questions

What Should You Do If You Suspect Hidden Damage After a Fire?


If you suspect hidden damage after a fire, it’s crucial to contact a professional restoration service immediately. Trained technicians can perform a thorough assessment using specialized tools like moisture meters and thermal imaging cameras to identify issues that may not be visible to the naked eye. This includes checking for water intrusion, smoke penetration, and structural integrity. Early detection of hidden damage can prevent further deterioration and costly repairs, ensuring a safer environment for occupants.

How Can You Prepare for a Fire Damage Restoration Assessment?


Preparing for a fire damage restoration assessment involves documenting the damage thoroughly. Take clear photographs of affected areas and create a list of damaged items, noting their condition and estimated value. Gather any relevant insurance documents and previous maintenance records that may assist the restoration team. Being organized and providing detailed information can help the restoration professionals develop a more accurate scope of work and streamline the insurance claims process.

What Are the Risks of Delaying Fire Damage Restoration?


Delaying fire damage restoration can lead to several risks, including increased structural damage, mold growth, and health hazards from lingering smoke and soot. The longer the damage remains unaddressed, the more extensive and costly the repairs may become. Additionally, insurance claims may be affected if restoration is not initiated promptly, as insurers often require timely action to mitigate losses. It’s essential to act quickly to minimize risks and ensure a safe living environment.

What Types of Insurance Coverage Are Typically Available for Fire Damage?


Insurance coverage for fire damage typically falls under homeowners or commercial property insurance policies. Standard policies often cover structural damage, personal property loss, and additional living expenses incurred while the property is being restored. However, coverage specifics can vary widely, so it’s essential to review your policy details. Some policies may also offer additional endorsements for higher coverage limits or specific items. Consulting with your insurance agent can clarify what is covered and help you understand your options.

How Can You Choose the Right Fire Damage Restoration Company?


Choosing the right fire damage restoration company involves researching their credentials, experience, and customer reviews. Look for companies that are certified by industry organizations, such as the Institute of Inspection, Cleaning, and Restoration Certification (IICRC). Ensure they offer 24/7 emergency services and have a proven track record in fire damage restoration. Request detailed estimates and ask about their restoration process to ensure they align with your needs. A reputable company will also assist with insurance claims, providing necessary documentation and support.

What Are the Long-Term Effects of Fire Damage on Property Value?


Fire damage can significantly impact property value, especially if not properly restored. Even after repairs, potential buyers may perceive a property as less desirable due to its history of fire damage. This can lead to lower offers or extended time on the market. Proper restoration, including thorough cleaning and structural repairs, is essential to mitigate these effects. Maintaining detailed records of the restoration process can also help reassure potential buyers about the property’s condition and safety.

Conclusion


Effective fire damage restoration is crucial for ensuring safety, preserving property value, and preventing long-term health risks associated with smoke and water damage. By understanding the restoration process and engaging professional services promptly, property owners can navigate recovery with confidence and clarity. Don't hesitate to reach out for expert assistance to secure your property and initiate the restoration journey. Contact us today to learn more about our comprehensive fire damage restoration services.

Essential Best Practices for Drying Water Damage Quickly

Expert Water Damage Drying Techniques

Water damage drying is the controlled process of removing water and moisture from building materials to prevent secondary damage such as mold growth, structural deterioration, and ruined contents. Rapid, measured drying reduces repair scope and cost by restoring equilibrium moisture content in materials through coordinated steps: extraction, directed airflow, dehumidification, and continuous monitoring. This article explains why fast, professional drying matters, outlines immediate homeowner actions, compares core drying techniques and equipment, and describes how to verify endpoints to prevent mold and long-term damage. You will learn practical safety checkpoints, the science behind refrigerant vs desiccant dehumidifiers, how air movers and injectidry systems reach hidden cavities, and which moisture metrics signal completion. Finally, the guide highlights local considerations for Austin and Central Texas climates, what advanced crews bring to complex jobs, and clear signs for when to escalate to professional restoration. Use the checklists and tables to make quick decisions on-site and to communicate effectively with insurers and service providers.

What Are the Immediate Steps for Effective Water Damage Drying?


Immediate water damage drying begins with a fast triage: stop the source, ensure safety, remove standing water, and create airflow to start evaporation while documenting conditions for insurance. The mechanism is simple: reduce bulk water, accelerate surface evaporation with air movement, and extract airborne moisture with dehumidification, so each step prioritizes limiting contamination and structural weakening. Acting within the first 24–48 hours dramatically lowers mold risk and shortens total drying time, while measured extraction and containment preserve salvageable materials. The short workflow below offers a prioritized sequence homeowners and first responders can follow until professionals arrive.


Initial, practical steps for quick field triage:

  1. Turn off electrical circuits serving wet areas if safe to do so and avoid standing water near outlets.

  2. Remove people and pets from contaminated areas and isolate the loss zone with temporary containment.

  3. Begin bulk water removal using pumps or wet vacuums and clear floor drains to reduce the standing water depth.

  4. Create airflow by opening windows and running available fans toward exterior ventilation while keeping contaminated air contained.


This numbered workflow gives clear, actionable steps to reduce immediate risk. After removing bulk water, the next priority is verifying safety protocols and choosing extraction methods appropriate to the situation.

How Do You Ensure Safety During Water Damage Drying?


Ensuring safety means evaluating electrical hazards, contamination category, and structural compromise before any drying work begins. Electrical risk is high in flooded spaces; if water reaches outlets, panels, or appliances, cut power at the main or call the utility and a professional. Do not step into water near live power. Contaminated water (sewage, floodwater) requires PPE gloves, boots, N95 or higher respirators, and sometimes full protective suits and limits DIY attempts to removal of obvious solids and documentation. Structural concerns such as bulging ceilings or sagging floors should prompt evacuation and an engineered assessment. Document conditions with photos and notes for insurance; safe documentation aids recovery and maintains liability control.


These safety steps naturally lead to appropriate extraction choices, where equipment selection balances speed and contamination handling.

What Are the Best Professional Water Extraction Methods?


Professional water extraction targets both visible standing water and entrained moisture in fabrics and structural assemblies using a tiered approach of pumps, truck-mounted extractors, and portable units. Submersible pumps and surface pumps remove deep standing water quickly from large losses; truck-mounted extractors supply high vacuum and heat to pull moisture from carpets and porous substrates efficiently. Portable extractors and wet vacs are best for localized events or contained rooms where maneuverability matters. Choosing the right method reduces residual moisture and shortens the drying phase, which lowers mold risk and replacement costs.


Compare extraction methods and typical scenarios in the quick reference table below.

Extraction Method

Key Equipment

Typical Use Case / Best For

Submersible pumps

High-flow pumps, hoses

Large volumes of standing water in basements and garages

Truck-mounted extractors

High-vacuum units, heated vacuum

Fast removal from carpets, large-scale water losses

Portable extractors / wet vacs

Hand-portable vacuums, suction wands

Small areas, stairwells, and spot extraction

Mopping / manual removal

Buckets, squeegees

Quick mitigation when pumps are unavailable; limited for larger losses


This table clarifies which extraction technique matches common site conditions. Once bulk water is removed, effective drying shifts to combining airflow and dehumidification to remove remaining moisture from materials.

Which Professional Drying Techniques Are Most Effective for Water Damage?


Professional drying techniques work together to move moisture from wet materials into the air and then remove that moisture from the environment; the core processes are extraction, airflow (air movers), dehumidification, heat application, and targeted structural drying. Evaporation is driven by airflow and temperature; dehumidifiers remove the vapor to maintain low relative humidity so evaporation continues. The right technique depends on material, temperature, humidity, and the presence of hidden moisture. Reviewing the mechanics and appropriate application for each technique helps choose the optimal combination for efficient, measurable drying.


Key techniques and when to use them:

  1. Extraction: Removes bulk and bound water before drying, essential to shorten drying time and reduce contamination.

  2. Air movers: Increase surface evaporation and direct airflow through wall cavities and assemblies.

  3. Refrigerant dehumidification: Condenses moisture; ideal for moderate temperatures and typical indoor conditions.

  4. Desiccant dehumidification: Adsorbs moisture; superior in low-temperature or extremely humid scenarios and for processing large moisture loads.


Selecting and sequencing these techniques forms the basis of structural drying plans and leads to specific equipment choices summarized below.

Technique

Key Equipment

Typical Application

Extraction

Pumps, extractors

Initial bulk water removal to reduce the load

Refrigerant dehumidification

LGR / refrigerant units

Common indoor environments, moderate temp/humidity

Desiccant dehumidification

Desiccant wheels, trailers

Low-temp or high-humidity sites, fast moisture adsorption

Directed airflow

Air movers, ducting

Surface drying and cavity drying support

Heat drying

Portable heaters, heat systems

Accelerates evaporation when balanced with dehumidification

How Does Dehumidification Work to Remove Moisture After Water Damage?


Dehumidification removes moisture from air, lowering relative humidity so water continues to evaporate from wet materials into the atmosphere and then is captured by the dehumidifier. Refrigerant units condense water onto cold coils and are energy-efficient in typical indoor temperatures, while desiccant systems chemically adsorb moisture, maintaining effectiveness in colder or highly humid conditions. The selection depends on psychrometric targets: professionals calculate humidity ratios and set endpoints based on material-specific equilibrium moisture content. Proper dehumidification prevents reabsorption and shortens total project duration, offering measurable endpoints for closure. Understanding dehumidification mechanics leads to the correct pairing with air movers and containment strategies that direct vapor toward the dehumidifier inlet.

Why Are Air Movers Essential for Structural Drying?


Air movers accelerate surface evaporation by increasing airflow over wet materials, disrupting boundary layers of humid air, and carrying moisture toward dehumidifiers. Placement strategy is critical: directed, overlapping airflow reduces dead zones and helps dry behind baseboards, under cabinets, and into wall cavities when combined with injectidry systems. Air mover capacity is measured in CFM and must be matched to room volume and material porosity; improper placement wastes energy and can prolong drying. Coordinating air movers with dehumidification maintains a gradient that encourages continuous evaporation without causing elevated humidity that would slow the process. This role of airflow naturally connects to methods for reaching hidden moisture through structural drying tools and diagnostics.

How Is Structural Drying Performed to Address Hidden Moisture?


Structural drying targets moisture trapped in wall cavities, subfloors, and assemblies using non-destructive techniques injectidry hoses, cavity drying, and controlled pressure differentials guided by moisture mapping and thermal imaging. Technicians create containment and direct airflow into cavities, using targeted heat and low-profile injectors to force evaporation into accessible air streams. Thermal imaging and in-depth moisture meters locate pockets of retained moisture, reducing unnecessary demolition. When non-destructive methods cannot reach soaked materials, controlled openings or material removal are performed to prevent prolonged degradation. Structural drying depends on precise diagnostics and monitoring, which informs endpoint criteria and limits needless reconstruction.

When and How Is Heat Drying Used to Accelerate Evaporation?


Heat drying raises the vapor pressure of water in materials to increase the evaporation rate, often combined with dehumidification to capture the extra vapor generated. Portable heaters and heated desiccant systems are powerful accelerants for cold-season drying or when rapid turnaround is vital, but they raise safety considerations electrical load, fire risk, and possible warping of sensitive materials. Professionals balance heat with humidity control: too much heat without dehumidification only increases RH and slows drying. Controlled heat applications shorten project timelines when integrated into an overall drying plan with continuous monitoring. Appropriate heat application is a measured tool that reduces restoration time while maintaining safety and material integrity.

How Can You Prevent Mold Growth and Secondary Damage After Water Damage Drying?


Preventing mold and secondary damage begins with fast drying and continues with sanitation, monitoring, and confirmation of drying endpoints. Mold can begin to colonize within 24–48 hours in favorable conditions, so reducing moisture quickly and maintaining low relative humidity is the core preventive action. Antimicrobial treatments, physical removal of contaminated materials, and proper drying protocols limit biological growth and persistent odors, but they are not substitutes for thorough drying and moisture verification. Documented monitoring and clear endpoints reassure homeowners and insurers that the property is stabilized and safe.


The checklist and monitoring practices below help teams and homeowners verify that drying has been effective and that microbial risks are minimized.

  • Dry the site within 24–48 hours when possible, using coordinated extraction, airflow, and dehumidification.

  • Apply surface sanitizers where contamination risk exists, but reserve deep antimicrobial treatment for confirmed colonization.

  • Use moisture meters, hygrometers, and thermal imaging to document progressive reduction in material moisture and room RH.


These prevention steps point directly to the tools used to apply antimicrobial work and to the need for rigorous monitoring protocols.

What Antimicrobial Treatments Are Used for Mold and Odor Control?


Antimicrobial treatments include surface sanitizers, encapsulants, and targeted biocides applied according to contamination type and material compatibility; they reduce viable spores and control odor but do not replace physical removal of heavily contaminated porous materials. Surface sanitizers are useful after drying to reduce residual microbial loads on hard, non-porous surfaces, while more aggressive interventions are reserved for significant mold growth that requires remediation. Trends favor safer, lower-toxicity chemistries for occupied spaces, and technicians must follow label instructions and regulatory guidance. Proper application accompanies containment, PPE, and disposal of affected materials to limit cross-contamination. Understanding antimicrobial options underscores why continuous moisture monitoring is necessary to confirm that re-colonization risks remain low.

How Is Continuous Moisture Monitoring Conducted During Drying?


Continuous monitoring uses a mix of tools, surface and pinless moisture meters, thermo-hygrometers for ambient conditions, and data-loggers for trend analysis to track drying progress and determine endpoints. A common workflow starts with baseline mapping, daily readings logged in consistent locations, and endpoint criteria based on manufacturer and industry standards for equilibrium moisture in specific materials. Target ranges often include stable moisture meter readings over consecutive days and relative humidity maintained below set thresholds, demonstrating that evaporation has ceased. Clear monitoring records provide the documentation needed for homeowner confidence and insurance claims. Consistent monitoring closes the loop from mitigation to successful restoration and informs any required reconstruction or contents restoration steps.

What Advanced Equipment Does The Steam Team Use for Water Damage Drying in Austin?


The Steam Team deploys industrial-grade drying equipment calibrated for Austin and Central Texas climate challenges, combining high-capacity refrigerant and desiccant dehumidifiers, directional air movers, thermal imaging cameras, and injectidry systems to locate and remove hidden moisture. Their crews are IICRC-certified, which supports measurable, standards-based drying decisions and thorough documentation. Equipment choice is tuned to local humidity and seasonal heat desiccants for peak humidity events and LGR refrigerant units for typical interior jobs so drying progresses efficiently while limiting invasive demolition. As a preferred vendor for major insurance carriers, their process emphasizes rapid response, documentation, and clear communication with adjusters to streamline claims.


Below is a practical equipment-to-outcome table showing typical functions and performance expectations in Austin’s climate.

Equipment

Function / Attribute

Expected Outcome

High-capacity refrigerant dehumidifier

Condenses airborne moisture in warm interiors

Steady RH reduction, efficient in moderate temps

Desiccant dehumidifier

Adsorbs moisture at low temps / high humidity

Maintains drying in saturated or cool conditions

Directional air movers

High CFM, focused airflow, ducting

Rapid surface evaporation, cavity drying support

Thermal imaging camera

Non-contact moisture visualization

Locates hidden moisture for targeted drying

Injectidry systems

Hose-driven cavity airflow

Non-destructive drying of wall and floor assemblies

How Do IICRC Certified Technicians Enhance Drying Quality?


IICRC-certified technicians apply standardized methodologies, psychrometric calculations, documented monitoring, and protocol-driven equipment selection that translate into reliable drying outcomes and defensible documentation for claims. Certification ensures crews understand equilibrium moisture content, the interplay of temperature and humidity, and when to escalate from non-destructive drying to controlled material removal. This competency reduces guesswork, shortens project timelines, and improves homeowner confidence through transparent reporting. Certification also supports consistent quality control checks throughout the restoration lifecycle. These quality controls complement advanced equipment choices and local operational experience.

What State-of-the-Art Drying Equipment Is Used for Austin’s Climate?


State-of-the-art selections for Austin emphasize flexibility: high-capacity refrigerant units for standard interiors, desiccant systems for peak humidity or cool-season events, directional air movers for efficient evaporation, and thermal imaging plus moisture meters for verification. For large commercial or severe residential losses, trailer-mounted systems and combined airflow/dehumidification arrays process vast moisture loads. Choosing the right equipment combination avoids over-drying sensitive materials and prevents insufficient drying that leads to mold. Equipment choice directly affects drying rates and endpoint verification. The equipment table above maps common tools to anticipated outcomes so homeowners understand why each device appears on-site.

How Does Local Expertise Improve Water Damage Drying Outcomes?


Local field experience matters because Austin’s seasonal heat and humidity, common building materials, and neighborhood response dynamics affect drying strategy and logistics. Crews familiar with local construction can anticipate trapped moisture in typical wall assemblies and select containment and injectidry tactics accordingly. Quick mobilization in the service area and established relationships with insurers shorten response times and reduce overall damage. Local expertise also means tuning dehumidification strategies for seasonal humidity swings to avoid prolonged jobs and repeated callbacks.


Local experience paired with disciplined monitoring produces faster, more predictable restorations and reduces downstream costs for homeowners.

When Should You Call Professionals for Water Damage Drying Services?


Call professionals when the loss exceeds the scope of safe DIY mitigation, contamination is present, or structural elements are wet. Early professional intervention limits damage and cost escalation. Professionals bring calibrated equipment, IICRC best-practice workflows, and measurable endpoints; they also document conditions for insurance and coordinate reconstruction when needed. If standing water covers large areas, water is contaminated (sewage/floodwater), or visible mold appears within 24–48 hours, elevate to professional services immediately. The steps below explain what to expect when you request service and prepare for an efficient response.


Signs and triggers that warrant professional help:

  1. Standing water covering more than a small room or deeper than a few inches.

  2. Contaminated water (sewage, river/flood water) or unknown contamination.

  3. Structural symptoms include sagging ceilings, compromised load-bearing elements, or bulging walls.

  4. Persistent moisture readings or failed DIY drying after 24–48 hours.


This checklist clarifies escalation priorities and helps homeowners decide when to contact restoration professionals.

What Are the Signs That Indicate You Need Expert Water Damage Drying?


Concrete signs include visible mold growth or musty odors within 24–48 hours, persistent moisture meter readings above recommended endpoints, failed DIY attempts with lingering dampness, or health symptoms among occupants such as respiratory irritation. Structural cues warped floors, peeling paint, or efflorescence, indicate deeper moisture problems that require targeted diagnostics. Contaminated water events always require professional containment, sanitation, and documentation. When these signs appear, professional drying prevents secondary damage and supports insurance claims with measurable records. Recognizing these signs early reduces remediation scope and supports a safer, faster recovery process.

How Can You Request a Quote or Schedule Emergency Water Damage Drying?


When requesting a quote or emergency response, provide concise information: the location of the loss, the type and extent of water (standing vs. damp), time elapsed since the event, and any known contamination. Expect an initial triage phone conversation followed by a rapid on-site assessment for emergency extraction and a documented drying plan. Professionals will outline equipment needs, monitoring frequency, and estimated timelines; they will also supply records for insurance. For urgent events, state that immediate extraction and drying are required to limit secondary damage and ask about 24/7 availability and response windows. Preparing photos and a simple damage log speeds assessment and helps service providers deliver an accurate, timely proposal.

The Steam Team - Rapid Response and Local Restoration Support


For homeowners in Austin and Central Texas seeking emergency assistance, The Steam Team offers 24/7 emergency water damage restoration with IICRC-certified technicians and industrial drying equipment calibrated for local climate conditions. Their crews provide emergency water removal, advanced drying and dehumidification, moisture mapping with thermal imaging, and documented drying plans to support claims and reconstruction coordination. To request inspection or an emergency response, have basic details ready (type of water, affected areas, time elapsed); The Steam Team’s rapid-response process focuses on safety, containment, and measurable drying milestones to restore properties efficiently.

Frequently Asked Questions

What are the common causes of water damage in homes?


Common causes of water damage in homes include plumbing leaks, roof leaks, flooding from heavy rain, burst pipes, and appliance malfunctions, such as washing machines or water heaters. Additionally, poor drainage systems and foundation issues can lead to water accumulation. Homeowners should regularly inspect plumbing and roofing, maintain gutters, and ensure proper drainage to mitigate these risks. Understanding these causes can help in taking preventive measures and responding quickly when water damage occurs.

How long does the water damage drying process typically take?


The duration of the water damage drying process can vary significantly based on several factors, including the extent of the damage, the materials affected, and the drying methods used. Generally, drying can take anywhere from 3 to 7 days for minor incidents, while more severe cases may require up to two weeks or longer. Professional assessment and equipment can expedite the process, ensuring that moisture levels return to normal as quickly as possible to prevent mold growth and structural damage.

What should I do if I notice mold after water damage drying?


If you notice mold after water damage drying, it is crucial to address it immediately to prevent further health risks and property damage. First, ensure that the area is safe and that moisture levels are controlled. Then, contact a professional mold remediation service to assess the situation. They can determine the extent of the mold growth and recommend appropriate removal methods. It’s essential to document the mold presence for insurance purposes and to ensure that the underlying moisture issue is resolved to prevent recurrence.

Can I perform water damage drying myself, or should I hire professionals?


While some minor water damage situations can be managed by homeowners, it is often advisable to hire professionals for significant incidents. Professionals have the expertise, specialized equipment, and knowledge of safety protocols to effectively handle water extraction, drying, and mold prevention. If the damage involves contaminated water, structural concerns, or extensive areas, professional intervention is essential to ensure thorough and safe restoration. DIY efforts may lead to incomplete drying and increased risks of mold and structural damage.

What types of insurance cover water damage restoration?


Water damage restoration may be covered under various types of insurance policies, primarily homeowners' insurance. Coverage typically includes damage from sudden and accidental incidents, such as burst pipes or appliance failures. However, it often excludes damage from flooding, which usually requires separate flood insurance. It's essential to review your policy details and consult with your insurance agent to understand your coverage limits, deductibles, and any specific exclusions related to water damage restoration.

How can I prepare my home for potential water damage?


To prepare your home for potential water damage, start by regularly inspecting and maintaining plumbing, roofs, and gutters. Ensure that downspouts direct water away from the foundation and consider installing a sump pump in basements prone to flooding. Additionally, keep valuable items elevated and create an emergency plan that includes contact information for restoration services. Having a water damage response kit with essential tools and supplies can also help you act quickly in case of an emergency.

What are the long-term effects of water damage if not addressed promptly?


If water damage is not addressed promptly, it can lead to severe long-term effects, including structural damage, mold growth, and compromised indoor air quality. Prolonged moisture can weaken building materials, leading to costly repairs and safety hazards. Mold can cause health issues, particularly for individuals with respiratory conditions or allergies. Additionally, lingering moisture can result in persistent odors and damage to personal belongings. Timely intervention is crucial to mitigate these risks and ensure a safe living environment.

Conclusion


Effective water damage drying is essential for preventing mold growth and structural deterioration, ensuring a safe and healthy living environment. By understanding the best techniques and equipment, homeowners can make informed decisions that minimize damage and expedite recovery. Engaging professional services not only enhances drying efficiency but also provides peace of mind through documented processes and expert guidance. For immediate assistance, contact The Steam Team to explore tailored solutions for your water damage needs.

Essential Air Duct Cleaning: Your Key to Allergy Relief

Breathe Easy: Instant Allergy Relief

Indoor allergens accumulate where we least expect them: inside ductwork and HVAC systems that continuously recirculate air through living spaces. Dirty air ducts concentrate dust, pollen, pet dander, dust mite fragments, and mold spores; when the HVAC runs, these particles become airborne again and worsen symptoms for allergy and asthma sufferers. This article explains how contaminated ducts affect indoor air quality, reviews the NADCA-certified cleaning process that targets allergen sources, outlines timing and signs for scheduling cleaning, and compares costs and long-term value for Austin homes. After a concise explanation of why professional methods outperform DIY approaches, you’ll find practical checklists, equipment comparisons, and localized guidance for Austin’s pollen and humidity patterns to help you decide when to act. For readers seeking certified service, The Steam Team, a locally owned cleaning and restoration company employing NADCA-certified technicians for air duct cleaning, provides NADCA-standard procedures that can be scheduled for homes and businesses; request a quote to compare options after reviewing the technical guidance below.

How Do Dirty Air Ducts Affect Allergies and Indoor Air Quality?


Dirty air ducts act as reservoirs and distribution routes for allergens, meaning contaminants lodged in ductwork are repeatedly reintroduced into the breathing zone whenever the HVAC operates. The mechanism is straightforward: particles settle in supply and return vents, then get dislodged by airflow or fan cycles and travel into living spaces, increasing airborne allergen concentrations. This circulation elevates exposure for occupants, amplifying sneezing, congestion, itchy eyes, and asthma exacerbations, especially during high-pollen seasons or periods of elevated indoor humidity. Understanding this mechanism highlights why removing the source of the settled material inside ducts is more effective for allergy relief than filtration alone, and leads naturally into identifying the most common duct-borne allergens.

What Common Allergens Are Found in Air Ducts?


Air duct systems commonly harbor dust mites, pollen (including local Austin types such as tree and grass pollen), pet dander, and mold spores that enter from outdoor intake, occupant activity, or moisture events. Dust mites thrive in settled dust, and pet dander provides a persistent protein source that triggers immune responses in sensitized individuals. Pollen enters when doors, windows, or fresh-air intakes operate and can accumulate on surfaces inside ducts, where it remains airborne once disturbed. These allergen sources link directly to why HVAC source removal reduces indoor concentrations more effectively than filter-only strategies, setting up the need for NADCA-standard extraction and containment.

How Do Contaminated Ducts Worsen Allergy and Asthma Symptoms?


Contaminated ducts worsen symptoms by increasing the frequency and intensity of exposure: each HVAC cycle can re-aerosolize particles that contact the nasal mucosa and airways, provoking inflammatory responses in sensitive individuals. For people with allergic rhinitis or asthma, this repeated exposure can lead to more frequent attacks, reduced sleep quality, and increased medication use. Clinical guidance and indoor air studies note that source control reduces exposure pathways, which often translates to measurable symptom improvements when combined with other controls such as high-quality filtration and humidity management. Recognizing these health impacts makes it clear why a targeted cleaning protocol and complementary home measures are recommended for sustained relief.

Evaluating Residential Air Duct Cleaning and IAQ: A Field Study


A nine-home field study was conducted to investigate the impact of mechanical air duct cleaning (ADC) methods on indoor air quality (IAQ) and system performance. ADC services were provided by the National Air Duct Cleaners Association (NADCA). Only mechanical ADC methods were evaluated. Surface treatments, such as biocides or encapsulants, were not part of the study. Pre- and post-ADC measurements were used to evaluate impacts. These included deposited duct dust measurements, airborne particle and fiber concentrations, microbial bioaerosol and surface sampling, and system performance factors such as temperature, relative humidity air flow rates, and static pressure. Surface sampling in ducts indicated that mechanical ADC is effective in removing adhered dust and dirt. The particle measurement data could not offer a clear indication that indoor levels can be reduced using mechanical ADC because there was an apparent strong influence from outdoor particle mass concentrations. Mechanical ADC did not significantly reduce bioaerosol or microbial density in the houses studied. Measurements of system performance factors suggest that ADC may have a positive effect. Supply air rates increased between 4 and 32% in eight of the houses, and return air flow rates increased 14 and 38% in two of the houses. Evaluating residential air duct cleaning and IAQ: results of a field study conducted in nine single-family dwellings, 1997

What Is the NADCA Certified Air Duct Cleaning Process by The Steam Team?


NADCA-certified air duct cleaning follows standardized steps that focus on source removal, containment, filtration, and verification to minimize recontamination and maximize allergen extraction. Pre-inspection identifies contamination levels and moisture issues, source removal uses agitation and mechanical brushing, HEPA-rated vacuuming pulls debris into sealed collection systems, and optional sanitization addresses microbial concerns when appropriate. This sequence inspection, agitation, HEPA containment, and verification reduces airborne allergen loads and prevents redistribution of settled material, which is critical for allergy relief. Below is a comparison table that clarifies key equipment used during NADCA-standard cleaning and the allergy-specific benefits each provides.


Introductory table explaining professional equipment and why it matters:

Equipment

Primary Purpose

Allergy Benefit

HEPA vacuum system

Captures fine particles during source removal

Prevents reintroduction of dust, pollen, and dander into living spaces

Rotary brushes/agitation tools

Loosens settled debris from duct surfaces

Enables the extraction of embedded dust mite and pet dander reservoirs

Negative-pressure containment

Isolates dust during cleaning

Minimizes contamination of living areas and reduces cross-contamination

Source collection and filtration

Collects and filters the removed debris

Ensures captured allergens are contained and not exhausted back inside


This equipment-focused comparison shows that NADCA-aligned tools prioritize source removal and containment, which delivers superior allergen reduction compared with handheld vacuums or surface-only approaches.

Why Is NADCA Certification Important for Allergy Relief?


NADCA certification represents adherence to industry standards for HVAC system cleaning, providing consistent protocols, trained technicians, and equipment expectations that matter for allergen control. Certified procedures reduce the risk of incomplete cleaning or accidental damage to system components and emphasize HEPA containment and verification steps that make allergen removal measurable and reliable. For allergy sufferers, this consistency translates into a higher probability that the major sources of settled allergens are removed rather than simply disturbed and redistributed. Comparing certified versus non-certified approaches highlights why choosing an NADCA-standard process reduces the chance of persistent allergen exposure.

What Advanced Equipment and Techniques Are Used in Professional Cleaning?


Professional cleaning uses integrated systems: HEPA-rated vacuums create negative pressure, mechanical agitation tools dislodge deposits, and sealed duct-access methods prevent cross-contamination of living spaces during work. Agitation techniques vary by system type but commonly include rotary brushes, compressed-air skids, or pneumatic tools to pull embedded dust loose; HEPA containment systems then capture particles at source. Safety and standards emphasize that filtration media must meet HEPA specifications and that technicians document before-and-after conditions to confirm effectiveness. These techniques collectively address both the removal of allergen reservoirs and the prevention of their redistribution, which is essential for lasting symptom reduction.

What Are the Key Benefits of Air Duct Cleaning for Allergy and Asthma Sufferers?


Air duct cleaning delivers measurable benefits by reducing settled allergen reservoirs, preventing mold colonization in damp conditions, and improving overall HVAC function to support cleaner airflow. Removing dust and biological material at the source lowers short-term airborne particle spikes during HVAC operation and, when combined with filtration upgrades and humidity control, reduces long-term exposure pathways. Additional advantages include potential energy savings from restored airflow and reduced stress on HVAC components, which contribute to healthier indoor environments and lower maintenance needs. The table below quantifies common allergen types, how cleaning reduces them, and expected impacts on symptoms to make the benefits tangible for decision-making.


Introductory table linking allergens to outcomes:

Allergen Type

How Cleaning Reduces It

Expected Impact on Symptoms

Dust mite fragments

Physical removal from ducts and registers

Fewer nighttime nasal symptoms and lower indoor dust levels

Pet dander

Extraction of settled dander from duct surfaces

Reduced sneezing and ocular irritation for pet-sensitive occupants

Pollen (Austin varieties)

Removal of trapped pollen grains from the intake and ductwork

Decreased seasonal symptom spikes indoors during cedar/grass seasons

Mold spores

Cleaning plus moisture control reduces colonization risk

Lowered musty odors and reduced respiratory irritation in damp periods


This benefit table clarifies that professional source removal translates into lower indoor exposure and a realistic expectation of symptom improvement when paired with other measures.


Air duct cleaning reduces airborne allergens primarily by removing source material rather than merely filtering air that has already circulated. Source removal decreases the reservoir of particles that would otherwise be dislodged during HVAC cycles, while filtration and humidity control limit reintroduction and growth. Together, these controls form an integrated approach: remove, prevent, and filter. Understanding how these layers interact helps homeowners prioritize actions that extend the effectiveness of a professional cleaning, such as regular filter replacement and humidity management.

When Should You Schedule Air Duct Cleaning for Allergy Relief?


Scheduling depends on household risk factors: allergy sufferers, pet owners, recent renovations, or known moisture problems should consider more frequent cleaning than general recommendations. For homes with pets or occupants with reactive allergies, earlier scheduling following symptom spikes or visible dust in vents is prudent; otherwise, periodic cleaning combined with regular filter maintenance suffices. Seasonal patterns in Austin, including high tree and grass pollen periods and humid months that can encourage mold, should influence timing to maximize relief when exposure risk is highest.


Introductory checklist explaining indicators for action:

  • Visible dust or debris: When vents and registers show settled dust after normal cleaning.

  • Worsening indoor allergies: If symptoms spike indoors despite other controls.

  • Recent renovation or construction: When dust from remodeling likely entered the ductwork.

  • Musty or moldy odors: Suggests moisture-driven contamination requiring professional assessment.


These signs point to source-level contamination that cleaning addresses directly; homeowners should prioritize professional inspection when multiple indicators appear. Prompt scheduling during or before peak pollen seasons can reduce indoor exposure when occupants are most vulnerable, and complementary maintenance like high-MERV filters and humidity monitors prolongs the benefits. Considering local seasonality and household risk yields the best timing strategy for reliable allergy relief.

How Often Should Allergy Sufferers and Pet Owners Clean Their Air Ducts?


Frequency recommendations vary by risk: households with allergy sufferers or multiple pets should consider source-focused cleaning every 2–3 years, while low-risk residences may extend intervals with vigilant filter upkeep. More frequent cleaning is warranted after renovations, water intrusion, or when occupants notice escalating symptoms despite other measures. Pairing cleaning intervals with seasonal checks and filter replacement schedules (monthly or per manufacturer guidance) maximizes indoor air improvements. Establishing a maintenance rhythm based on household conditions and symptom tracking helps maintain long-term control of allergen exposure.

What Are the Signs That Your Air Ducts Need Cleaning?


Key signs include visible dust blowing from vents, persistent musty smells, increased dust accumulation on surfaces despite cleaning, and worsening indoor allergy symptoms that correlate with HVAC use. Observable debris around registers or discolored return grilles indicates settled material that can be mobilized by system operation. If occupants experience repeated symptom flares when the system cycles or after weather events, these are strong cues to request a professional inspection. Recognizing these indicators early allows for targeted cleaning and prevents prolonged exposure cycles.

Why Choose The Steam Team for Air Duct Cleaning in Austin?


The Steam Team is a locally owned cleaning and restoration company in Austin that emphasizes NADCA standards, uses NADCA-certified technicians for air duct work, and provides services to both residential and commercial customers. Choosing a provider that follows standardized, documented cleaning protocols matters for allergy outcomes because consistent techniques and HEPA containment reduce the likelihood of partial or ineffective cleanings. The Steam Team’s local focus supports knowledge of Austin-specific allergens and humidity patterns, which helps tailor timing and complementary recommendations for long-term indoor air quality. For readers ready to compare options, requesting a formal quote from a NADCA-aligned provider clarifies scope and expected outcomes.

How Does 42 Years of Local Experience Benefit You?


Local experience provides technicians with practical knowledge of Austin-specific issues like seasonal pollen influxes and humidity-driven mold risks, enabling more targeted inspections and preventive recommendations that help sustain allergy relief. Longstanding local operations also foster quicker response times and familiarity with common building types and HVAC setups in the region. This institutional knowledge can translate into more effective problem diagnosis, tailored maintenance plans, and realistic timelines for follow-up work or filter upgrades. Homeowners benefit when technicians combine standardized cleaning procedures with regional expertise to minimize the recurrence of duct contamination.

What Awards and Customer Satisfaction Ratings Support Our Service?


Local reputation and customer feedback are important signals when evaluating providers; readers should consult public reviews and business profiles to confirm service consistency and satisfaction claims. Transparent documentation, such as before-and-after inspection notes and photo records, helps validate that the scope of work addressed allergen sources thoroughly. While individual ratings vary, selecting a provider that offers NADCA-standard reports and clear verification steps reduces uncertainty and supports informed decision-making. These verification practices give homeowners confidence that cleaning efforts will translate into measurable indoor-air benefits.

Which Areas in Austin and Central Texas Do We Serve?


A local provider's service area affects response time and familiarity with neighborhood-specific conditions, which is especially relevant for timely cleanings during high-allergen periods. The Steam Team serves Austin and Central Texas locations, enabling technicians to apply localized strategies for pollen seasons and humidity events that influence mold risk. Local coverage also facilitates coordinated follow-up work, such as HVAC assessments or dryer vent cleaning, when technicians identify related issues during inspections. Efficient local service supports a practical maintenance schedule that aligns with seasonal allergen cycles.

What Are the Typical Costs and Value of Air Duct Cleaning in Austin?


Air duct cleaning costs depend on home size, number of vents/registers, contamination level (e.g., heavy dust, mold evidence), system accessibility, and whether additional services like sanitization or repairs are needed. Pricing also reflects technician qualifications and the use of NADCA-standard equipment and HEPA containment; investing in certified procedures often yields better long-term value for allergy sufferers. Below is a practical cost-context table that compares typical home sizes, vent counts, and approximate price ranges to help Austin homeowners set expectations before requesting a formal quote.


Introductory cost-comparison table for the Austin context:

Home Size

Typical # of Vents

Typical Price Range

Small (1,000 sq ft)

6–10 vents

$300–$450

Medium (1,500–2,500 sq ft)

10–18 vents

$450–$700

Large (2,500+ sq ft)

18+ vents

$700+

Additional services (mold remediation/sanitization)

As-needed

Varies by scope


Summary paragraph after cost table:


These examples illustrate core drivers of cost rather than fixed quotes; the precise price depends on contamination severity, system complexity, and any remediation needs identified during inspection. For allergy-focused value, consider the combination of source removal plus follow-up measures, upgraded filtration, humidity control, and professional verification, which often reduces ongoing medical and cleaning expenses. Requesting an on-site assessment helps translate these typical ranges into an actionable plan tailored to your home and symptoms.

What Factors Influence Air Duct Cleaning Prices?


Primary cost drivers include the number of vents/registers to service, the length and complexity of duct runs, evidence of mold or heavy contamination that requires remediation, and accessibility of the air handler and duct openings. Commercial systems and specialty HVAC setups may require additional labor and equipment, while post-renovation cleanings often incur higher costs due to increased debris. Preparing for an accurate quote by noting system type, recent water events, and symptom history enables technicians to scope work appropriately. Clear pre-inspection communication reduces surprises and helps homeowners weigh cost versus expected allergen reduction outcomes.

How Does Professional Cleaning Provide Long-Term Value for Allergy Relief?


Professional cleaning yields long-term value by removing allergen reservoirs that would otherwise persist and periodically re-aerosolize, reducing the need for repeated ad hoc cleaning and lowering cumulative exposure over time. Improved HVAC airflow can also enhance energy efficiency and extend equipment life, indirectly offsetting cleaning costs. When combined with upgraded filtration, routine maintenance, and moisture control, a NADCA-standard cleaning becomes part of a sustained indoor-air strategy that reduces symptomatic episodes and associated costs. For homeowners prioritizing allergy relief, investing in certified cleaning plus follow-up controls offers a defensible return in health and home system resilience.


Air duct cleaning focused on source removal, performed to NADCA standards and combined with filtration and humidity control, provides a practical path to reducing indoor allergen exposure for Austin residents. If you or household members experience persistent indoor allergy symptoms, consider a NADCA-standard inspection and cleaning; The Steam Team offers certified technicians and localized expertise to assess and execute these procedures. Request a quote to compare scopes and determine the best timing relative to Austin’s seasonal pollen and humidity cycles.

Frequently Asked Questions

What are the health benefits of clean air ducts beyond allergy relief?


Clean air ducts not only alleviate allergy symptoms but also contribute to overall health by reducing the risk of respiratory infections and improving sleep quality. By minimizing airborne contaminants, clean ducts help create a healthier indoor environment, which is especially beneficial for children, the elderly, and individuals with compromised immune systems. Additionally, cleaner air can enhance cognitive function and productivity, making it essential for both home and workplace settings. Regular maintenance of air ducts can thus lead to a more comfortable and healthier living space.

Can air duct cleaning help with odors in the home?


Yes, air duct cleaning can significantly reduce unpleasant odors in your home. Odors can accumulate in ductwork from various sources, including pet dander, mold, and dust. When the HVAC system operates, these odors can be circulated throughout the living space. By removing the source of these smells through professional cleaning, you can improve indoor air quality and create a fresher environment. Additionally, combining duct cleaning with other measures, such as using air purifiers and maintaining humidity levels, can further enhance odor control.

How does humidity affect air duct cleanliness and indoor air quality?


Humidity plays a crucial role in air duct cleanliness and overall indoor air quality. High humidity levels can promote mold growth and dust mite proliferation within duct systems, leading to increased allergen levels. Conversely, low humidity can cause dust to become airborne more easily, exacerbating allergy symptoms. Maintaining optimal humidity levels (ideally between 30-50%) through dehumidifiers or humidifiers can help mitigate these issues. Regular air duct cleaning, combined with humidity control, ensures a healthier indoor environment and reduces the risk of mold and allergens.

What should I do if I suspect mold in my air ducts?


If you suspect mold in your air ducts, it is essential to act quickly. First, avoid using the HVAC system to prevent spreading mold spores throughout your home. Next, contact a professional air duct cleaning service that specializes in mold remediation. They can conduct a thorough inspection and determine the extent of the contamination. If mold is confirmed, they will follow NADCA-certified procedures to safely remove it and address any underlying moisture issues to prevent future growth. Prompt action is crucial for health and safety.

Are there any DIY methods for maintaining clean air ducts?


While professional cleaning is recommended for thorough duct maintenance, there are several DIY methods to help keep your air ducts cleaner between professional cleanings. Regularly replace or clean HVAC filters, as this prevents dust and allergens from circulating. Additionally, vacuum vents and registers to remove visible dust and debris. Keeping the surrounding areas clean and minimizing clutter can also help reduce the amount of dust that enters the duct system. However, for deep cleaning and allergen removal, professional services are still necessary.

How can I choose the right air duct cleaning service?


Choosing the right air duct cleaning service involves several key considerations. Look for companies that are NADCA-certified, as this ensures they adhere to industry standards for cleaning. Check customer reviews and ratings to gauge their reputation and service quality. Inquire about their cleaning methods, equipment used, and whether they provide a detailed inspection before cleaning. Additionally, ask for a written estimate and ensure they offer a satisfaction guarantee. A reputable service will be transparent about its processes and committed to improving your indoor air quality.

Conclusion


Air duct cleaning significantly enhances indoor air quality by removing allergen reservoirs, which can lead to improved health outcomes for allergy and asthma sufferers. By choosing a NADCA-certified service like The Steam Team, you ensure that the cleaning process adheres to industry standards, maximizing the effectiveness of allergen removal. Regular maintenance and timely cleaning can help sustain these benefits, providing a healthier living environment. Take the first step towards cleaner air by requesting a quote today.

Emergency Tips for Commercial Water Damage Events

Essential Water Damage Tips for Austin

Commercial water damage events can range from a burst pipe in a restaurant kitchen to floodwater in a warehouse, and each scenario creates immediate structural, operational, and health risks that demand fast, organized action. This article explains what constitutes a commercial water damage emergency, why rapid mitigation matters for business continuity, and how targeted steps, both immediate and professional, minimize repair costs and reduce downtime. You will learn clear, prioritized actions to protect people and property; how professional commercial water extraction and structural drying work; safety protocols for staff and customers; documentation and insurance guidance specific to Texas commercial claims; preventative maintenance strategies; and decision rules for when to contact emergency restorers. The guidance uses practical checklists, equipment comparisons, and documentation templates so facility managers and business owners can act decisively. Throughout, semantic insights link common restoration terms like structural drying, moisture mapping, and industrial dehumidification to actionable choices for offices, restaurants, hotels, warehouses, and retail spaces, helping you apply these recommendations to your Austin property immediately.

What Are the Immediate Steps to Take During a Commercial Water Damage Emergency?


Immediate actions in a commercial water damage event focus on protecting life, stabilizing the property, and preserving evidence for insurance and restoration planning. The first priority is safety: assess occupant risk, shut down utilities if safe to do so, and establish exclusion zones to prevent injury. Simultaneously, begin documenting the incident with timestamped photos and notes to create a clear record for adjusters and contractors. Quick mitigation water extraction, containment, and removal of salvageable contents reduces the time moisture remains in assemblies and limits secondary damage like mold growth and delamination. These steps set the stage for professional assessment and structural drying, which determine the scope and timeline of full restoration.

  1. Ensure occupant safety: Evacuate affected zones and account for staff and customers.

  2. Isolate utilities: Shut off water sources and electricity only if trained personnel or facilities staff can do so safely.

  3. Document the incident: Photograph all areas, equipment, and contents with timestamps and short descriptions.

  4. Stabilize and contain: Use sandbags, temporary barriers, and tarps to limit water spread and protect undamaged zones.


These immediate actions protect people first while preserving physical and evidentiary conditions that professionals will use during mitigation and claims processing. The next subsection explains how to locate and operate shutoffs and when to hand control to licensed technicians.

How Do You Safely Shut Off Water and Electricity in a Commercial Building?


Knowing the location and operation method of main shutoffs and electrical disconnects is essential to stop active leaks and prevent electrical hazards during a commercial water event. Begin by consulting facility plans or posted utility maps to locate the main water valve, curb stop, and service disconnect; if those are inaccessible, contact building maintenance or your utility provider. For electricity, turn off branch circuits feeding wet zones and, when safe, use the main disconnect; however, if circuitry is submerged or sparking, evacuate and wait for licensed electricians. Always wear PPE if entering wet electrical rooms, and tag circuits with a lockout/notification system so others do not re-energize equipment during mitigation. Training facility staff on shutoff points and having clearly labeled access points reduces delay and risk, and that preparation naturally leads to methods for documenting damage for restoration and insurance purposes.

What Documentation Should You Collect Before Restoration Begins?


Collecting thorough documentation before major disturbance ensures restoration work is accurately scoped and supports timely insurance adjustments; focus on photos, inventories, and official logs. Take wide-angle and close-up photos of affected areas, note water levels and timestamps, and capture images of serial numbers, pre-loss condition if available, and any safety hazards. Prepare an inventory of damaged contents with estimated values and provenance where possible, log any immediate mitigation steps you perform, and retain receipts for emergency supplies or temporary repairs. Organize files using consistent naming conventions (date_location_photo#) and create both cloud and local backups to prevent data loss. Proper documentation streamlines adjuster reviews and expedites approvals, and it connects directly to professional mitigation plans that follow the initial assessment.

How Does Professional Commercial Water Extraction and Structural Drying Work?


Professional commercial water extraction and structural drying follow a standards-based workflow: assessment and moisture mapping, targeted extraction, controlled drying with monitoring, and final verification. Technicians perform moisture mapping using surface and penetrating meters and infrared imaging to identify wet materials and hidden pockets of moisture; this diagnostic step determines extraction priorities and placement of drying equipment. Extraction uses industrial pumps and truck-mounted units to remove standing water quickly, after which air movers and dehumidifiers create controlled airflow and lower relative humidity to drive evaporation from wet assemblies. Continuous monitoring with moisture meters and documentation of drying progress ensures that drying goals measured as moisture content percentages or equilibrium relative humidity are met before reconstruction begins.


Different commercial property types require tailored approaches: warehouses need high-capacity truck-mounted extractors and desiccant dehumidifiers for large volumes, while offices and retail spaces often benefit from modular refrigerant dehumidifiers and distributed air movers to protect finishes and contents. Controlled drying interrupts microbial growth by keeping materials below mold-threshold moisture levels, which reduces remediation scope and long-term liability.


The global impact of water damage highlights the importance of proactive mitigation and professional restoration, as detailed in a comprehensive review of UK properties.


UK Water Damage Risks and Restoration for Commercial Properties


The UK has experienced significant levels of water damage in recent years, posing significant risks to both residential and commercial properties. Property owners can employ various methods to identify potential leaks within their properties and to mitigate the impact of water damage. Early detection and prompt remediation are crucial for minimizing structural damage, preventing mold growth, and reducing overall repair costs. Professional water damage restoration services offer specialized equipment and expertise to effectively address these issues, ensuring properties are returned to their pre-loss condition.


Water damage restoration, structural drying and remediation of damp issues in UK properties: A comprehensive review, 2024


Equipment

Characteristic

Typical Application

Truck-Mounted Extractor

High-flow pumping and vacuum capacity

Rapid removal of standing water from large open spaces and slab drains

Portable Submersible Pump

Submersible design for immediate water removal

Localized flooding in basements, pits, or equipment rooms

Air Mover

High-velocity directed airflow

Accelerates evaporation from floors, carpets, and wall assemblies

Refrigerant Dehumidifier

Condensation-based moisture removal

Moderate humidity control for offices and retail spaces

Desiccant Dehumidifier

Low-relative-humidity control at low temps

Warehouses, cold-storage areas, and fast drying under airflow constraints


This equipment comparison clarifies how meronyms like air movers and industrial dehumidifiers function within the broader water damage restoration hypernym of "property restoration services." Understanding equipment roles makes it possible to evaluate contractor plans; the next subsection explains how drying prevents mold and secondary damage.


In Austin and Central Texas, time-to-dry depends on temperature, humidity, and construction materials; planning should consider seasonal humidity spikes and long-term moisture migration.

What Advanced Equipment Is Used for Commercial Water Removal in Austin?


Commercial water removal relies on several classes of industrial equipment designed to match the scale and materials of the property involved. High-capacity truck-mounted extractors provide large-volume water removal and powerful vacuuming, making them suited for warehouses and large retail footprints, while portable submersible pumps address deeper, localized flooding in mechanical rooms. Air movers create focused airflow across wet surfaces to accelerate evaporation, and moisture meters, both contact and penetrating, provide quantitative data that guide drying placement. Dehumidifiers differ by technology: refrigerant units remove moisture efficiently at moderate temperatures, while desiccant systems perform better at lower temperatures or when achieving very low relative humidity is required. A clear plan aligns equipment selection to the property's construction and business continuity needs.

  1. Truck-mounted extractors: Rapid removal for high-volume flooding.

  2. Portable pumps: Targeted extraction in confined or deep areas.

  3. Air movers and dehumidifiers: Coordinated airflow and humidity control to meet drying goals.


This equipment-focused overview informs decisions about scope and cost; the following subsection covers how structural drying stops mold growth and prevents further material failure.

How Does Structural Drying Prevent Mold and Secondary Damage?


Structural drying prevents mold and secondary damage by reducing moisture levels below biological and structural thresholds, halting microbial colonization, and limiting material breakdown. Mold spores require elevated moisture in porous materials to germinate; by maintaining relative humidity and reducing moisture content in wood, drywall, and insulation, drying interrupts that lifecycle and reduces the need for invasive mold remediation. Controlled drying also prevents delamination, corrosion, and swelling in laminates, metal components, and finishes, preserving asset value and shortening reconstruction timelines. Monitoring documents when assemblies reach equilibrium moisture content and supports clearance decisions, which protects occupant health and ensures restoration meets insurance and code expectations. Proper drying creates measurable outcomes that make subsequent reconstruction predictable and cost-effective.

What Safety Protocols Should Businesses Follow During Water Damage Events?


Safety protocols protect employees, customers, and restoration personnel from electrical hazards, contamination, and structural risks and should be part of every facility's emergency operations plan. On arrival to a flood or major leak, trained staff should assess for obvious electrical dangers sparking panels, hydrostatic pressure on electrical rooms, or appliances partially submerged, and isolate power only if safe. Contaminated water categories require different responses: clean water from supply lines poses different health risks than sewage or chemical-laden floodwaters, which necessitate PPE, restricted access, and hazardous-waste handling procedures. Establishing exclusion zones with clear signage and a re-entry clearance process reduces liability and ensures the safety of returning staff and customers. These safety measures align with standard disaster recovery protocols used by professional restorers and emergency responders.

  • Electrical hazard indicators: Sparks, buzzing, tripped breakers, or water near panels require immediate professional attention.

  • Contamination signs: Foul odors, visible sewage, or industrial chemicals indicate category 2/3 water and need specialized handling.

  • PPE recommendations: Gloves, boots, eye protection, and respirators for contaminated zones; training is essential.


Implementing these protocols prepares a facility for the professional mitigation phase and reduces risk during mitigation operations; the next subsection details how to identify hazards quickly.

How to Identify Electrical and Contamination Hazards in Flooded Commercial Properties?


Identifying hazards begins with visual and sensory checks performed from a safe distance; look for water contacting electrical panels, visible sparks, exposed wiring, and chemical odors that indicate hazardous materials. Electrical danger signs include frequent breaker trips, scorch marks, or arcing sounds; if any of these are present, evacuate immediately and notify licensed electricians rather than attempting shutoffs. Contaminated water is often discolored, odorous, or accompanied by debris; assume category 2/3 contamination for unknown flood sources and restrict access until trained restorers and environmental technicians evaluate the site. Document hazards with photographs and short notes for responders and insurers, and communicate clear "do not enter" instructions to staff. Recognizing these hazards quickly protects people and informs the PPE and disposal requirements for remediation teams.

What Are the Best Practices for Ensuring Employee and Customer Safety?

  • Establish exclusion zones using barriers and signage, and assign staff to communications roles to notify employees, customers, and emergency contacts about closures or restricted areas.

  • Maintain access logs of who enters affected zones, require PPE for authorized personnel, and coordinate with restoration teams to receive clearance criteria. such as moisture readings and air-quality test results before re-opening.

  • Prepare re-entry checklists that include mechanical system verification, electrical inspection sign-offs, and documented mitigation completion to ensure the environment is safe for normal operations.


Clear communication and documented verification reduce liability and speed safe reopening.

How Can Austin Businesses Navigate Commercial Water Damage Insurance Claims?


Navigating Texas commercial water damage claims requires methodical documentation, timely communication with carriers, and an understanding of how mitigation actions affect coverage and adjuster decisions. Start by notifying your insurer promptly and maintain an incident log with dates, times, actions taken, and all vendor communications. Provide organized photo and video evidence, inventories of damaged contents with estimated values, and mitigation logs including equipment usage and drying progress; these items create transparency and support reimbursement for emergency services and repairs. Keep copies of contractor estimates, invoices, and permit documentation if reconstruction is necessary, and follow insurer instructions for claims submission to avoid delays. Well-organized documentation and proactive communication materially shorten claim cycle times and reduce disputes.

Document Type

Why It's Needed

How to Prepare

Damage Photos & Video

Visual proof of loss condition and extent

Timestamped, wide, and close shots; organize by area

Inventory of Contents

Establishes value and priority for content restoration

Itemized list, serial numbers, and purchase receipts if available

Mitigation Logs

Shows steps taken to reduce loss and limit further damage

Daily equipment logs, moisture readings, technician notes

Vendor Estimates & Invoices

Supports repair and replacement costs claimed

Detailed line items and scope descriptions

Utility & Incident Reports

Corroborates cause and operations impact

Provide facility incident logs, utility shutdown records


Documenting these items in a consistent file structure reduces back-and-forth with adjusters and supports faster approvals. Next, understand how preferred vendors can further simplify interactions with insurance carriers.

What Documentation Is Required for Texas Commercial Water Damage Claims?


For Texas commercial claims, adjusters commonly require visual evidence, inventories, mitigation documentation, and contractor scopes to evaluate loss and authorize payments. Capture photos and videos immediately with timestamps and maintain an itemized contents inventory including estimated values, descriptions, and serial numbers where possible. Keep mitigation logs that record equipment used (pump hours, dehumidifier runtimes), drying goals, and moisture readings, and save vendor estimates and receipts as separate labeled files. Organize files by date and location, and provide a concise incident summary to the adjuster to reduce ambiguity. Consistent, well-labeled documentation speeds adjuster reviews and provides a defensible record in case of disputes.

How Does Working with Preferred Vendors Simplify the Insurance Process?


Working with preferred vendors often streamlines approvals because insurers recognize their documentation standards and operational procedures, enabling faster scopes and more predictable billing workflows. Preferred vendors typically provide standardized mitigation logs, moisture documentation, and restoration scopes that align with carrier expectations, reducing the need for repeated clarifications. This relationship can enable direct communication channels between the vendor and adjuster, which accelerates authorization for necessary work and helps coordinate contents restoration or temporary repairs. For businesses seeking practical assistance, a trusted local restoration partner with preferred-vendor relationships can reduce administrative friction and support efficient claim resolution.


If you need assistance compiling documentation or initiating an emergency claim workflow, The Steam Team provides 24/7 emergency response and works with major carriers as a preferred vendor to support documentation and mitigation efforts. Contact The Steam Team by phone at 512-451-8326 for emergency assistance or to request a quote; their technicians can assist with mitigation documentation and insurance coordination while you focus on operations.

What Preventive Measures Can Commercial Properties Take to Avoid Water Damage?


Preventative maintenance reduces the probability and impact of water events through scheduled inspections, investment in detection systems, and targeted risk mitigation for high-vulnerability systems. Regular roof inspections, seasonal gutter and drainage maintenance, and routine plumbing checks reduce the chance of catastrophic leaks. Installing leak detection and automatic shutoff systems in mechanical rooms, kitchens, and under critical equipment provides early alerts and can stop water flow before flooding occurs. HVAC and drainage maintenance prevent overflows and backup events, and facility managers should prioritize inspections before monsoon season or heavy rain periods common in Central Texas.

  • Roof maintenance: Inspect flashing, membranes, and drains quarterly and after major storms.

  • Plumbing routines: Schedule inspections for pressure zones, backflow devices, and grease traps in food-service operations.

  • Leak detection: Place sensors near water heaters, main supply lines, and under equipment with automatic shutoff capability.


These preventive actions form a layered defense that reduces downtime and lowers long-term repair costs. The next subsection compares detection systems and inspection schedules to help prioritize investments.


Understanding the economic implications of flood damage and the cost-effectiveness of mitigation strategies is crucial for businesses, especially in flood-prone regions.

Economic Analysis of Flood-Proofing Commercial Buildings


Floods are among the costliest natural disasters worldwide. Integrated flood risk management approaches involving both public and private measures have been proposed to cope with trends in flood risk. These approaches are hampered by a lack of information about the cost-effectiveness of private flood damage mitigation measures. This study examines the economic desirability of flood-proofing different types of commercial buildings in Umbria, which is a flood-prone region in Europe. A cost–benefit analysis (CBA) is applied, which uses empirical information on flood damages to a variety of commercial activities. The CBA accounts for a diversity of uncertainties, including those of flood damage statistics and related flood-proofing benefits derived from bootstrap methods. Results show that, on average, dry flood-proofing is economically attractive for certain categories of commercial buildings. The flood probability and uncertainty of damage are key factors driving CBA results. Implications of our findings for policymakers and insurers are discussed.


Economic assessment of mitigating damage of flood events: Cost–benefit analysis of flood-proofing commercial buildings in Umbria, Italy, WJW Botzen, 2017


Preventive Action

Frequency

Risk Reduction

Roof Maintenance

Quarterly and post-storm

High - reduces the chance of roof leaks and interior flooding

Plumbing Inspections

Semi-annual

Medium - identifies early failures and prevents burst pipes

Leak Detection Systems

Continuous monitoring

High - early alerts limit volume and duration of water exposure

HVAC & Drain Cleaning

Seasonal (pre-summer/pre-monsoon)

Medium - prevents condensate and overflow failures

Automatic Shutoff Valves

As-installed testing quarterly

High - stops active leaks and minimizes spread


Comparing these preventive measures helps prioritize budget and risk mitigation for different commercial property types. Effective prevention reduces reliance on emergency response and supports uninterrupted operations.

How Do Leak Detection and Regular Inspections Reduce Flood Risks?


Leak detection systems and regular inspections work together: sensors provide continuous monitoring and immediate alerts, while inspections verify system integrity and catch issues sensors might not detect. Sensor systems placed near mechanical equipment, under sinks, and around water-using appliances detect early leaks and can trigger automatic shut-offs or alerts to on-call staff, reducing the volume of water released. Regular inspections by maintenance staff identify wear, corrosion, and early signs of failure in plumbing and roof systems before leaks escalate. Combining both approaches delivers the best return on investment by preventing large losses and minimizing business interruption.

What Role Does Roof and Plumbing Maintenance Play in Water Damage Prevention?


Roof and plumbing maintenance address the most common commercial water intrusion pathways and should be scheduled based on seasonal risk and building use. Roof inspections focus on membrane integrity, flashing, and drain functionality to prevent ponding water and infiltration during heavy rains; addressing issues early prevents interior damage. Plumbing maintenance identifies pressure anomalies, worn seals, and compromised joints that can lead to sudden bursts; proactively replacing at-risk components avoids emergency replacements. Seasonal preparedness, particularly in a climate with summer storms, ensures systems are resilient and reduces the probability of urgent mitigation needs.

When Should Austin Businesses Contact Emergency Commercial Water Damage Restoration Services?


Contact professional emergency restoration services immediately when standing water is present, structural elements are compromised, there's evidence of contaminated water, or business operations face significant interruption; these thresholds determine when DIY measures are insufficient. Standing water that cannot be removed quickly with in-house equipment, visible structural movement or sagging, sewage or chemical contamination, and situations where downtime threatens revenue are all triggers for emergency vendor engagement. Rapid professional response limits secondary damage such as mold growth, corrosion, or delamination, and provides documented mitigation that supports insurance claims. Knowing these decision rules enables facility managers to balance immediate action with timely professional intervention.

  1. Immediate contact: Standing water, sewage contamination, structural instability, or critical area flooding.

  2. Within hours: Moderate leaks affecting multiple rooms or HVAC/mechanical systems.

  3. Scheduled: Minor leaks contained to a single area with no contamination and minimal operational impact.


Understanding response thresholds helps preserve assets and supports continuity planning; the following subsections explain response timing expectations and why certifications matter.

How Quickly Can The Steam Team Respond to Commercial Water Emergencies?


The Steam Team provides 24/7 emergency services across Austin and Central Texas, deploying technicians to triage commercial water emergencies and begin mitigation promptly upon notification. Typical on-site arrival and assessment windows vary by location and event scale, but emergency response focuses on rapid extraction, containment, and stabilization to limit secondary damage while preparing documentation for insurance. On arrival, crews perform a prioritized assessment, begin water removal with appropriate extractors, place drying equipment, and document moisture readings and mitigation actions. For immediate assistance and rapid mobilization, contact The Steam Team at 512-451-8326 to request emergency service or a prompt quote; their local teams specialize in commercial water extraction, drying, and contents protection to restore operations quickly.

What Are the Benefits of Choosing Certified Professionals for Water Damage Cleanup?


Choosing certified professionals ensures standards-based drying, safe handling of contaminated materials, and thorough documentation that supports insurance claims and reconstruction planning. Certifications indicate adherence to industry protocols such as systematic moisture mapping, monitored drying endpoints, and correct disposal of contaminated materials, which reduce the risk of recurring problems. Certified teams provide measurable outcomes through moisture metrics and documented mitigation logs that support adjuster approvals and minimize long-term liability. Ultimately, professional restorers protect occupants, preserve more of your assets through proper techniques, and create a defensible record for insurers and stakeholders.

Frequently Asked Questions

What are the long-term effects of water damage on commercial properties?


Long-term effects of water damage can be severe, leading to structural issues, mold growth, and deterioration of building materials. Prolonged exposure to moisture can weaken foundations, walls, and ceilings, resulting in costly repairs. Additionally, mold can pose health risks to occupants, leading to potential liability issues for business owners. It is crucial to address water damage promptly to mitigate these risks and ensure the safety and longevity of the property.

How can businesses prepare for potential water damage emergencies?


Businesses can prepare for potential water damage emergencies by implementing a comprehensive emergency response plan. This includes regular inspections of plumbing and roofing systems, installing leak detection devices, and training staff on emergency procedures. Additionally, maintaining an updated inventory of critical equipment and establishing relationships with local restoration services can expedite response times. Proactive measures can significantly reduce the impact of water damage and ensure business continuity.

What types of insurance coverage are available for water damage?


Insurance coverage for water damage typically falls under property insurance policies, which may include coverage for sudden and accidental water damage, such as burst pipes. However, coverage for flood damage often requires a separate flood insurance policy. It's essential for business owners to review their policies carefully, understand exclusions, and consider additional coverage options to protect against various water damage scenarios, including natural disasters and plumbing failures.

What role does employee training play in water damage response?


Employee training is vital in water damage response as it equips staff with the knowledge to act quickly and effectively during emergencies. Training should cover safety protocols, emergency shutoff procedures, and documentation practices. Well-trained employees can help minimize damage by initiating immediate response actions, ensuring safety, and preserving evidence for insurance claims. Regular drills and updates on procedures can enhance preparedness and reduce response times during actual events.

How can businesses assess the effectiveness of their water damage prevention measures?


Businesses can assess the effectiveness of their water damage prevention measures through regular audits and inspections of their facilities. This includes reviewing maintenance logs, evaluating the performance of leak detection systems, and analyzing incident reports for any recurring issues. Additionally, soliciting feedback from employees about potential vulnerabilities can provide insights. By continuously monitoring and adjusting prevention strategies, businesses can enhance their resilience against water damage.

What should businesses do if they suspect hidden water damage?


If businesses suspect hidden water damage, they should conduct a thorough inspection using moisture meters and infrared cameras to identify affected areas. It’s advisable to consult with professional restoration services for a comprehensive assessment. Prompt action is crucial to prevent further damage and mold growth. If hidden damage is confirmed, initiating a mitigation plan with certified professionals can help restore the property and ensure safety for occupants.

Conclusion


Addressing commercial water damage effectively is crucial for maintaining business continuity and protecting assets. By implementing immediate safety measures, thorough documentation, and professional restoration services, businesses can minimize downtime and repair costs. Understanding preventative strategies further enhances resilience against future incidents. For expert assistance in navigating water damage challenges, contact The Steam Team today.

Eliminate Pet Odors: Discover the Best Pet Odor Eliminators

Effective Pet Odor Solutions in Austin


Persistent pet odors signal that organic residues urine, dander, oils, and bacteria, have embedded into fabrics, padding, or structural materials, and removing those smells requires targeted science, not masking. This article explains what causes deeply set pet odors, how enzymatic and professional restoration methods eliminate odor at the molecular level, and which surface-specific approaches are most effective for carpets, upholstery, hardwood, and subfloors. You will learn inspection techniques such as blacklight detection, the step-by-step professional workflow used to locate and neutralize uric acid crystals, and practical prevention strategies tailored to Austin’s climate and common flooring choices. Throughout the guide, we highlight when DIY methods work, when they fail, and how professional intervention prevents recurrence, culminating in clear guidance on scheduling services locally in Austin, TX. If you’re researching pet odor removal services in Austin, Texas, or wondering about guaranteed outcomes and certified technicians, this guide maps the decisions you should make and the questions to ask before booking treatment.

What Causes Persistent Pet Odors and How Do They Embed in Your Home?


Persistent pet odors are the result of organic compounds and microbes binding with materials in your home, creating long-lasting volatile compounds that standard cleaning often only masks. Uric acid crystals, ammonia, skin oils, and bacterial VOCs penetrate fibers, padding, and even porous subfloor materials; once they crystallize or integrate with the substrate, surface cleaning alone is ineffective. The chemical and biological interaction between urine salts and bacteria both creates new odorous molecules and protects residues from being dissolved by water-based detergents, which explains why smells return after DIY cleaning. Understanding how odors embed clarifies why detection and enzymatic breakdown are the first steps toward lasting remediation and introduces the next section on surface-specific detection cues and odor types.

Which Common Pet Odors Affect Carpets, Upholstery, and Subfloors?


Different surfaces trap and hold odors in distinct ways, so accurate identification guides treatment choice and outcome expectations. Carpets and padding absorb liquid and trap uric acid crystals in the fiber base and cushioning; upholstery similarly soaks into cushions and backing layers, while hardwood and tile typically hold surface residues unless the urine penetrates joint lines or gaps into subfloor materials. Signs that odors are deep-set include odor persistence after cleaning, multiple repeat accidents in the same zone, and visible or UV-detected staining; blacklight inspection often reveals latent urine deposits that smell tests miss. Detecting the true penetration depth informs whether enzymatic cleaning, hot water extraction, padding replacement, or subfloor remediation is required, which prepares homeowners for potential structural steps discussed next.

How Do Pet Urine, Dander, and Bacteria Contribute to Lingering Smells?


Pet urine introduces uric acid and ammonia salts that, when left to dry, crystallize and become resistant to water-based removal; bacteria feed on organic residues and produce volatile organic compounds (VOCs) that the human nose detects as stale or sour odors. Dander and skin oils add an ongoing layer of organic material that supports bacterial growth and binds to textiles, increasing odor load even between accidents. Moisture common in humid climates reactivates uric crystals and enhances bacterial metabolism, making odors resurface after cleaning if substrates remain contaminated. Recognizing these mechanisms explains why enzymatic breakdown and careful extraction are necessary to remove the substrate that fuels recurrent smells, which leads to how professionals approach the problem.

How Do Professional Pet Odor Removal Services Work to Eliminate Odors?


Professional pet odor removal targets the source with a predictable, documented workflow: identify contamination, apply enzymatic breakdown agents, extract residues and moisture, then deodorize or seal substrates when needed to prevent recurrence. Inspection and detection (including blacklight and olfactory mapping) determine contamination extent, guiding technicians to either surface restoration or structural remediation of padding and subfloor. Enzymatic and microbiological cleaners break down uric acid and organic matter, while hot water extraction and industrial drying equipment remove dissolved residues and prevent bacterial rebound. This stepwise approach reduces the likelihood of masked, returning odors and prepares the property for any further sealing or restorative work required, as detailed in the company-specific process below and in the EAV table that follows.


Professionals typically follow a concise 5-step process that is both diagnostic and corrective:

  1. Inspection and Detection: Locate contamination using blacklight and moisture meters.

  2. Pre-treatment: Apply enzymatic cleaners and dwell to break down uric acid.

  3. Extraction: Use hot water extraction and industrial vacuums to remove residues.

  4. Drying and Dehumidification: Deploy air movers and dehumidifiers to prevent bacterial regrowth.

  5. Deodorize/Seal: Apply neutralizers or encapsulators if structural sealing is necessary.


This numbered sequence clarifies each stage’s goal and timing and leads directly into a practical EAV breakdown of inspection and tools.


Professionals use specialized tools and protocols to ensure each step delivers measurable outcomes:

Process Phase

Tools Used

Expected Outcome

Inspection

Blacklight, moisture meter, olfactory mapping

Accurate contamination map to target treatment

Enzymatic Treatment

Professional-grade enzymatic solutions, controlled dwell time

Breakdown of uric acid crystals and organic residues

Extraction & Drying

Hot water extractors, commercial vacuums, air movers

Removal of dissolved residues and controlled drying

Deodorize/Seal

Odor neutralizers, encapsulators/sealers

Long-term odor suppression and substrate protection


This process table shows how each phase advances remediation from detection to durable results, and it connects directly to why certified training matters for technicians.

What Are the Key Steps in The Steam Team’s Pet Odor Treatment Process?


The Steam Team applies a structured, inspection-driven workflow that mirrors professional best practices while leveraging certified training and a customer satisfaction approach for local Austin clients. Technicians begin with a thorough inspection using blacklight detection and moisture mapping to document contamination, then select a treatment pathway, surface enzymatic cleaning and extraction, or deeper remediation, including padding and subfloor work, based on findings. The next steps include professional enzymatic pre-treatment with calibrated dwell times, hot water extraction, aggressive drying, and targeted deodorization or encapsulation when structural sealing is necessary. This company-level example demonstrates how certified training and an evidence-based workflow reduce the chance of recontamination and prepare customers for realistic timelines and potential structural interventions.


The Steam Team’s local service model emphasizes technician credentials and responsiveness, which helps set realistic expectations for Austin homeowners and businesses.

Why Is IICRC Certification Important for Pet Odor Removal Specialists?


IICRC certification represents formal training in cleaning and restoration standards that directly impact treatment selection, chemical handling, and drying protocols for odor remediation. Certified technicians understand how to measure moisture, control humidity, select the right enzymatic formulations, and avoid practices that simply mask odors or push contamination deeper into substrates. This training reduces error rates and improves long-term outcomes because certified professionals can differentiate when to restore versus when to remove and replace materials like padding or subfloor boards. For homeowners, asking for IICRC or NADCA-trained technicians is a practical proxy for competence and safety, which ties into why choosing a certified provider matters when odors persist.


Certification also links to consumer assurances such as satisfaction guarantees and transparent follow-up actions, which leads naturally to the next H2 on surface-specific solutions.

Which Specialized Solutions Target Different Surfaces and Odor Types?


Different surfaces require tailored interventions because penetration depth, substrate porosity, and material sensitivity determine what treatments succeed. Soft surfaces like carpets and upholstery often need enzymatic breakdown plus controlled moisture extraction, while hardwood and tile typically require surface cleaning with inspection for joint penetration and potential sanding or sealing if the urine has migrated. Concrete and subfloor contamination often need encapsulation or selective removal because uric salts can embed into porous cement and continue to off-gas odors. Matching treatment to surface limits unnecessary replacement and increases the probability of a permanent fix, which is summarized further in the EAV comparison below.

Surface

Typical Penetration Depth

Recommended Professional Treatment

Carpet & Padding

Fiber base for padding

Blacklight detection, enzymatic pre-treatment, hot water extraction, padding inspection, or replacement

Upholstery

Cushion core and backing

Targeted enzymatic application from underside, controlled extraction, and possible panel removal

Hardwood

Surface to joint gaps

Surface cleaning, inspecting gaps, sanding, and sealing if penetration occurred

Subfloor/Concrete

Deep porosity into the substrate

Moisture and salt testing, encapsulation, or selective removal and replacement


This comparison helps homeowners see why a different technical path is chosen for each material and prepares them to discuss options with a service provider.


At the end of surface assessment, homeowners are often asked whether they prefer restoration-first or removal-first strategies; understanding the table above clarifies when each approach applies and naturally transitions to example protocols for common pet scenarios.

How Is Dog Urine Odor Removed from Carpets and Hardwood Floors?


For carpets, the protocol emphasizes locating all affected areas, applying professional enzymatic cleaners with sufficient dwell time, and using hot water extraction to remove dissolved residues and moisture; padding inspection follows to confirm whether a replacement is necessary. If padding or subfloor shows contamination, targeted removal and remediation prevent recurrence by eliminating uric crystals that cannot be dissolved in place. For hardwood, treatment begins with surface cleaning and moisture assessment; if urine has penetrated joints or gaps, sanding and sealing or localized board replacement may be required to stop continued off-gassing. This surface-specific approach reduces repeat problems and helps homeowners decide when to pursue restoration versus replacement.


Knowing these distinctions helps identify the right initial steps and prepares homeowners for potential structural work if odors persist after extraction.

What Are the Best Methods for Cat Pee Smell Removal from Upholstery and Walls?


Cat urine often contains higher concentrations of uric acid and tends to be more concentrated or repetitive, especially in cases of spraying, which complicates removal from vertical surfaces like walls and upholstery. For upholstery, technicians commonly access the underside of cushions to apply enzymatic solutions directly to the source and control moisture so the cleaner penetrates without saturating the frame or padding. For walls and drywall, detection followed by controlled cleaning, application of enzymatic treatments, and, when necessary, sealing or replacement of affected drywall panels stops the odor source; paint or topical masks fail when underlying uric salts remain. Addressing chronic cat odor typically requires deeper inspection and sometimes structural intervention to reach the contaminated substrate.


These surface strategies explain why professionals may recommend more invasive remediation for chronic cat issues and lead to a deeper discussion of enzymatic science.

Why Are Enzymatic Cleaners the Best Choice for Pet Odor Removal?


Enzymatic cleaners work by using biological catalysts to break organic molecules, including uric acid salts and odor-causing proteins, into smaller, nonvolatile pieces that can be extracted or neutralized, unlike masking agents that only cover smells. Enzymes act like tiny scissors that cut large organic substrates into components that bacteria can no longer convert into odorous VOCs, delivering a true reduction in odor source rather than a temporary cover-up. Professional enzymatic formulations differ from consumer products in concentration, stabilizers, and recommended dwell times, which collectively improve their performance on old or crystallized urine. Understanding the biochemical mechanism clarifies why enzyme-based approaches are necessary for stubborn or recurrent odors and when professional-grade application is warranted.


The following EAV-style comparison clarifies enzyme advantages versus common DIY agents and helps readers choose the right response.

Cleaner Type

Mechanism

Limitations

Enzymatic Cleaner

Enzymes digest organic molecules and uric acid into extractable compounds

Requires sufficient concentration and dwell time; professional formulations are stronger

Baking Soda/Vinegar

Neutralizes pH or absorbs odors temporarily

Does not break uric crystals; often masks rather than removes

Standard Detergents

Solubilize surface soils

Ineffective on crystallized salts and deep substrates


This comparison shows that enzymatic cleaners address the underlying chemistry of pet urine while common home remedies often fall short, setting up the criteria for when to call a professional.

How Do Enzymatic Cleaners Break Down Pet Urine and Organic Odors?


Enzymatic cleaners contain specialized enzymes, proteases, ureases, and other hydrolases that target proteinaceous materials and uric acid by catalyzing chemical bond cleavage, converting them into smaller molecules that can be rinsed or extracted away. Visualize enzymes as molecular scissors that make the substrate too small for bacteria to metabolize into VOCs, effectively removing the fuel for odor production rather than hiding the smell. Dwell time and correct dilution are critical because enzymes need contact time with the substrate to act, which is why professional applications use calibrated concentrations and controlled moisture. This biochemical breakdown produces a lasting reduction in odor when paired with thorough extraction and drying.


Recognizing enzyme action informs the decision criteria in the next subsection about when DIY fails, and professionals are needed.

When Do DIY Methods Fail and Professional Enzymatic Treatments Are Needed?


DIY methods commonly fail when stains are old, urine has penetrated the padding or subfloor, or odors return after cleaning, clear indicators that uric acid crystals or deep contamination remain. Other red flags include multiple accidents in the same area, persistent smell despite repeated home treatments, and detection of hidden deposits via blacklight; these cases usually require professional-grade enzymes, extraction, and possibly structural remediation. Professional treatments also include moisture control and drying, which prevent bacterial rebound that can re-create odors after DIY wet cleaning. Deciding to hire professionals hinges on the age of the stain, recurrence after DIY attempts, and whether structural penetration is suspected.


If DIY attempts are no longer effective, scheduling a professional inspection becomes the necessary next step, which the following H2 explains in practical terms.

What Preventive Tips Help Keep Your Home Fresh and Odor-Free?


Prevention focuses on reducing the amount of organic material that creates odors, timely response to accidents, and routine maintenance that limits bacterial growth and odor formation. Regular vacuuming with HEPA-rated filters, routine professional deep cleaning for high-traffic pet areas, and consistent pet grooming reduce dander and oils that accumulate on fabrics and floors. Immediate containment and correct cleaning after accidents prevent uric crystals from forming; keeping humidity controlled in Austin’s climate also reduces moisture reactivation of old salts. These measures together lower the frequency of deep treatments and extend the effectiveness of professional remediation when it is performed.


Below are actionable, snippet-friendly tips homeowners can implement quickly to reduce odor risk and maintenance burden.

  1. Vacuum high-traffic areas weekly to remove dander and hair before they embed.

  2. Bathe and groom pets on a schedule to reduce skin oil transfer to fabrics.

  3. Use washable bedding and launder regularly to eliminate concentrated residues.

  4. Address accidents within minutes by blotting and applying the enzyme spot cleaner.

  5. Control indoor humidity to prevent reactivation of uric crystals in damp seasons.


These preventive steps are practical starting points that reduce odor load and naturally lead to immediate accident-response tactics covered next.

How Can Regular Cleaning and Grooming Reduce Pet Odors?


Consistent maintenance lowers the baseline organic load that feeds bacterial VOC production and makes deep-set odor less likely to develop, which reduces the need for invasive remediation. Weekly vacuuming removes dander and hair before it embeds, while monthly or seasonal professional cleaning removes oils and microscopic residues that vacuums cannot extract. Regular grooming reduces shedding and surface oils, which both decrease the rate at which textiles become saturated with odor-causing material. Implementing these routines extends the lifespan of carpets and upholstery and complements professional treatments when they are performed.


Maintaining this routine also improves indoor air quality and transitions into immediate steps to take when accidents do occur.

What Immediate Actions Should You Take After Pet Accidents?


Acting quickly after an accident prevents penetration and crystallization: blot liquids with absorbent cloths, avoid scrubbing, which spreads contamination, and apply an enzyme-based spot cleaner following product instructions and dwell times. Avoid ammonia-based cleaners because they can confuse pets and mask or exacerbate odors; instead, use enzyme formulas or consult a professional if the accident is large or repeated. If the stain is old, covers an extensive area, or the smell persists after spot treatment, contacting a professional inspector is the recommended next step. Quick, correct action reduces long-term damage and often prevents the need for subfloor or padding replacement.


These immediate steps complete the prevention arc and lead to guidance on scheduling professional services locally.

How Can You Schedule Professional Pet Odor Removal Services in Austin, TX?


Requesting a professional inspection typically begins with a brief property intake location of odors, surface types, and history of accidents, so technicians can plan equipment and estimate time on site. During scheduling, homeowners should expect questions about the affected areas, whether accidents are ongoing, and permission to conduct a blacklight inspection upon arrival; these details determine whether restoration or removal is likely and shape appointment length. Technicians generally allocate time for inspection, treatment, extraction, and drying phases, and they will advise on follow-up steps, including humidity control and potential structural work if subfloor contamination is discovered. Understanding these expectations streamlines the appointment and helps homeowners compare proposals.


If you choose to engage a local provider, you can ask about certifications, guarantees, and response times to ensure alignment with your priorities.

What Should You Expect During a Professional Pet Odor Treatment Appointment?


A typical appointment begins with access and a walkthrough to map contamination, followed by blacklight detection and moisture measurements to set the treatment plan; this inspection informs whether on-the-spot restoration is realistic or if further remediation is required. Technicians then apply enzymatic pre-treatment, allow recommended dwell time, perform hot water extraction, and set up drying equipment; total time ranges by scope, but most single-room treatments are completed in a few hours for active work plus drying time. Customers should prepare by clearing fragile items and providing access to affected rooms; technicians will explain post-treatment ventilation and any follow-up required to confirm odor elimination. Clear expectations reduce surprises and ensure the chosen approach aligns with the results goals.


Knowing what to expect helps homeowners decide when to accept a restoration-first plan versus a removal-first strategy and connects to the service guarantees professionals may offer.

How Does The Steam Team Guarantee Effective Pet Odor Removal?


The Steam Team offers a local, certified approach to pet odor remediation that emphasizes documented inspection, certified technician training, and a customer satisfaction guarantee to address persistent issues when initial treatments need follow-up. Technicians leverage IICRC and NADCA-aligned practices, professional enzymatic protocols, and structured inspection reports to ensure the treatment matches the contamination profile, and the company stands behind remediation work with follow-up commitments if odors persist. Serving residential and commercial clients across Austin and surrounding Central Texas communities, The Steam Team also highlights responsiveness, especially for urgent cases, and aims to make remediation predictable through certification-driven methods and customer-focused guarantees. To request an inspection or discuss treatment options, homeowners can contact The Steam Team by phone at 512-451-8326 to schedule a consultation.

  1. Prepare basic property details and the history of the odor problem before calling.

  2. Ask about technician certifications and guaranteed follow-up procedures.

  3. Request an inspection that includes blacklight detection and moisture mapping.


These final steps help homeowners choose a provider who follows evidence-based workflows and offers accountability for results.

Frequently Asked Questions

What are the signs that pet odors are deeply embedded in my home?


Signs of deeply embedded pet odors include persistent smells that return after cleaning, visible stains, and multiple accidents in the same area. If you notice a strong odor even after cleaning efforts, it may indicate that uric acid crystals or organic residues remain in the materials. Using a blacklight can help detect hidden urine deposits that are not visible to the naked eye, further confirming the need for professional intervention.

How can I choose the right professional pet odor removal service?


When selecting a professional pet odor removal service, consider their certifications, such as IICRC or NADCA, which indicate trained technicians. Look for companies that provide detailed inspection processes, including blacklight detection and moisture mapping. Additionally, inquire about their treatment methods, guarantees, and customer reviews to ensure they have a proven track record of effectively addressing pet odor issues.

Are there any DIY methods that can effectively remove pet odors?


While some DIY methods can help with minor odors, they often fall short for deep-set issues. Enzymatic cleaners are the most effective DIY option, as they break down uric acid and organic residues. However, if the odor persists or if there are signs of deep penetration into carpets or subfloors, professional treatment is usually necessary. DIY methods may mask odors temporarily but often do not address the root cause.

How often should I schedule professional cleaning for pet odors?


The frequency of professional cleaning for pet odors depends on several factors, including the number of pets, their behavior, and the type of flooring or upholstery in your home. Generally, scheduling a professional cleaning every 6 to 12 months is advisable for homes with pets. However, if you notice persistent odors or frequent accidents, more frequent treatments may be necessary to maintain a fresh environment.

What should I do if my pet has repeated accidents in the same area?


If your pet has repeated accidents in the same area, it’s essential to address both the odor and the behavioral aspect. Clean the area thoroughly with an enzymatic cleaner to eliminate the scent that may encourage repeat behavior. Additionally, consider consulting a veterinarian or a pet behaviorist to understand any underlying issues that may be causing the accidents, such as stress or health problems.

Can pet odors affect indoor air quality?


Yes, pet odors can significantly impact indoor air quality. The organic compounds and bacteria associated with pet urine, dander, and feces can release volatile organic compounds (VOCs) into the air, leading to unpleasant smells and potential health issues. Regular cleaning, proper ventilation, and professional odor removal services can help improve indoor air quality and create a healthier living environment for both pets and humans.

What are the benefits of using enzymatic cleaners over traditional cleaning methods?


Enzymatic cleaners offer several advantages over traditional cleaning methods. They work by breaking down organic materials, such as uric acid and proteins, into smaller, non-odorous components, effectively eliminating the source of the smell. Unlike traditional cleaners that may only mask odors, enzymatic solutions provide a more thorough and lasting solution. Additionally, they are often safer for pets and the environment, making them a preferred choice for pet owners.

Conclusion


Effective pet odor removal is essential for maintaining a fresh and healthy home environment, especially in households with pets. By understanding the science behind odor persistence and utilizing professional enzymatic treatments, homeowners can achieve lasting results that go beyond mere masking. Taking proactive steps, such as regular cleaning and timely professional interventions, can significantly reduce the likelihood of recurring odors. To explore tailored solutions for your pet odor challenges, contact a certified professional today.

Effective Home Smoke Damage Cleanup Solutions You Can Trust

Expert Smoke Damage Restoration

Smoke damage combines visible soot, invisible odor molecules, and chemical residues that degrade materials and harm indoor air quality, so prompt, informed cleanup preserves health and property. This guide explains how different types of smoke behave, why tailored cleaning methods matter, and which interventions remove soot and neutralize odors effectively for homeowners. You will learn to identify dry, wet, protein, and fuel-oil smoke, apply safe DIY odor-reduction steps, and recognize when advanced professional treatments like thermal fogging, ozone, or hydroxyl treatments are necessary. The article also outlines soot removal techniques for walls, ceilings, carpets, and contents, lays out an end-to-end restoration workflow assessment through verification, and provides transparent cost ranges and insurance guidance for smoke incidents. Throughout, actionable checklists, comparison tables, and restoration process steps help you decide whether to manage cleanup yourself or engage certified professionals. By combining practical DIY measures with clarity about professional scopes, this resource is designed to help homeowners restore livability and value after smoke exposure.

What Are the Different Types of Smoke Damage and Their Effects?


Smoke damage types differ by fuel, combustion temperature, and chemical composition, and those differences determine how deeply residues penetrate materials and how difficult cleanup will be. Dry smoke results from high-temperature fires and leaves fine, powdery soot that is easier to remove from non-porous surfaces, while wet smoke from smoldering fires produces sticky residues that bond to surfaces and stain more severely. Protein smoke, often from overheated food, can leave clear, pungent films that corrode finishes and require specialized cleaning, whereas fuel oil or petroleum-based smoke deposits oily, malodorous residues that chemically alter fabrics and finishes. Understanding these mechanisms helps homeowners pick appropriate cleaning sequences and decide when to call professionals with equipment for deep content and HVAC decontamination, which follows from recognizing visible and olfactory clues that point to each smoke type.

How Does Dry, Wet, Protein, and Fuel Oil Smoke Damage Differ?


Dry smoke forms tiny soot particles that settle as a fine, powdery film on surfaces; its removal typically relies on dry sponging and HEPA vacuuming before wet cleaning to avoid smearing. Wet smoke arises from slow, low-oxygen burning and coats surfaces with a tacky, brown residue that often needs specialized chemical cleaners and sometimes light abrasive action to lift stains. Protein smoke creates thin, chemically reactive films that cause persistent odors and can yellow paints and plastics; deodorization plus careful surface cleaning are usually required. Fuel oil and hydrocarbon-based smoke deposit oily, strongly odorous residue that soaks into porous materials and often requires content pack-out, solvent-based cleaning, and professional deodorization techniques.


Research into the behavior of smoke-contaminated electronics highlights the challenges posed by chloride contamination, particularly from burning materials containing polyvinylchloride.

Cleaning and Reliability of Smoke-Contaminated Electronics


1. This work deals with problems that arise when modern surface-mounted electronics are to be reconditioned after smoke contamination. In a fire, hydrogen chloride, which is formed when polyvinylchloride is present, is deposited on various materials. Electronic equipment is especially sensitive since malfunction may occur after a longer or shorter time of operation due to the chloride contamination.


2. Earlier work has shown that through-hole electronics can be reconditioned, with good results, after deposition of up to 100 µg chloride/cm2in the surrounding area. The lower limit when cleaning is needed is often specified to 10 µg chloride/cm2.


3. In this work, therefore, surface-mounted electronics have been exposed to smoke containing hydrogen chloride, which has contaminated the test boards with 45 to 75 µg chloride/cm2. Three different methods for cleaning smoke-contaminated electronics were investigated: manual, automatic spray, and ultrasonic. Each method was able to clean to a contamination level lower than 1.5 µg sodium chloride equivalents/cm2. The automatic spray method could not remove all contaminants beneath the components. All three methods were capable of improving the surface insulation resistance to a satisfactory level.


4. Conformal coating can, to a large extent, protect the electronics against corrosive smoke. However, decontamination of boards conformally coated with acrylic coatings may be complicated since smoke products are partly absorbed into the conformal coating. The large difference between chloride contamination in a fire and during the manufacture of electronic equipment is the nature of deposition. Experiments have shown that the hydrogen chloride reacts with lead in the solder to form lead chloride. During manufacture, chloride salts are deposited all over the test board.


5. Migration between conductors of different potential has not occurred. This is due to the fact that chloride is localized on the conductors as lead chloride. G


Cleaning and reliability of smoke-contaminated electronics, 1993


What Are the Health Risks and Structural Impacts of Smoke and Soot?


Soot and smoke carry fine particulate matter and volatile compounds that irritate eyes, throat, and lungs and can exacerbate asthma and other respiratory conditions in the short term. Long-term exposure to embedded residues can degrade indoor air quality and contribute to chronic irritation, and some smoke-derived chemicals accelerate corrosion of metals and the breakdown of finishes and painted surfaces. Structurally, soot can penetrate insulation, HVAC ductwork, porous drywall, and textiles, creating hidden sources of odor and recontamination if not fully addressed. Recognizing these health and material risks motivates rapid assessment, containment, and selection of appropriate cleanup methods to protect occupants and prevent progressive material damage.

How Can You Remove Smoke Smell from Your House Effectively?


Effective smoke-odor removal couples source control, filtration, and targeted chemical or physical deodorization to neutralize odor molecules rather than merely masking them. Immediate source control involves removing burned items and heavily contaminated porous materials, followed by aggressive ventilation and HEPA air filtration to reduce airborne particulates and odor carriers. Professional options such as ozone treatment, thermal fogging, and hydroxyl generators attack odor molecules through oxidation or encapsulation, while HEPA filtration and HVAC cleaning prevent redistribution; choosing among these depends on odor severity, smoke type, and occupancy considerations. The next subsections explain practical DIY steps and a decision checklist for when to escalate to professional odor neutralization.

What DIY Methods Work for Smoke Odor Removal?


Homeowners can reduce smoke odor initially by increasing ventilation, using HEPA-filtered fans if available, and removing or laundering washable textiles to reduce odor reservoirs. Absorbent materials like baking soda, activated charcoal, and odor-absorbing gels can trap some odor molecules from the air and surfaces, but they often only mask or slow odors when residues remain embedded. For painted walls and hard surfaces, a staged clean dry wiping, HEPA vacuuming, then a gentle detergent or trisodium phosphate (TSP) rinse can remove surface soot and some odors, but porous materials usually retain smell. If odors persist after thorough DIY cleaning and HVAC attention, professional deodorization methods are usually required to fully neutralize embedded compounds.


Common at-home odor reduction steps include:

  1. Open windows and run fans with HEPA filtration to exchange and filter indoor air.

  2. Remove or launder curtains, bedding, and soft textiles to eliminate primary odor reservoirs.

  3. Place activated charcoal or baking soda in bowls around affected rooms to absorb ambient odors.

  4. Clean hard surfaces with dry sponges, then appropriate detergent to remove soot films.


Using these DIY steps can reduce immediate odor and improve air quality, but persistent, pervasive smells often point to deep penetration that requires professional treatment.


Intro to deodorization methods table: The following table compares common professional deodorization approaches so homeowners can weigh effectiveness and safety before engaging suppliers.

Treatment

Characteristic

Typical Consideration

Ozone treatment

Strong oxidizer that neutralizes some odor molecules

Effective for certain odors but requires vacating the space during treatment

Thermal fogging

Encapsulates and chemically neutralizes odor molecules in place

Good for large, furnished areas; requires professional equipment

Hydroxyl generators

Produce hydroxyl radicals to break down odor compounds safely around people

Safer for occupied spaces, but may be slower for heavy contamination

HEPA air filtration

Physically removes particulates and odor carriers from air

Essential for particulate reduction; does not chemically neutralize odors


This comparison shows that pairing filtration with a chemical or oxidative deodorization often yields the best long-term results, and safety/occupancy constraints guide method selection.

When Should You Choose Professional Smoke Odor Neutralization?


You should escalate to professionals when odor persists after thorough DIY cleaning, when HVAC systems or ductwork are contaminated, or when occupants experience health symptoms linked to smoke residues. Professionals bring specialized equipment hydroxyl generators, thermal foggers, ozone units, and industrial HEPA air scrubbers, plus protocols for containment and clearance testing that reduce the risk of recontamination. Consider professional help when odors are widespread, when sensitive populations occupy the home, or when the smoke source involves petroleum or protein residues that chemically bond to materials. A professional assessment also documents conditions and scope for insurance purposes, and homeowners can request quotes or schedule remediation services to restore safe indoor air and material surfaces.


For trusted local support, The Steam Team provides emergency response, certified technicians, and professional deodorization services, and can prepare estimates or schedule an on-site assessment to determine which neutralization methods are appropriate and safe for each home.

What Are the Best Techniques for Soot Removal from Walls and Surfaces?


Soot removal follows a staged process: dry removal to prevent smearing, HEPA vacuuming to capture particulates, and then controlled wet cleaning or chemical treatment tailored to surface type and soot composition. The immediate mechanism is to separate loose soot from substrates before introducing moisture, because wetting powders or certain residues can drive staining deeper into materials. For painted drywall and ceilings, professionals often test small areas to select cleaners and avoid finish damage, whereas masonry and glass tolerate stronger alkaline cleaners or mechanical action. Porous materials such as unsealed wood, insulation, and some textiles usually require pack-out and specialized content restoration or replacement to fully remove embedded soot.

How Do Professionals Clean Smoke Residue from Walls, Ceilings, and Furniture?


Professionals begin with containment and air management to prevent cross-contamination, using negative pressure and HEPA filtration to control airborne particulates during cleaning. They perform surface tests to identify smoke type and select appropriate cleaning agents, dry sponges for light powdery soot, solvent-based cleaners for oily residues, and alkaline detergents for heavy staining while protecting finishes and adjacent materials. Personal protective equipment, structured cleaning sequences, and documented cleaning logs ensure safety and repeatability, and technicians often follow with sealants or repainting as needed after residues are removed. Proper sequencing testing, dry cleaning, vacuuming, wet cleaning, and verification reduces the risk of residues causing recurring odors or staining.


Intro to cleaning-tool comparison: The following table highlights common tools and their best use cases to guide decisions about DIY versus professional engagement.

Tool/Method

Best Use Case

Benefit

Dry cleaning sponge (soot sponge)

Light, powdery soot on painted surfaces

Removes surface soot without smearing

HEPA vacuuming

All stages before wet cleaning, plus porous materials

Captures fine particulates and prevents re-aerosolization

TSP or alkaline cleaners

Heavy soot staining on washable surfaces

Breaks down oily residues for rinsing

Solvent-based cleaners

Oily fuel or hydrocarbon soot

Dissolves oily deposits where water alone fails


This table clarifies that matching the tool to the soot type is critical: improper selection increases the chance of staining or lingering odor and may necessitate professional restoration.

How Is Smoke Damage Removed from Carpets, Upholstery, and Contents?


Soft goods and personal contents demand assessment to determine salvageability, then cleaning protocols like hot-water extraction, solvent cleaning, or immersion cleaning for hard-to-reach residues. Carpets contaminated by oily smoke or heavy soot may require professional deep extraction and deodorization or, if deeply impregnated, removal and replacement to eliminate odor sources. Upholstery and textiles often respond to specialized detergents, ozone-safe pack-out cleaning, or professional laundering; fragile or sentimental items may need contents restoration specialists who use controlled environments for cleaning and odor neutralization. A careful contents triage assessing material, value, and contamination depth guides whether restoration or replacement is the prudent choice to restore habitability and indoor air quality.

What Is the Complete Smoke Damage Restoration Process for Homes?


A complete restoration process moves logically through assessment, containment/mitigation, cleaning and repair, and final deodorization and verification to restore safety and habitability. The mechanism is structured triage: identify hazards and contamination pathways, stabilize the property to prevent further damage, remove or restore affected materials and contents, and then validate air and surface quality before reoccupation. This workflow prevents common failures such as recontamination via HVAC systems or incomplete deodorization of porous materials. The next subsections lay out assessment and safety protocols, followed by the cleaning, drying, and verification steps that professionals use to return a home to pre-loss conditions.

How Is Initial Damage Assessment and Safety Conducted?


Initial assessment defines hazards, structural compromise, energized systems, and chemical residues and establishes a documented scope for remediation and insurance claims through photos and inventories. Professionals evaluate HVAC contamination, material porosity, presence of water from firefighting, and locations of heavy soot deposits to prioritize mitigation and contents salvage. Safety measures include grounding electrical hazards, securing unstable structures, and isolating contaminated zones with physical barriers and negative pressure to protect occupants and prevent spread. Thorough documentation during assessment not only guides remediation but also provides the necessary records homeowners need when working with insurers or requesting detailed estimates.


Key assessment and safety tasks include:

  1. Document visible damage and take photos for insurance and scope definition.

  2. Identify and isolate areas with electrical or structural hazards.

  3. Inspect HVAC systems and plan for duct cleaning or containment if contaminated.

  4. Prioritize water extraction if firefighting introduces moisture to prevent mold.


These initial steps reduce secondary damage and inform the restoration plan that follows.

What Are the Steps for Structural Cleaning, Water Damage Mitigation, and Final Deodorization?


After assessment, teams execute water extraction and drying protocols when firefighting water is present, using dehumidifiers and air movers to prevent microbial growth and structural swelling. Structural cleaning proceeds with staged soot removal, dry cleaning, and HEPA vacuuming before wet cleaning and then targeted repairs such as repainting, trim replacement, and HVAC restoration to remove hidden contamination. Final deodorization pairs filtration with targeted oxidative or encapsulation treatments and clearance testing to ensure odor molecules have been neutralized and air quality meets re-occupancy standards. Verification often includes visual inspections, air sampling when appropriate, and a final walkthrough with homeowners to confirm restoration of livability and function.


For homeowners who prefer professional handling, The Steam Team applies these end-to-end steps with documented assessments and can provide on-site estimates and scheduling to coordinate mitigation, cleaning, and verification efficiently.

How Much Does Fire and Smoke Damage Cleanup Cost, and Does Insurance Cover It?


Smoke cleanup costs vary widely depending on the affected area, the smoke type, materials involved, and whether water damage from firefighting is present; transparent ranges help homeowners plan and communicate with insurers. Typical factors influencing price include square footage affected, porous versus non-porous materials, contents restoration needs, complexity of HVAC cleaning, and required deodorization technology. While exact pricing depends on inspection, conservative estimates range from modest per-room cleanups for light smoke to several thousand dollars for severe, whole-home contamination with content pack-out and specialized deodorization. The next subsections present typical cost ranges by room and severity and practical steps for documenting claims and coordinating with insurers.

What Are Typical Smoke Damage Restoration Costs by Room and Severity?


Below is a generalized cost table showing typical ranges for common scenarios to guide homeowners; individual estimates will vary based on local conditions and contamination severity.

Service Component

Typical Cost Range

Notes

Single room light smoke cleanup

$200 - $800

Surface cleaning, HEPA vacuuming, mild deodorization

Multiple rooms or moderate contamination

$800 - $3,000

Includes content cleaning and targeted deodorization

Severe whole-home contamination

$3,000 - $15,000+

Pack-out, contents restoration, HVAC cleaning, advanced deodorization

Contents restoration (per household sets)

$500 - $5,000+

Varies with volume and required specialty treatments


These ranges illustrate that costs scale with contamination depth and the need for specialized deodorization or content restoration, and they emphasize the importance of early assessment to reduce secondary expenses.

How Can Homeowners Navigate Insurance Claims for Smoke Damage?


Homeowners should document the scene thoroughly with photos, keep an itemized inventory of damaged contents, and request written estimates from restoration providers to support claims and negotiations. Prompt mitigation, such as temporary tarping, water extraction, or emergency ventilation, helps protect claims and may be required by insurers to show reasonable steps were taken to limit damage. Restoration providers often assist by preparing scope documents, contractor estimates, and technical explanations of needed work to the adjuster, which can smooth approval for advanced treatments like HVAC cleaning or thermal fogging. If homeowners need a professional estimate or assistance coordinating with an adjuster, The Steam Team offers assessment and documentation services to support claim submission and scheduling of necessary restoration work.

Why Choose The Steam Team for Emergency Smoke Damage Cleanup in Austin, Texas?


The Steam Team is a locally focused cleaning and restoration provider serving Austin and Central Texas with emergency response and certified technicians, offering homeowners documented processes and service reliability during smoke incidents. The company highlights 24/7 emergency response to reduce secondary damage after a fire event and employs IICRC-certified technicians who follow industry best practices for assessment, containment, and restoration. Local expertise supports rapid coordination with insurers and content restoration workflows tailored to Central Texas building types and materials, while customer satisfaction guarantees and a recognized business rating provide additional reassurance when selecting a provider. The next subsections explain the operational benefits of 24/7 response and certification and describe how quality controls and customer processes support successful outcomes.

What Makes The Steam Team’s 24/7 Emergency Response and IICRC Certification Unique?


Round-the-clock availability shortens the time between loss and mitigation, reducing risks such as microbial growth after firefighting water and limiting soot penetration into contents and HVAC systems. IICRC certification indicates that technicians have completed industry-standard training in restoration protocols, which relates directly to consistent assessment, cleaning sequences, and safety practices that protect both occupants and property. Operating with a local focus in Austin and Central Texas helps the team prioritize rapid mobilization and an understanding of regional construction practices and materials. Homeowners benefit from a combination of immediate response capability and technicians trained to apply accepted industry standards during complex smoke remediation.

How Does The Steam Team Ensure Customer Satisfaction and Quality Restoration?


Quality restoration begins with documented assessments, clear scopes of work, and checkpoints for verification throughout mitigation, cleaning, and final deodorization phases to ensure work aligns with homeowner expectations. The Steam Team emphasizes thorough documentation and communication during the restoration journey and provides follow-up verification to confirm odor removal and material cleanliness before project closeout. Local case-based practices and a focus on customer satisfaction guarantee that teams prioritize both technical completeness and homeowner peace of mind. Homeowners seeking an assessment, quote, or scheduling for smoke damage cleanup are encouraged to request a professional evaluation to determine the scope and methods appropriate for their home.

  1. Request an on-site assessment to establish the scope and estimate.

  2. Prioritize immediate mitigation to limit secondary damage.

  3. Choose providers with documented processes and certified technicians for complex restorations.

Frequently Asked Questions

What are the signs that smoke damage has occurred in my home?


Signs of smoke damage can include visible soot on surfaces, a persistent burnt odor, discoloration of walls or ceilings, and respiratory issues among occupants. You may also notice a film on windows or furniture, and HVAC systems may carry smoke particles throughout the home. If you suspect smoke damage, it's crucial to conduct a thorough inspection, as some effects may not be immediately visible. Early detection can help mitigate further damage and improve indoor air quality.

Can I clean smoke damage myself, or should I hire a professional?


While some minor smoke damage can be addressed with DIY methods, such as cleaning surfaces and improving ventilation, significant damage often requires professional intervention. Professionals have specialized equipment and expertise to effectively remove soot and odors, especially from porous materials and HVAC systems. If the damage is extensive or if health symptoms arise, it's advisable to consult with certified restoration services to ensure thorough cleanup and restoration.

How long does the smoke damage restoration process typically take?


The duration of smoke damage restoration varies based on the extent of the damage, the size of the affected area, and the methods used. Minor smoke damage may take a few days to clean and restore, while severe cases can extend to weeks, especially if extensive content pack-out or structural repairs are needed. A professional assessment can provide a more accurate timeline based on the specific conditions of your home.

What should I do immediately after a fire to minimize smoke damage?


Immediately after a fire, prioritize safety by ensuring the area is secure and that there are no ongoing hazards, such as electrical issues or structural instability. Remove any burnt items and ventilate the space by opening windows and using fans. Avoid using household cleaning products on soot, as they can worsen the situation. Contact a professional restoration service as soon as possible to assess the damage and begin the cleanup process effectively.

Are there any health risks associated with smoke damage?


Yes, smoke damage poses several health risks, particularly respiratory issues. Fine particulate matter and volatile organic compounds in smoke can irritate the eyes, throat, and lungs, exacerbating conditions like asthma. Long-term exposure to smoke residues can lead to chronic health problems and degrade indoor air quality. It's essential to address smoke damage promptly to protect the health of all occupants, especially vulnerable populations such as children and the elderly.

What types of insurance typically cover smoke damage restoration?


Smoke damage restoration is often covered under homeowners' insurance policies, particularly if the damage results from a fire. Coverage may include cleanup costs, repairs, and content restoration. However, the specifics can vary by policy, so it's crucial to review your coverage details and consult with your insurance provider. Documenting the damage with photos and keeping an inventory of affected items can help streamline the claims process.

How can I prevent smoke damage in the future?


Preventing smoke damage involves several proactive measures. Install smoke detectors and ensure they are functioning correctly. Practice fire safety by keeping flammable materials away from heat sources and having a fire extinguisher accessible. Regularly maintain heating appliances and electrical systems to reduce fire risks. Additionally, consider creating an emergency plan that includes evacuation routes and communication strategies in case of a fire, which can help minimize damage and ensure safety.

Conclusion


Effective smoke damage cleanup is essential for restoring health and safety in your home, as it addresses both visible soot and harmful odors. By understanding the types of smoke and employing the right cleaning techniques, homeowners can significantly improve indoor air quality and prevent long-term damage. For those facing extensive smoke damage, professional restoration services offer the expertise and equipment necessary for thorough remediation. Contact The Steam Team today to schedule an assessment and take the first step towards a smoke-free home.

Discover the Science of Hot Water Extraction Carpet Cleaning

Unlocking Hot Water Extraction Magic

Hot water extraction carpet cleaning (often shortened to HWE) uses a coordinated combination of heat, chemistry, mechanical agitation, and high-powered vacuum recovery to remove soils, allergens, and odor-causing compounds from deep within carpet fibers. This article explains the underlying physics and chemistry of how heated water and surfactant chemistry lower surface tension, how pressurized injection displaces bonded soils, and how vacuum recovery captures suspended particulates, so readers understand why HWE delivers measurable cleaning outcomes. Homeowners and facility managers often face stubborn stains, pollen loads, pet dander, and humidity-driven microbial risk; understanding the mechanisms behind HWE clarifies when professional HWE is the right choice versus other approaches. Below we map the step-by-step process, the health and fiber-restoration benefits, a direct comparison with what is commonly called steam cleaning, the chemistry behind effective cleaning solutions, the equipment and innovations that improve performance, and specific adaptations for Austin and Central Texas climates. Throughout, semantic links between heat → reaction rate → soil emulsification and vacuum → pressure differential → extraction are emphasized to show cause-and-effect for practical decisions about cleaning frequency and methods.

What Is Hot Water Extraction and How Does the Process Work?


Hot water extraction is a professional carpet cleaning method that injects heated cleaning solution into the carpet pile under controlled pressure and immediately extracts the suspension with a strong vacuum, producing deep soil removal without excessive residual moisture. The mechanism combines heat-driven increases in chemical reaction rates, surfactant-mediated emulsification of hydrophobic soils, and pressure-differential extraction to physically remove contaminants from fibers. The result is a reduction in trapped particulates and soluble soils that improves appearance and indoor air quality. Key operational variables nozzle temperature, injection pressure, solution concentration, and recovery vacuum, must be balanced to maximize soil removal while minimizing moisture retention and fiber stress.

What Are the Key Steps in the Hot Water Extraction Process?


Hot water extraction follows a repeatable sequence that pairs each mechanical action with a specific scientific rationale and outcome. The process begins with a systematic inspection and pre-treatment of traffic lanes and stain zones to loosen oxidized soils and target hydrophobic residues. Next, a heated cleaning solution is injected under pressure while mechanical agitation via brush, groomer, or wand agitation disrupts packed soils and helps surfactants encapsulate oils and particulate matter. Powerful vacuum recovery immediately follows injection to capture suspension and reduce residual moisture, and the procedure finishes with pile grooming and airflow management to restore appearance and accelerate drying. Typical drying times vary with humidity and extraction effectiveness; accurate extraction and recovery are essential to keep drying time low and microbial risk minimal.

  • Key steps in HWE include pre-inspection and pre-treatment, heated solution injection, agitation to mobilize soils, high-volume extraction, and post-clean grooming.

  • These steps align science to outcome: pre-treatment alters soil chemistry, heat accelerates reactions, agitation breaks bonds, and vacuum removes the suspension.


This clear procedure ensures each scientific mechanism directly supports the practical goal of deep, residue-minimized cleaning.

How Do Heat, Pressure, and Vacuum Physics Enhance Cleaning?


Heat raises the kinetic energy of molecules, reducing surface tension and accelerating surfactant action, so soils detach from fiber surfaces more readily under warm conditions. Pressure-driven injection forces solution into the carpet matrix, overcoming capillary hold and embedded soil adhesion; higher injection pressures improve penetration but must be modulated to avoid fiber and backing stress. Vacuum recovery creates a pressure differential that mechanically lifts suspended particles and solution into the recovery tank; efficient recovery reduces retained moisture and decreases the window for microbial growth. Together, these physical forces, thermal activation, hydraulic penetration, and suction extraction create a coordinated system where each variable amplifies overall cleaning efficiency while minimizing collateral effects like over-wetting or residue.

Surfactant-Assisted Pressurized Hot Water Extraction for Marker Compounds


Pressurized hot water extraction (PWHE) is a technique that uses heated water at temperatures above its boiling point, but below its critical point, under pressure to extract compounds from a sample. The high temperature increases the solubility of many organic compounds, while the pressure keeps the water in a liquid state. Surfactants can be added to enhance the extraction efficiency by reducing the surface tension of the water and improving the penetration of the solvent into the sample matrix.


Evaluation of surfactant‐assisted pressurized hot water extraction for marker compounds in Radix Codonopsis pilosula using liquid chromatography and liquid …, ES Ong, 2003


What Are the Benefits of Hot Water Extraction for Deep Carpet Cleaning?


Hot water extraction delivers benefits that are traceable to measurable mechanisms: improved allergen and microbial removal because of heat and extraction; stain and odor reduction through surfactant emulsification and removal of odor precursors; and fiber restoration by removing abrasive soils that abrade pile and flatten fibers. These outcomes translate into better indoor air quality, reduced odor recurrence, and improved carpet appearance and longevity when performed with proper rinse and recovery. For property owners, the value lies in combining health outcomes with asset preservation: removing trapped soils prevents ongoing abrasion while extracting allergens that resuspend into indoor air. Below is a structured representation of the benefits tied to the mechanism and expected outcome.

Benefit Area

Mechanism

Typical Outcome

Allergen reduction

Heat + extraction of particulates and dander

Significant reduction in airborne resuspension and settled allergen load

Microbial load control

Elevated temperature + mechanical removal

Lower viable counts and reduced odor-causing biomass

Fiber restoration

Removal of abrasive soils and proper rinsing

Improved pile loft, appearance, and reduced long-term wear


This table shows how scientific mechanisms map directly to homeowner-relevant outcomes: cleaner air, fewer odors, and preserved carpet life. Understanding these links helps set realistic expectations for cleaning frequency and post-clean care.


For practical planning, homeowners should consider these three advantages:

  1. Health-oriented cleaning: HWE reduces pollen, pet dander, and dust mite reservoirs that contribute to indoor allergen exposure.

  2. Appearance restoration: By removing embedded soils, HWE restores pile texture and color vibrancy.

  3. Longevity: Eliminating abrasive particles slows fiber wear, preserving carpet investment.


After evaluating scientific benefits and practical outcomes, many readers want a reliable local provider to execute HWE with consistent equipment and controls. The Steam Team provides professional hot water extraction services across Austin and Central Texas, staffed by IICRC-certified technicians and supported by an A+ BBB rating and 24/7 emergency service availability. For homeowners and businesses seeking an evidence-based, reliable clean, The Steam Team invites requests for quotes or to schedule an appointment via phone; their local expertise aligns scientific cleaning practices with practical scheduling to address health and appearance goals.

How Does Hot Water Extraction Remove Allergens, Bacteria, and Odors?


Hot water extraction removes allergens and microbes through a combination of thermal stress, surfactant-enabled suspension, and efficient extraction that physically removes particles from the carpet matrix. Heat can denature some microbial proteins and weaken adhesion forces holding dust mite fragments and pollen grains, while surfactants emulsify oils and odor precursors to create a water-compatible suspension. High-volume vacuum recovery then captures suspended particulates and microbes in the recovery tank rather than allowing resettlement. This mechanism reduces both settled allergen reservoirs and the potential for patient exposure through resuspension during daily activity, improving indoor air quality when paired with effective pre-treatment and rinsing.

How Does Hot Water Extraction Improve Carpet Fiber Restoration and Longevity?


Removing abrasive soils that embed between fiber strands is the primary way HWE restores pile and slows wear; as grains of dirt are removed, fibers regain loft and reflect light more evenly, improving appearance. Proper chemistry selection and rinsing prevent sticky residues that re-attract soil; maintaining near-neutral rinse pH and using low-residue detergents protect fiber integrity. Repeated, controlled HWE cycles scheduled based on traffic patterns and local contaminant loads prevent progressive abrasion and extend service life. In practice, homeowners who pair timely HWE with routine vacuuming see fewer wear patterns and longer intervals before replacement is needed.

How Does Hot Water Extraction Compare to Steam Cleaning?


At the top level, hot water extraction uses heated liquid combined with immediate extraction, whereas true steam cleaning uses high-temperature vapor with minimal liquid volume; they are related but not identical approaches. Hot water extraction typically operates with nozzle temperatures in the range of roughly 150–210°F at the point of contact while delivering measurable liquid for suspension and vacuum recovery. True steam methods rely on vapor temperatures that can be higher but often leave less solvent action and limited extraction, affecting residue and soil-lift outcomes. The practical implication is that HWE balances chemical and mechanical mechanisms to remove both soluble and particulate soils, whereas vapor-only approaches emphasize thermal kill but may be less effective at removing suspended particulate reservoirs.

Method

Key Attribute

Practical Impact

Hot Water Extraction (HWE)

Heated solution + high-volume extraction

Thorough removal of soluble and particulate soils with controlled drying

True Steam Cleaning

High-temperature vapor, low liquid

Strong thermal effect but limited soil suspension and extraction

Low-moisture systems

Encapsulation/dry methods

Fast drying but less effective for embedded particulates


The table clarifies that while both approaches can reduce microbes under certain conditions, HWE provides more consistent particulate removal and lower long-term residue when properly rinsed and extracted.

What Are the Temperature and Moisture Differences Between HWE and Steam Cleaning?


Numerically, HWE nozzle temperatures often reach the 150–210°F window, which speeds chemical reactions without over-saturating backing materials when properly controlled. Steam-cleaning vapor temperatures can technically exceed those ranges at the generator, but deliver far less liquid; consequently, steam methods present lower net moisture transfer but limited physical removal of suspended soils. Moisture profiles after HWE depend on recovery efficiency; effective extraction leaves carpet surface damp but dries in an acceptable window, whereas inadequate extraction leaves extended dampness that increases microbial risk. Understanding these temperature and moisture trade-offs helps operators select settings that maximize soil removal while preserving backing and pad.


Pressurized Hot Water Extraction: Principles and Applications


Pressurized hot water extraction (PHWE), also known as subcritical water extraction, superheated water extraction, or accelerated solvent extraction using water as a solvent, utilizes water at temperatures above 100 °C and pressures above atmospheric pressure. Under these conditions, water exhibits unique properties, such as reduced polarity and increased solvating power for organic compounds, making it an effective extraction solvent.


Pressurized hot water extraction of bioactives, M Plaza, 2017


How Do Drying Times and Residue Impact Carpet Health?


Drying time is a critical variable because prolonged moisture retention raises the risk of mold and odor development, and residues from cleaning solutions can accelerate soil re-attraction and fiber breakdown. Recommended drying times after properly executed HWE typically fall within a range that depends on ambient humidity and extraction efficiency; quick and effective recovery plus airflow management keeps drying within safe windows and minimizes microbial proliferation. Residue prevention relies on proper formulation selection (low-residue detergents), adequate rinse steps, and sufficient vacuum recovery; residues that remain act as tackifiers, attracting particulate re-deposition and degrading carpet aesthetics. Minimizing residual chemicals and moisture both protects manufacturer warranties and improves long-term fiber performance.

What Is the Chemistry Behind Effective Carpet Cleaning Solutions in Hot Water Extraction?


Effective HWE chemistry balances surfactant selection, pH control, and solvent strength to target specific soil classes without damaging fibers. Surfactants, both anionic for particulate suspension and nonionic for oily soil emulsification, lower surface tension and form micelles that encapsulate oils into water-compatible structures for extraction. pH modulation targets stain chemistry: alkaline formulations help saponify and lift greasy soils, while acidic rinses can neutralize alkaline residues and aid in removing mineral-based discoloration. The optimal approach often uses an integrated sequence: pre-treatment with targeted chemistries, an extraction solution tuned for fiber safety, and a neutral rinse to leave minimal residue.

How Do Surfactants and pH Balance Work to Break Down Dirt and Stains?


Surfactants reduce surface tension and encapsulate hydrophobic soil into micelles, enabling suspension in water for vacuum recovery; anionic surfactants excel at lifting particulate and charged soils, while nonionic surfactants are effective with oily, hydrophobic residues. pH influences chemical reactivity: alkaline cleaners saponify fats and break down organic soils, whereas acidic rinses help dissolve mineral salts and set dyes in a stable state. Matching pH to fiber type is essential; some synthetic fibers tolerate broader pH ranges, but natural fibers require gentler chemistry. The science-to-practice rule is: use surfactants to mobilize soils and pH control to target soil chemistry while ensuring a neutral final rinse to prevent residue buildup.

What Role Do Eco-Friendly Cleaning Agents Play in Hot Water Extraction?


Eco-friendly agents, including biodegradable surfactants and low-VOC formulations, reduce environmental impact and indoor chemical exposure while still providing solid emulsification and rinsing properties. Performance trade-offs exist: some green formulations have reduced foaming or different solubilization profiles, requiring adjusted application strategies and mechanical agitation to achieve equal results. For many clients, reduced residue and lower odor profiles are compelling advantages, especially in sensitive environments. Recent industry trends show growing adoption of certified green agents when paired with professional HWE protocols that compensate for formulation differences through precise temperature, agitation, and extraction control.

What Advanced Equipment and Technology Are Used in Hot Water Extraction?


Equipment advances amplify HWE outcomes by delivering consistent temperature, modulated pressure, and high-rate recovery to reduce moisture retention and improve soil lift. Truck-mounted systems deliver higher PSI and greater heat capacity, enabling faster throughput on large jobs, while portable units offer access flexibility for tight or multi-level properties. Wand design, flow-path engineering, and recovery tank configurations further influence extraction efficiency; innovations like modulated heating and recovery flow control permit consistent performance across variable job conditions. Below is a comparative table outlining truck-mounted systems versus portable units on core attributes.

System Type

Attribute

Typical Impact

Truck-mounted

Higher PSI, greater heat capacity

Faster extraction, superior recovery rates for large/commercial jobs

Portable unit

Greater portability, lower footprint

Access to tight spaces and multi-floor apartments, where truck access is limited

Wand and recovery system

Nozzle design, flow-path efficiency

Directly affects moisture removal and fiber stress


This table emphasizes choosing equipment based on access constraints and performance needs rather than assuming one-size-fits-all.

How Do Truck-Mounted Systems and Portable Units Differ in Performance?


Truck-mounted systems generally offer higher continuous heat and stronger vacuum recovery, translating to improved water recovery rates and shorter drying times on larger projects. Portables sacrifice some thermal and recovery capacity for flexibility, making them preferable for interior-only access or multi-unit buildings. Water recovery rate, PSI capability, and sustained temperature are the primary performance variables; matching system choice to job scale and access ensures efficient cleaning without unnecessary fiber stress. Provider-grade truck units combined with trained technicians yield throughput and extraction efficiency that reduce duration and moisture risk on heavy-duty jobs.


The Steam Team uses provider-grade truck-mounted systems and employs IICRC-certified technicians to validate equipment-driven claims; this combination supports predictable temperature and recovery control that improves cleaning consistency. For homeowners and businesses wanting a reliable quote or to schedule a visit for an inspection-based recommendation, The Steam Team offers local service scheduling and estimates by phone.

What Innovations in Water Heating and Pressure Regulation Improve Results?


Recent innovations include modulated heating systems that maintain consistent nozzle temperatures under varying flow rates, and pressure-control valves that adjust injection force to match fiber sensitivity and soil load. Improved recovery pumps and baffled recovery tanks reduce aeration and filter out fine particulates, increasing capture efficiency and shortening drying times. Wand designs that optimize contact angle and flow-through recovery can further reduce residual moisture while preserving pile integrity. These engineering improvements translate into measurable outcomes: greater soil removal efficiency, fewer rinse passes, and lower post-cleaning moisture percentages.

How Does Hot Water Extraction Address Local Austin and Central Texas Carpet Cleaning Challenges?


Local environmental factors in Austin and Central Texas seasonal pollen, plant-based soils, clay-rich dust, and periods of elevated humidity, change contaminant profiles and influence optimal HWE settings. Pollen and plant debris are often hydrophobic or adhesive and respond well to targeted pre-treatment and surfactant selection, while clay and mineral soils require agitation and effective rinse to avoid abrasive re-deposition. High humidity slows drying and increases microbial risk, making aggressive extraction and post-clean airflow strategies essential in the region. Tailoring chemical sequence, equipment settings, and drying protocols to these regional attributes yields better health and appearance outcomes.

How Does HWE Tackle Austin-Specific Allergens and Soil Types?


In Austin, common allergens such as seasonal pollen and plant particulates bind to fibers and settle into the pile; pre-treatment with surfactants that target sticky organic residues and mechanical agitation loosens these particulates for extraction. Clay and mineral soils brought in from outdoor activity require robust suspension and adequate rinsing to prevent fine abrasive retention. Adjusting cleaning cadence more frequent HWE during high pollen seasons reduces the cumulative reservoir of allergens. Homeowners are advised to coordinate HWE scheduling around peak pollen periods and high-traffic events to maintain indoor air quality and reduce allergen resuspension.

  • Local tactics include pre-treatment for organic soils, mechanical agitation for clay removal, and scheduling during lower-humidity windows where possible.

  • Recommended cadence increases during allergy season and after major outdoor events that elevate indoor soil loads.


These practical adaptations help ensure HWE addresses both the chemical nature of local soils and the mechanical demands of extraction.

What Are the Effects of Humidity and Climate on the HWE Process?


Higher humidity extends drying times and raises the risk of microbial activity if extraction and ventilation are insufficient, so mitigation requires increased extraction passes, use of high-capacity recovery systems, and active air movement or dehumidification post-clean. In drier periods, less extraction may suffice, but consistent rinsing to prevent residue remains important. Practical scheduling advice is to favor morning or mid-day appointments that allow natural ventilation and sunlight to assist drying when outdoor humidity is lower. Providers who monitor ambient conditions and adjust process variables more extraction, stronger recovery, and air movers when needed, minimize post-clean moisture retention and associated risks.

  1. Pre-treatment and agitation reduce bonded pollen and clay.

  2. Aggressive extraction and airflow limit drying time in humid months.

  3. Seasonal scheduling keeps allergen reservoirs low and preserves indoor air quality.


This regional approach ensures that the scientific principles of HWE are applied where local contaminants and climate create specific risks and opportunities for improved outcomes.

Frequently Asked Questions

What types of carpets are best suited for hot water extraction cleaning?


Hot water extraction is effective for a wide range of carpet types, including nylon, polyester, and olefin. However, natural fiber carpets like wool may require more careful handling due to their sensitivity to heat and moisture. It's essential to assess the carpet's material and construction before proceeding with HWE to avoid damage. Consulting with a professional cleaner can help determine the best approach for specific carpet types, ensuring optimal cleaning results without compromising fiber integrity.

How often should I schedule hot water extraction cleaning for my carpets?


The frequency of hot water extraction cleaning depends on several factors, including foot traffic, the presence of pets, and local environmental conditions. Generally, high-traffic areas may benefit from cleaning every 6 to 12 months, while less frequented spaces can be cleaned every 12 to 18 months. During allergy seasons or after significant events that increase soil levels, more frequent cleaning may be necessary. Regular maintenance, including vacuuming, can also extend the time between professional cleanings.

Can hot water extraction help with pet stains and odors?


Yes, hot water extraction is particularly effective at removing pet stains and odors. The combination of heat, surfactants, and vacuum recovery works to break down and lift pet-related soils, including urine and feces, from carpet fibers. Pre-treatment with specialized enzymatic cleaners can enhance the effectiveness of HWE by targeting organic stains and neutralizing odors. For best results, it's advisable to address pet accidents promptly and consult a professional cleaner experienced in handling such issues.

What should I do to prepare my home for a hot water extraction cleaning?


Preparing your home for hot water extraction cleaning involves several steps. First, remove any furniture or items from the carpeted areas to ensure unobstructed access. Vacuum the carpets thoroughly to eliminate loose dirt and debris. If there are specific stains or problem areas, inform the cleaning technician so they can apply targeted treatments. Additionally, ensure that the cleaning area is accessible, and consider scheduling the cleaning when you can allow for adequate drying time afterward.

Are there any risks associated with hot water extraction cleaning?


While hot water extraction is generally safe and effective, there are some risks to consider. If not performed correctly, excessive moisture can lead to mold growth or damage to carpet backing. Additionally, using incorrect cleaning solutions can harm fibers or leave residues. To mitigate these risks, it's crucial to hire a qualified professional with experience in HWE. They will use appropriate techniques and equipment to ensure thorough cleaning while minimizing moisture retention and protecting your carpets.

How does hot water extraction impact indoor air quality?


Hot water extraction can significantly improve indoor air quality by removing allergens, dust, and microbial contaminants trapped in carpet fibers. The process effectively extracts pollutants such as pet dander, pollen, and dust mites, which can contribute to respiratory issues. By reducing these allergens, HWE helps create a healthier living environment. Regular cleaning also prevents the buildup of odors and improves overall air circulation, making it an essential practice for maintaining good indoor air quality.

What is the typical drying time after hot water extraction cleaning?


Drying time after hot water extraction cleaning typically ranges from 2 to 6 hours, depending on several factors, including humidity, airflow, and the effectiveness of the extraction process. Properly executed HWE should leave carpets damp but not overly wet. To expedite drying, it's beneficial to use fans or dehumidifiers and to maintain good ventilation in the cleaned areas. Scheduling cleaning during lower humidity periods can also help reduce drying times and minimize the risk of microbial growth.

Conclusion


Hot water extraction carpet cleaning offers significant benefits, including improved indoor air quality, effective allergen removal, and enhanced carpet longevity. Understanding the science behind this method empowers homeowners to make informed decisions about their cleaning needs. For those seeking reliable and professional services, The Steam Team is ready to assist with expert hot water extraction tailored to your specific requirements. Contact us today to schedule your appointment and experience the difference in your home.

Discover Customer Reviews: Tile vs. Grout Cleaning Choices

Austin's Top Tile Care

Many Austin homeowners and business owners wrestle with whether to book tile cleaning, grout cleaning, or both when floors look tired or stained; this article defines each service, explains how they work, and shows how to choose the right approach. You will learn the technical difference between surface tile cleaning and grout-line restoration, why grout problems often drive service requests in Austin, how frequently professional cleaning is recommended for local conditions, and the cost-to-value tradeoffs that influence customer decisions. This guide draws on practical indicators, visual cues, odor, and material type so you can match symptoms to the appropriate service and avoid unnecessary work. The piece also explains restoration workflows, sealing benefits, and real customer response patterns that shape local preferences. Throughout, relevant terms like tile cleaning Austin, grout cleaning Austin, grout sealing Austin, and natural stone tile cleaning Austin are used to help you identify the right treatment for ceramic, porcelain, and natural stone floors.

What Is the Difference Between Tile Cleaning and Grout Cleaning?


Tile cleaning targets the tile surface, using specific cleaners, agitation, and extraction to remove surface grime and restore shine; grout cleaning focuses on the porous grout lines where soils, stains, and microbes embed. Mechanistically, tile cleaning often uses low-abrasion solutions and mechanical polishing for stone, while grout cleaning uses targeted agitation, extraction, and sometimes specialized chemistry to lift deep-seated soils. The major benefit for tile cleaning is restored surface appearance and reduced film, whereas grout cleaning restores color uniformity and mitigates mold risk in joints. Understanding this distinction helps customers choose services that address the real problem instead of treating symptoms.


Tile cleaning restores surface shine and removes grime by combining chemistry and controlled mechanical action to lift soils from the tile face while protecting surface finishes. For ceramic and porcelain, pH-balanced cleaners loosen trapped oils and dirt which are then extracted by hot-water or low-moisture equipment; for natural stone, stone-safe cleaners and minimal abrasion prevent etching. Visible results include improved sheen, reduced hazing, and clearer grout contrast, but the extent of improvement depends on tile material and prior sealers. These outcomes mean that surface-focused cleaning can often return the original look without replacing tiles when the issue is primarily film or dullness.


Why is grout cleaning essential for removing stains and mold? Grout is a porous component of tiled floors that soaks up spills and embeds microbes, so routine mopping rarely reaches its depth. Professional grout cleaning uses focused agitation, extraction, and sometimes oxidation or enzymatic action to break apart stain matrices and biofilms, then extracts residues to reveal the grout’s natural color. The health and aesthetic benefits are clear: removing mildew reduces allergenic exposure and prevents ongoing odor, while restoration of grout tone dramatically improves perceived cleanliness. After cleaning, follow-up sealing reduces re-soiling and extends results, which is why targeted grout work is often prioritized when visible dark lines or mold are present.


Different cleaning needs are best compared visually and mechanically:

Service

Typical Method

Typical Outcome

Tile Cleaning

Surface cleaning, agitation, extraction, polishing for stone

Restored shine, removed film, improved slip resistance

Grout Cleaning

Targeted agitation, extraction, stain-lifting chemistry

Restored grout color, mold removal, healthier joints

Combined Service

Integrated assessment, sequential tile and grout processes

Uniform appearance, longer-lasting cleanliness, sealing readiness

Why Do Austin Customers Prefer Professional Grout Cleaning?


Austin customers frequently prioritize grout cleaning because grout shows stains and mold earlier than tile surfaces, especially in wet rooms and busy kitchens. The porous nature of grout means spills, oils, and outdoor track-in concentrate in joints, creating visible contrast that makes floors look older even when tiles themselves are intact. Professional grout cleaning provides observable restoration that DIY methods often cannot achieve because pros use extraction and targeted chemistry rather than surface scrubbing alone. Additionally, grout sealing after cleaning extends the restoration, reducing the frequency of repeat deep cleans and making maintenance easier.


Common grout problems that lead customers to choose grout cleaning generally include deep discoloration, recurring mildew, grout breakdown, and haze from improper cleaners. These symptoms can present as dark lines, powdery surfaces, or persistent odors, visual and olfactory indicators that simple mopping won’t fix. Quick DIY checks include testing with diluted bleach in a hidden area to see if color lifts or using a stiff brush and hot water to assess embedded dirt; when the stain resists those tests, professional intervention is advisable. Recognizing these signs helps homeowners move from short-term fixes to durable restoration.


Professionally applied grout sealing prevents future stains by creating a protective sealer layer that repels water and oil, lowering grout porosity and slowing re-soiling. Sealers come in penetrating or topical forms; penetrating sealers absorb into grout and block internal absorption, while topical sealers form a surface film that can darken grout tone temporarily. Expected longevity varies with traffic and product choice, but resealing every 1–3 years is a practical maintenance strategy. Sealing is a clear value-add because it reduces cleaning frequency and preserves aesthetic gains from a professional restoration.


Austin homeowners consistently cite practical benefits in lists like the one below; these summarize why many choose grout-focused work.


Austin customers choose grout cleaning for several practical reasons:

  • Stain Removal: Grout lines regain original color after deep extraction.

  • Mold and Health: Removing mildew improves indoor air quality and reduces allergens.

  • Longer Results: Sealing after cleaning extends the interval between services.

  • Cost Efficiency: Targeting grout often avoids replacing tiles and yields big visual improvement.


These points show why grout services often outperform surface-only fixes in perceived value and lasting cleanliness.

When Should You Choose Tile Cleaning, Grout Cleaning, or Both?


Choose tile cleaning when the tile surface looks dull, has hazing, or feels slippery from residue; choose grout cleaning when grout lines are visibly dark, stained, or show mold; choose both when the entire floor lacks uniformity or when tile and grout both show significant wear. Material matters: natural stone may need stone-safe tile work and polishing, while ceramic and porcelain tolerate more aggressive surface cleaning. Traffic and use-case also inform decisions; kitchens, entryways, and commercial zones often require combined plans to restore both appearance and hygiene.


Factors that determine the best cleaning service include tile material, degree of soiling, presence of biological growth, and homeowner goals for aesthetics versus budget. Start with an assessment: inspect grout porosity, test a small area, and evaluate whether surface film or ingrained grout soil is the dominant issue. Scenarios help clarify choices for a high-traffic kitchen with marked grout staining, combined tile and grout cleaning, plus sealing is usually the most cost-effective path; for a lightly soiled hallway with dull tile, surface cleaning alone may suffice. This decision framework helps prioritize services that deliver the greatest visible impact.


Use this quick decision table to match floor conditions to recommended actions:

Condition

Indicator

Recommended Service

Dull or hazy tile surface

Loss of sheen, film on tile

Tile Cleaning (surface-focused)

Dark or discolored grout lines

Visible staining, black lines, odor

Grout Cleaning + Sealing

Whole-floor uniform deterioration

Both tile and grout appear aged

Combined Tile & Grout Cleaning

Natural stone with concern for etching

Sensitive surface, irregular shine

Stone-safe Tile Cleaning; assess for polishing


Recommended cleaning frequency in Austin depends on use and traffic: residential rooms typically benefit from professional attention every 12–18 months, while commercial or high-traffic areas need more frequent service. The local climate and outdoor activity patterns in Austin increase tracked-in soils during certain seasons, so scheduling cleaning after heavy-use months can preserve appearance. Between professional visits, simple maintenance, prompt spill cleanup, regular sweeping, and pH-appropriate cleaners extend results and reduce microbial growth. These intervals balance appearance, health, and budget.

How Does The Steam Team Provide Expert Tile and Grout Cleaning in Austin?


The Steam Team uses an assessment-first approach to recommend tile cleaning, grout cleaning, or a combined restoration plan tailored to the floor type and symptoms observed. Technicians evaluate tile material, grout porosity, and staining mechanisms before proposing a workflow that sequences cleaning, possible recoloring, and sealing as appropriate. Credibility signals include IICRC-certified technicians and local recognition that reflect training and quality control; these elements support predictable outcomes and a customer satisfaction guarantee. The local focus on Austin and Central Texas conditions means recommendations factor in climate, typical traffic patterns, and common household soils.


What makes The Steam Team’s tile cleaning services stand out is a combination of stone-safe methods, specialized equipment, and quality assurance steps that protect delicate finishes while restoring shine. For natural stone tile cleaning Austin customers, techniques emphasize low-abrasion, pH-balanced cleaners and extraction that prevent etching while lifting soils. Equipment choices and product selections are matched to tile hyponyms, ceramic tile cleaning, porcelain tile cleaning, and natural stone cleaning to ensure the method aligns with material needs. The outcome is a balance of restored aesthetics and surface protection that avoids unnecessary replacement.


How are grout cleaning and restoration handled by The Steam Team? The workflow begins with testing and inspection, followed by targeted deep-cleaning using agitation and extraction, then optional recoloring and grout sealing to lock in results. Technicians evaluate whether grout recoloring is appropriate and discuss sealing options to reduce recoloring frequency; the process includes post-service care instructions so homeowners can maintain results. Typical timelines are presented during assessment so customers understand step sequencing and expected downtime, and before-and-after documentation reinforces transparency and decision-making.


For readers ready to act, The Steam Team operates as a lead generation and information hub focused on helping Austin homeowners request quotes or schedule appointments; this includes a customer-focused call to request a personalized estimate. The Steam Team emphasizes useful information about cleaning and restoration services, builds trust through clear explanations, and invites potential clients to request a quote or schedule an appointment to get a site-specific plan. Contact details are provided through their public listings and phone contact; this step helps convert assessment insights into an actionable restoration plan for tile cleaning and grout sealing Austin homeowners often prefer.

What Do Austin Customers Say About Tile and Grout Cleaning Services?


Austin customers commonly praise reliability, visible results, and clear communication as top themes when evaluating tile and grout cleaning providers. Reviews frequently highlight dramatic before-and-after transformations where grout lines are restored and tile surfaces regain shine, which directly influences neighborhood reputation and referral behavior. Customers also cite professional credentials and satisfaction guarantees as confidence builders when choosing a provider for sensitive natural stone tile cleaning Austin projects. These themes shape expectations: people want demonstrable outcomes, transparent processes, and a follow-up maintenance plan.


Which tile and grout cleaning reviews highlight customer satisfaction? Representative review themes include on-time arrivals, careful workmanship around fragile surfaces, and follow-through on sealing and maintenance guidance. Summarized excerpts emphasize results, grout lines returning to original color, stone finishes protected, and positive interactions that reduce stress during restoration work. When evaluating reviews, look for consistent mentions of process clarity, before-and-after evidence, and whether the provider addresses follow-up care; aggregated sentiment that repeats these points is a strong indicator of reliable service.


Before-and-after transformations influence customer preferences by providing visual proof that targeted work, especially grout cleaning or combined services, produces an outsized visual impact compared to surface-only approaches. Customers often shift preferences toward combined tile and grout restoration when gallery images show uniform color and renewed tile sheen after a coordinated process. Visual storytelling matters because it helps people imagine final results in their own homes, and galleries that label material types and processes increase trust. Readers are encouraged to compare before-and-after photos that match their tile type to set realistic expectations.


Common review themes seen in local feedback can be summarized:

  1. Reliability: Timely, consistent service delivery.

  2. Results: Noticeable restoration of grout color and tile shine.

  3. Communication: Clear pre- and post-service instructions.


These points indicate why many Austin customers favor providers who combine technical skill with clear customer communication and proof of results.

What Are the Costs and Value of Professional Tile and Grout Cleaning in Austin?


Cost drivers for tile and grout cleaning include square footage, tile material, level of soil and staining, and any additional restoration steps like grout recoloring or sealing. Labor intensity rises with heavily soiled grout lines and with natural stone that requires stone-safe care, which affects cost but also raises value by preventing damage. The professional value proposition centers on improved appearance, longer floor life, reduced maintenance frequency, and health benefits from mold removal, each contributing to homeowner ROI. Rather than fixed price lists, the best route is a personalized estimate that reflects local conditions and desired outcomes.


How does grout cleaning cost compare to tile cleaning services? Grout cleaning typically demands focused labor along linear joints and can be lower in materials cost but higher per-square-foot in labor intensity; tile cleaning can range from simple surface extraction to more involved stone polishing that increases cost. Combined services may offer efficiencies, sequential workflows prevent rework, and can lower overall per-square-foot cost compared to separate appointments. Decision-makers should weigh immediate expense against longevity gains from sealing, which reduces repeat cleanings and enhances total value.


Presenting costs and value in a compact EAV table helps clarify tradeoffs:

Service

Typical Cost Range

Value / ROI

Grout Cleaning

Lower–Moderate

High visual impact; reduces mold risk and maintenance frequency

Tile Cleaning

Moderate

Restores sheen; protects surface and can improve slip resistance

Combined Tile & Grout

Moderate–Higher

Best long-term ROI; uniform restoration and sealing minimize repeat costs


What makes professional cleaning a worthwhile investment for Austin homeowners is the combination of preserved resale appeal, reduced replacement costs, and improved indoor environmental quality. Removing mold and deep stains protects family health, while sealing and proper stone care extend surface life and reduce the total cost of ownership. Recent practice trends emphasize data-driven frequency recommendations and targeted sealing to maximize intervals between professional services. For homeowners, the right balance of initial investment and maintenance planning yields noticeable savings and preserved floor value over time.


For readers ready to obtain a tailored estimate, requesting a personalized assessment produces the most accurate cost-to-value understanding; many homeowners discover that combined solutions offer the best long-term return.

Frequently Asked Questions

1. How often should I schedule professional tile and grout cleaning?


In Austin, the recommended frequency for professional tile and grout cleaning varies based on usage. Residential areas typically benefit from cleaning every 12 to 18 months, while high-traffic commercial spaces may require more frequent service. Factors such as local climate, outdoor activity, and the type of flooring also influence how often cleaning should occur. Regular maintenance, including prompt spill cleanup and routine sweeping, can help extend the intervals between professional cleanings, ensuring your floors remain in optimal condition.

2. What are the benefits of sealing grout after cleaning?


Sealing grout after cleaning provides several significant benefits. It creates a protective barrier that repels water and oil, reducing the porosity of the grout and slowing down the re-soiling process. This means that your grout will stay cleaner for longer, making maintenance easier and less frequent. Additionally, sealing helps to preserve the aesthetic improvements achieved through professional cleaning, ensuring that the grout retains its restored color and appearance. Resealing every 1 to 3 years is a practical strategy to maintain these benefits.

3. Can I perform tile and grout cleaning myself, or should I hire a professional?


While DIY tile and grout cleaning is possible, professional services often yield superior results. Professionals use specialized equipment and targeted cleaning solutions that can effectively remove deep-seated stains and mold that household methods may miss. Additionally, they have the expertise to assess the condition of your flooring and recommend the best cleaning approach. If you notice persistent stains or mold, it’s advisable to seek professional help to ensure thorough cleaning and restoration, especially for sensitive materials like natural stone.

4. What should I do to maintain my tile and grout between professional cleanings?


To maintain your tile and grout between professional cleanings, regular upkeep is essential. Start with routine sweeping or vacuuming to remove dirt and debris. Promptly clean up spills to prevent staining, and use pH-balanced cleaners that are safe for your specific tile type. Avoid harsh chemicals that can damage the surface or grout. Additionally, consider using mats in high-traffic areas to minimize dirt tracked onto your floors. These practices can help extend the life of your flooring and keep it looking fresh.

5. What types of cleaning methods are used for natural stone tiles?


Natural stone tiles require specialized cleaning methods to avoid damage. Professionals typically use low-abrasion, pH-balanced cleaners that are safe for stone surfaces. These methods focus on gentle agitation and extraction to lift dirt without etching or scratching the stone. Additionally, steam cleaning may be employed to sanitize and refresh the surface without harsh chemicals. It’s crucial to choose a service that understands the unique needs of natural stone to ensure effective cleaning while preserving the integrity of the material.

6. How can I tell if my grout needs cleaning or sealing?


Signs that your grout needs cleaning include visible discoloration, dark lines, or persistent odors, which indicate embedded dirt or mold. If you notice that your grout appears dull or has lost its original color, it’s time for a professional cleaning. Additionally, if water is absorbed quickly into the grout rather than beading on the surface, it may indicate that sealing is needed. Regular inspections can help you determine when cleaning or sealing is necessary to maintain the appearance and health of your flooring.

7. What factors influence the cost of tile and grout cleaning services?


The cost of tile and grout cleaning services is influenced by several factors, including the size of the area being cleaned, the type of tile and grout material, and the level of soil and staining present. More intensive cleaning methods, such as those required for heavily soiled grout or delicate natural stone, can increase labor costs. Additional services like grout recoloring or sealing also contribute to the overall price. For the most accurate estimate, it’s best to request a personalized assessment from a professional service provider.

Conclusion


Choosing the right tile and grout cleaning service can significantly enhance the appearance and longevity of your floors, ensuring they remain a source of pride in your home. Understanding the distinct benefits of tile and grout cleaning helps you make informed decisions that prioritize both aesthetics and health. For optimal results, consider scheduling a professional assessment to determine the best approach for your specific needs. Contact us today to explore tailored solutions that will restore your floors to their original beauty.

Avoid These Top Mistakes in Tile Maintenance - Austin Tips

Avoid These Tile Care Mistakes

Many homeowners unknowingly accelerate wear and discoloration by repeating common tile maintenance mistakes that erode glazes, weaken grout, and invite mold growth. This guide explains why those errors happen, the mechanisms behind grout and stone damage, and practical steps that extend the life and appearance of ceramic, porcelain, and natural stone tile. You will learn material-specific care for different tile types, clear do/don’t routines for spills and daily upkeep, and a neutral decision framework for when professional restoration is needed. The article maps out the most frequent errors, grout maintenance and sealing, destructive daily habits, immediate spill response, professional intervention criteria, and safe product choices, all tailored to Austin’s humidity-driven risks and local maintenance realities. Read on to reduce repair costs, prevent health risks from mold, and keep tile surfaces performing and looking their best.

What Are the Most Common Tile Cleaning Mistakes to Avoid?


Most tile cleaning mistakes stem from either using the wrong chemical on a specific tile material or applying excessive mechanical or moisture stress that compromises grout and substrate integrity. These errors cause etching on natural stone, grout erosion, staining, and the growth of mold and mildew in high-humidity environments, which shortens tile life and increases restoration costs. Identifying and stopping the most common missteps early preserves finish, reduces discoloration, and lowers the need for invasive repairs. Below is a concise list of frequent mistakes and safe alternatives to help homeowners act immediately to prevent cumulative damage.


Common tile cleaning mistakes and safer substitutes:

  1. Using harsh acidic cleaners on stone: Acidic products etch marble and travertine; use pH-neutral stone cleaners instead.

  2. Over-wetting floors and grout: Excess water soaks grout and underlayment, promoting mold; damp-mop and dry quickly.

  3. Scrubbing with abrasive tools: Steel wool and harsh brushes scratch glazes; switch to microfiber or soft-bristle options.

  4. Ignoring grout sealing: Unsealed grout soaks in stains and moisture; reseal according to manufacturer guidance.


These quick corrections, choosing the right cleaner, controlling moisture, avoiding abrasives, and sealing grout significantly reduce long-term risk. If the damage is advanced (deep etching, persistent mold, or structural grout failure), professionals can often remediate or restore surfaces, which we discuss in detail in the section on when to call a pro.

Why Is Using Harsh Chemicals Harmful to Tile and Grout?


Harsh chemicals damage tiles and grout by chemically reacting with surface materials or stripping protective sealants, which accelerates wear and increases re-staining risk. For natural stone such as marble and travertine, acids and bleach can chemically etch the calcite-based surface, causing dull spots and irreversible loss of polish. On ceramic and porcelain, alkaline or acidic cleaners can discolor grout and degrade sealants, making lines porous and harder to clean. Safer alternatives include manufacturer-approved pH-neutral cleaners and labeled stone products that preserve sealants; always test cleaners in an inconspicuous area to confirm compatibility. Understanding the chemical mechanism behind damage helps homeowners choose appropriate products and prevents costly restoration needs down the line.


Research indicates that the glaze layer on ceramic materials can be significantly affected by erosive and abrasive challenges.

Ceramic Glaze Durability: Impact of Erosive and Abrasive Challenges


Effect of erosive and abrasive challenges on the glaze layer applied to ceramic materials

How Does Over-Wetting Floors and Grout Cause Damage?


Excessive water penetrates grout and the thinset mortar beneath tile, increasing grout porosity, loosening adhesive bonds, and creating conditions for mold and mildew growth in the subfloor and wall cavities. Repeated soaking accelerates efflorescence and mineral deposits that appear as white, flaky residues, while trapped moisture weakens the mortar bed and can cause loose tiles over time. Practical damp-mopping techniques using minimal liquid, wringing mops thoroughly, and drying floors promptly limit water ingress and reduce biological risk. If you notice persistent dampness, musty odors, or tiles lifting, these signs indicate moisture-related damage that may require professional inspection to prevent structural deterioration.

How Can You Prevent Grout Cleaning Errors and Maintain Grout Effectively?


Grout is porous and chemically sensitive, so prevention focuses on limiting penetration of soils and moisture while preserving sealants that form a protective barrier. Regular maintenance includes routine cleaning with mild, pH-neutral solutions, periodic inspection for cracks or missing grout, and resealing at manufacturer-recommended intervals to maintain resistance against staining and mold. Proper grout care reduces discoloration, eases future cleaning, and minimizes long-term repair costs by extending service life. The quick steps below summarize a practical preventative routine you can adopt for both residential and light commercial settings.


Three preventive grout maintenance steps:

  1. Clean with pH-neutral cleaners monthly to remove surface soil without stripping sealants.

  2. Inspect grout lines quarterly and touch up cracked or missing grout to prevent water ingress.

  3. Reseal grout according to use and manufacturer guidance—high-traffic or wet areas need more frequent attention.


Following these steps reduces the frequency of deep cleaning and the need for replacement, and it creates a stable baseline for spotting early damage that warrants professional remediation.


Intro to grout issue decision table: The table below maps common grout problems to causes and recommended actions, helping homeowners decide whether a DIY fix suffices or a professional service is warranted. This quick reference clarifies severity thresholds and typical remedies.

Grout Problem

Likely Cause

Recommended Action

Surface discoloration

Soil buildup or superficial staining

DIY deep-clean with pH-neutral cleaner; reseal if effective

Dark, musty grout

Mold/mildew from trapped moisture

Clean with a mold-safe product; call a pro if it returns frequently

Cracked or missing grout

Movement, improper installation, or impact

Regrout or patch; call a pro for large areas or structural concerns

Powdery white residue (efflorescence)

Moisture-driven mineral salts

Dry and neutral-clean; professional moisture assessment if persistent


This table helps translate visual symptoms into practical next steps and reduces uncertainty when selecting between DIY care and professional intervention. Regular monitoring and small, timely repairs prevent escalation to more costly restoration.

What Are the Risks of Ignoring Grout Maintenance and Sealing?


Ignoring grout maintenance allows moisture and soils to penetrate, which increases the likelihood of persistent stains, mold growth, and eventual structural weakening of the grout joint and substrate. Over time, neglected grout becomes harder to clean, raising labor and remediation costs and potentially creating indoor air quality problems from biological growth in high-humidity regions. Resealing acts as a cost-effective preventive measure that extends grout life and reduces the frequency of deep cleanings. Investing modestly in sealing and timely repairs prevents both aesthetic degradation and more extensive restoration work later.

How Does Grout Discoloration Occur and How to Avoid It?


Grout discoloration results from several mechanisms: surface soil accumulation, chemical reactions with improper cleaners, biological staining from mold and mildew, and mineral deposits from efflorescence when moisture moves through substrate materials. Visual clues spotty versus uniform discoloration, presence of powdery residues, or recurring dark lines, help diagnose the cause and guide treatment choices. Preventive actions include using correct cleaners, maintaining dry conditions, sealing grout, and addressing source moisture through ventilation or repairs. When discoloration persists after targeted cleaning, professional stain removal or selective regrouting may be the most practical restoration approach.

Which Bad Tile Cleaning Habits Cause Long-Term Damage?


Everyday habits that seem harmless, using a metal scouring pad, skipping daily sweeping, or mopping with dirty water, create cumulative mechanical and chemical damage that abrades finishes and embeds soil into grout pores. Mechanical damage from grit and abrasive tools scratches glazes and dulls polished stone, while neglected dirt becomes an abrasive compound that acts like sandpaper with each footstep. Replacing destructive habits with softer tools, consistent sweeping schedules, and proper mop care prevents micro-scratching and maintains tile appearance. The list below highlights the most damaging habits and immediate corrective practices to adopt at home.


Damaging cleaning habits and corrective steps:

  • Using steel wool or stiff wire brushes: Replace with soft-bristle brushes and non-abrasive pads.

  • Skipping daily sweeping: Adopt daily dry sweeping or vacuuming to remove grit before it abrades surfaces.

  • Mopping with dirty water: Change mop water frequently or use microfiber pads to avoid re-depositing grime.


Changing these routines reduces micro-scratches and keeps finishes intact, which in turn decreases the frequency of restorative polishing or replacement.

Why Should You Avoid Using Abrasive Tools and Scrubbers on Tile?


Abrasive tools physically remove surface coatings and glaze layers, which can lead to matte patches on glazed tiles and worn edges on grout joints. Repeated abrasion reduces the reflective quality and protective finishes that manufacturers apply, exposing underlying materials to stains and wear. For natural stone, abrasion accelerates loss of polish and can exacerbate etching when combined with improper cleaners. Instead, choose microfiber cloths, soft-bristle brushes, and nylon scrubbers for grout scouring; these alternatives clean effectively without cutting protective layers. Adopting gentle tools preserves surface integrity and reduces the need for professional polishing or refinishing.

How Does Neglecting Regular Sweeping and Vacuuming Affect Tile Floors?


Failing to remove loose dirt and grit allows particles to grind into tile and grout underfoot, progressively scratching surfaces and dulling finishes in high-traffic zones. Embedded grime also traps moisture and stains, making routine cleaning less effective and raising the chance of discoloration. A simple maintenance schedule daily sweeping in high-traffic areas, vacuuming with a soft-floor setting weekly, and damp-mopping as needed, prevents embedded abrasion and prolongs the life of both tile and grout. For commercial or busy homes, increasing cleaning frequency in entranceways and kitchens greatly reduces long-term mechanical damage.

What Are the Best Practices for Immediate Spill and Dirt Cleanup on Tile?


Immediate response to spills is essential because many contaminants begin to penetrate grout and react with surfaces within minutes to hours, especially in porous materials or unsealed grout. Quick, appropriate action removes potential stains and reduces chemical interaction that leads to etching or permanent discoloration. Keep a small cleanup kit with microfiber cloths, pH-neutral cleaner, a soft brush, and paper towels near high-risk zones like kitchens and baths for rapid response. The three-step HowTo below provides a clear, immediate action pattern that protects tile and minimizes long-term damage.


Three immediate steps for spills and tracked-in dirt:

  1. Contain and blot the spill immediately: Use paper towels or microfiber to lift the liquid; avoid rubbing, which spreads the stain.

  2. Clean with appropriate product: Use water for most spills, pH-neutral cleaner for residues, and manufacturer-approved stone cleaners for natural stone.

  3. Dry and inspect for residue: Thoroughly dry the area and re-clean if residue remains; seal or spot-treat grout if stains persist.

Why Is Cleaning Spills Immediately Crucial for Tile Longevity?


Spills like wine, oil, or dye begin to interact with grout and porous stone surfaces quickly; delay increases the chance of penetration and permanent staining. For oil-based spills, prompt application of an absorbent followed by an appropriate cleaner often prevents seepage into grout, while acidic spills can etch stone if not neutralized and rinsed promptly. Rapid action reduces chemical and biological pathways that lead to deterioration, and consistent prompt cleanup forms a habit that significantly extends tile life. Knowing which spill types require specific cleaners and when to stop DIY efforts is central to protecting tile investment.

How Does Using Dirty Water or Mops Impact Tile Cleanliness?


Reusing dirty mop water or not rinsing cleaning tools re-deposits grime across tile surfaces, leaving streaks and a residual film that attracts more soil and dulls finishes. The mechanism is simple: soils remain suspended in the cleaning solution and settle back onto the floor as the water becomes saturated, effectively undoing cleaning efforts. Best practices include frequent water changes when mopping, using dual-bucket systems, or switching to microfiber pads and spray-mopping systems that use minimal water. For heavy soils or large commercial areas, extraction cleaning or professional cleaning methods remove embedded grit and restore the original appearance.

When Should You Choose Professional Tile and Grout Cleaning Services?


Choose professional services when stains, biological growth, or structural grout problems exceed DIY remedies or when you need restoration rather than routine cleaning. Professionals bring specialized equipment (steam/extraction, rotary cleaning, stone polishing) and knowledge to address deep-set stains, chemical damage, persistent mold, and adhesion failures that DIY methods cannot reliably fix. Clear criteria for calling a pro include recurring mold after cleaning, grout erosion or missing joints, deep etching of natural stone, and widespread discoloration unresponsive to recommended cleaners. The decision framework in the brief table below helps homeowners decide when professional intervention is appropriate and what to expect from corrective services.

Problem

Severity / Signs

Recommended Service / Action

Persistent mold or mildew

Recurs after cleaning; musty odor; visible regrowth

Mold remediation and deep cleaning; professional assessment of moisture source

Widespread grout erosion

Crumbling grout, loose tiles, or movement

Regrouting and substrate repair by a qualified technician

Chemical etching or dull stone

Loss of polish, white spots on the stone

Stone polishing and restoration services

Stubborn staining

Stains not removed by manufacturer-approved cleaners

Deep cleaning with specialty methods; consider regrouting or sealing


This structured guidance clarifies when to invest in professional work and what outcomes are reasonable, from remediation to restoration.


The Steam Team: local expertise note: The Steam Team provides tile and grout cleaning, natural stone restoration, marble polishing, and related restoration services across Central Texas, including Austin. As a local family-owned company that offers emergency response and restoration options, they combine certified technician methods and advanced cleaning systems to address stubborn stains, mold remediation needs, and structural grout issues. Homeowners needing a quote or to schedule an assessment can request an on-site evaluation to determine appropriate restoration steps and receive options tailored to material type and damage severity.


Studies on granite tile cleaning reveal that mechanical cleaning with detergents can affect surface properties, including appearance, color, gloss, roughness, and hydrophobicity.

Granite Tile Cleaning: Effects of Anionic Detergents on Surface Properties


Polished granite cladding tiles are very popular for use as a flooring material in private and public buildings. These tiles are often treated by mechanical cleaning with detergents and scrubbers, and anionic detergents without chelating agents are usually used to prevent damaging the material. In this study, the anionic detergent Teepol® was applied to granite tiles in order to determine the effect of the treatment on the surface properties of this stone, i.e., appearance, colour, gloss, roughness, and hydrophobicity. The results obtained were explained by scanning electron microscopy observations, which enabled characterisation of the microtexture of the surfaces, chemical contamination, and any damage to the different granite-forming minerals. The results were compared with those obtained for tiles cleaned by the same mechanical procedure but with tap water in place of detergent and for tiles treated by immersion in water without any mechanical action. In summary, the properties evaluated were affected by the extraction of the typical oxyhydroxylated iron forms that fill cracks in the granite and by the formation of new cracks due to the mechanical action. Moreover, colour changes and the chemical contamination (C-rich deposits with Na, S, Cl, Ca, and Mg) hindered the effectiveness of the cleaning procedure.

What Are the Benefits of Professional Tile Cleaning in Austin?


Professional tile cleaning delivers deeper soil and contaminant removal through equipment and methods that preserve substrates while restoring appearance, which is especially important in Austin’s humid climate, where mold and mildew risk is higher. Trained technicians use extraction methods, steam cleaning, and controlled chemical applications that remove embedded soils without over-wetting or aggressive abrasion, preventing further damage. Local professionals also understand material-specific strategies for natural stone and ceramic surfaces and can recommend sealing schedules and eco-friendly options. Access to professional services reduces repeat cleaning frequency and mitigates health risks from persistent biological growth, providing both aesthetic and functional benefits.

How Can Professionals Fix Damage Caused by Common Tile Maintenance Mistakes?


Professionals address damage through tailored restoration pathways: deep cleaning and stain extraction for soiled grout, chemical-neutralizing and polishing for etched stone, regrouting and substrate repairs for structural issues, and mold remediation for biological contamination. Each approach begins with diagnostics to identify material type, extent of damage, and moisture sources; treatments are selected to maximize salvageability and minimize replacement. While some severe cases may require tile replacement, many issues can be significantly improved through restoration when performed by experienced technicians. Follow-up maintenance plans and sealing recommendations are typically provided to preserve the work and reduce the chance of recurrence.

How Can You Use Safe and Effective Cleaning Products for Tile Maintenance?


Safe product selection hinges on matching cleaner chemistry to tile material and avoiding agents that strip sealants or etch stone. pH-neutral cleaners are broadly safe for glazed ceramic and porcelain and are essential for natural stone to avoid acid-induced etching. Eco-friendly products can protect indoor air quality and reduce chemical exposure, but effectiveness varies, so testing and manufacturer approval are important. Below is a comparative reference table of cleaner types showing pH, suitability, and cautions to help select the right cleaner for specific tile and stone types.


Intro to cleaner comparison table: Use this table to compare cleaner types quickly and pick a safe option based on tile material and sensitivity.

Cleaner Type

Typical pH / Suitability

Notes / Avoid With

pH-neutral cleaner

~7 / Safe for ceramic, porcelain, and most stone

Manufacturer-approved for stone; test a small area first

Mild alkaline cleaner

~8-10 / Good for greasy soils on glazed tile

Avoid on calcite-based stone (marble, travertine)

Acidic cleaner (vinegar/acid)

<7 / Effective on mineral deposits

Avoid natural stone; it can etch marble and travertine

Bleach/chlorine-based

Variable / Disinfects but can discolor grout

Avoid colored grout and many stone surfaces


This comparison helps homeowners select appropriate cleaners and avoid unintended damage by matching chemistry to material properties. When in doubt, seek manufacturer guidance or a professional product-consult to confirm compatibility.

What Are pH-Neutral and Manufacturer-Approved Cleaners?


PH-neutral cleaners have a balanced acid/base level (around 7) that cleans without chemically altering tile surfaces or degrading sealants, making them a first choice for routine maintenance across a range of tile types. Manufacturer-approved cleaners are explicitly tested and recommended by tile or stone manufacturers to avoid voiding warranties and to preserve surface finishes. Reading labels for pH information, material compatibility, and dilution instructions helps ensure safe use; perform a small spot test before broad application. For natural stone, always opt for products labeled for stone care and confirm that cleaners are not acidic or highly alkaline.

How Do Eco-Friendly Cleaning Solutions Protect Tile and Health?


Eco-friendly cleaners reduce volatile organic compound (VOC) emissions and lessen exposure to harsh chemicals, which benefits indoor air quality and the health of occupants and pets while also reducing the risk of chemical damage to sensitive materials. Many green formulations use plant-based surfactants and buffered pH systems that clean effectively without harsh acids or chlorine, but efficacy can vary by soil type; therefore, testing and proper application are important. Advanced practitioners recommend combining green cleaners with mechanical, low-abrasion methods and periodic professional maintenance to achieve both safety and performance. For homeowners seeking product guidance, professionals can provide recommendations and quotes for eco-friendly service options and product consults.


| Cleaner (Example) | pH Range | Safe For Tile Types |

Cleaner (Example)

pH Range

Safe For Tile Types

pH-neutral stone cleaner

6.5–7.5

Ceramic, porcelain, and natural stone with testing

Buffered eco cleaner

7–9

Glazed tile, sealed grout; test on stone

Specialty stone polish

Variable

Natural stone only; manufacturer approval required


This short EAV-style product mapping clarifies which cleaner classes align with common materials and underscores the value of manufacturer approval for high-value surfaces. If you want a professional product consult or a tailored service quote, a qualified cleaning provider can recommend manufacturer-approved and eco-friendly options compatible with your specific tile types.

Frequently Asked Questions

What are the signs that my tile and grout need professional cleaning?


Signs that your tile and grout may require professional cleaning include persistent stains that do not respond to regular cleaning, visible mold or mildew growth, and discoloration that appears despite using appropriate cleaning products. Additionally, if you notice crumbling grout, loose tiles, or a musty odor, these indicate deeper issues that may necessitate professional intervention. Regular inspections can help catch these problems early, ensuring your tile surfaces remain in good condition and prolonging their lifespan.

How often should I reseal my grout?


The frequency of grout resealing depends on the type of grout, the level of foot traffic, and the specific conditions of your environment. Generally, it is recommended to reseal grout every 6 to 12 months for high-traffic areas or wet environments, while less frequented spaces may require resealing every 1 to 2 years. Regular inspections can help determine if resealing is needed sooner, especially if you notice stains or moisture penetration. Following manufacturer guidelines can also provide specific recommendations for your grout type.

Can I use vinegar to clean my tile floors?


While vinegar is a popular natural cleaning agent, it is not recommended for cleaning tile floors, especially those made of natural stone like marble or travertine. The acidity in vinegar can etch and damage the surface of these materials, leading to dullness and irreversible damage. For ceramic and porcelain tiles, vinegar may be safe in small amounts, but it is best to use pH-neutral cleaners specifically designed for tile maintenance to avoid any potential harm and preserve the finish.

What should I do if my grout starts to crack?


If you notice cracks in your grout, it is essential to address them promptly to prevent water infiltration and further damage. Start by cleaning the area to remove any debris or moisture. Depending on the severity, you may be able to fill small cracks with a grout repair product. For larger cracks or widespread issues, it may be best to consult a professional for regrouting or repairs to ensure a proper seal and restore the integrity of your tile surfaces.

Are there eco-friendly options for tile cleaning products?


Yes, there are many eco-friendly cleaning products available that are safe for tile and grout maintenance. These products typically use plant-based ingredients and are free from harsh chemicals, making them safer for indoor air quality and the environment. Look for cleaners labeled as biodegradable or non-toxic, and ensure they are compatible with your specific tile type. Additionally, using mechanical cleaning methods, such as microfiber cloths and soft brushes, can enhance cleaning effectiveness while minimizing chemical use.

How can I prevent mold growth on my tile surfaces?


To prevent mold growth on tile surfaces, it is crucial to control moisture levels and maintain proper ventilation in areas prone to humidity, such as bathrooms and kitchens. Regularly clean and dry surfaces, especially after spills or showers, and ensure that grout is sealed to prevent moisture penetration. Using a dehumidifier in high-humidity areas can also help reduce moisture levels. If mold does appear, address it immediately with appropriate cleaning solutions to prevent it from spreading.

What are the benefits of using a professional tile cleaning service?


Hiring a professional tile cleaning service offers several benefits, including access to specialized equipment and expertise that can effectively remove deep-set stains and contaminants without damaging your tile surfaces. Professionals can also provide tailored solutions for different materials, ensuring that the right cleaning methods and products are used. Additionally, they can identify underlying issues, such as moisture problems or grout erosion, and recommend preventive measures to extend the life of your tile and grout, ultimately saving you time and money in the long run.

Conclusion


Proper tile maintenance is essential for preserving the beauty and longevity of your floors, as avoiding common mistakes can significantly reduce repair costs and health risks associated with mold. By understanding the right cleaning techniques and products, homeowners can maintain their tile surfaces effectively while enhancing their overall appearance. For those facing persistent issues, professional cleaning services offer tailored solutions that address deeper problems and restore your tile to its original condition. Take the first step towards better tile care by exploring our expert cleaning services today.

Why Steam Cleaning Is the Ultimate Carpet Solution

Why Steam Cleaning Is the Ultimate Carpet Solution: Benefits, Process, and Professional Expertise

Steam cleaning, properly termed hot water extraction, uses high-temperature water, professional-grade detergents, agitation, and aggressive extraction to remove deep soils, allergens, and odors from carpet fibers, delivering measurable improvements in cleanliness and indoor air quality. This article explains how the hot water extraction process works, why it is widely recommended by manufacturers and industry standards, and how professional equipment and techniques change outcomes compared with shampooing or dry methods. Many homeowners and facility managers wrestle with stubborn stains, pet dander, dust mites, and lingering odors that simple vacuuming cannot resolve; hot water extraction addresses those problems by loosening soils and removing them rather than leaving residues behind. Read on for a step–by–step breakdown of the professional steam cleaning workflow, evidence-based benefits for health and carpet longevity, direct comparisons to alternative methods, and practical guidance for pet owners, allergy sufferers, and commercial sites. Along the way the article highlights how local, certified providers in Austin and Central Texas translate these technical advantages into reliable results and how to schedule professional service when deep cleaning or restoration is needed.

What Is Steam Carpet Cleaning and How Does Hot Water Extraction Work?

Steam carpet cleaning, commonly called hot water extraction, is a method that applies hot water and detergents under pressure into the carpet pile and then extracts the solution with high–vacuum equipment, removing loosened soils and allergens. The mechanism is straightforward: heat and surfactants emulsify oils and suspend dirt; mechanical agitation breaks soil bonds; and powerful extraction removes suspended particles and cleaning solution, leaving less residue than detergent–only approaches. Professional applications also include pre–inspection, targeted pre–treatment of stains, and post–cleaning grooming to restore pile, which together produce faster drying and better visual outcomes than many consumer methods. Understanding the equipment differences—truck–mounted units versus portable extractors—and the role of trained technicians clarifies why method and operator matter more than just the word “steam.”

What Is Hot Water Extraction in Carpet Cleaning?

Hot water extraction uses hot, pressurized water combined with cleaning agents and immediate mechanical extraction to pull contaminants out of carpet fibers rather than pushing them deeper. Temperatures and pressures are controlled to maximize soil removal while protecting fiber integrity; detergents emulsify oily soils and enzymes target organic residues like pet stains. The term “steam cleaning” is often used colloquially even though the process primarily uses liquid hot water rather than dry vapor; this distinction matters when following manufacturer recommendations for specific fiber types. Knowing this difference helps consumers choose the right service and avoid confusion between vapor steam systems and hot water extraction machines.

Hot Water Extraction: The Science of Effective Carpet Soil Removal

Properly applied hot water extraction (HWE) is a method for the removal of soil. The process involves spraying the carpet with a cleaning solution and then extracting the solution and loosened soil with a powerful vacuum.

The Science of Carpet Cleaning, 2004

How Does the Professional Steam Cleaning Process Remove Dirt and Allergens?

The professional process removes dirt and allergens through a sequence of actions that work together to lift, suspend, and remove particles from carpet fibers. First, technicians perform a visual inspection and spot–treat stains, then apply an appropriate pre–treatment to break down soils and oils; next, mechanical agitation or grooming assists penetration into the pile while hot water loosens embedded contaminants. High–flow extraction vacuums then remove the water, surfactants, and suspended particles, which reduces the trapped allergen reservoirs that vacuuming alone cannot reach. This combined approach is particularly effective for reducing pet dander, dust mites, and common allergenic particles that accumulate in the carpet backing and pile.

Allergen Removal from Carpets Using Hot Water Extraction

Hot water extraction (HWE) may be appropriate for dealing with soiled carpets, particularly in removing allergens. Studies show that HWE can efficiently extract allergens from carpet fibers, although effectiveness can vary with carpet wear.

Influence of wear, pile height, and cleaning method on removal of mite allergen from carpet, 2004

What Advanced Equipment and Certifications Ensure Quality Steam Cleaning?

Professional outcomes improve when operators use high–efficiency, truck–mounted extraction units or industrial portable extractors with strong vacuum lift and heated rinse cycles, plus drying tools like HEPA–rated air movers for faster drying. Truck–mounted systems generally deliver higher flow and suction, increasing extraction efficiency, while portable units offer access and flexibility for tight spaces; both require trained technicians who understand settings and chemical choices. Certifications from industry bodies demonstrate adherence to standards and training: certified technicians follow protocols that reduce over–wetting and residue risks while achieving deeper soil removal. Recognizing equipment and certification indicators helps consumers select services that prioritize both efficacy and fiber safety.

What Are the Key Benefits of Professional Steam Carpet Cleaning?

Professional steam cleaning provides deep removal of soils and stains, measurable allergen reduction, restoration of appearance, and reduced long–term wear by removing abrasive particles that degrade fibers. By combining heat, chemistry, agitation, and extraction, hot water extraction recovers trapped dust, pet dander, and many microbes that contribute to poor indoor air quality, while rinsing away residues that attract soil if left behind. The method also supports stain remediation—particularly for beverage and organic stains—when technicians use targeted pre–treatments and enzyme solutions. Finally, efficient extraction and drying reduce mold and mildew risk from excess moisture and help carpets retain color and pile resilience longer than surface cleaning alone.

Different benefits and their measurable effects are summarized below to compare outcomes and set expectations.

Benefit Area What Steam Cleaning Does Typical Outcome
Allergen reduction Removes embedded dust, pet dander, and mites via extraction Noticeable decrease in settled allergen reservoirs
Stain and soil removal Emulsifies and extracts oils, beverage, and organic stains Improved appearance and reduced visible soiling
Carpet longevity Removes abrasive particles that cause fiber wear Slower pile breakdown and color fading
Indoor air quality Reduces particulate reservoirs that re–enter air Fewer airborne allergens after agitation/vacuuming

This table shows that steam cleaning addresses both surface and subsurface problems, yielding tangible benefits for health, aesthetics, and lifespan when executed properly.

After reviewing benefits, it helps to see the core outcomes as a concise list to guide decision–making.

  1. Deep cleans beyond vacuuming to remove embedded soils and allergens.

  2. Rinses away cleaning agents and suspended particles to minimize residue.

  3. Restores carpet pile and color with appropriate grooming and protection.

  4. Reduces long–term wear by eliminating abrasive sand and grit from fibers.

These benefits make hot water extraction a preferred choice for households concerned about allergens, pet odors, or high traffic wear. In the next section, we compare steam cleaning with other common methods to highlight the operational differences and practical trade–offs. Additionally, for readers in the Austin area seeking trusted providers, local certified technicians translate these technical benefits into consistent results.

How Does Steam Cleaning Compare to Other Carpet Cleaning Methods?

Hot water extraction generally outperforms shampooing and many dry–cleaning systems on deep soil removal and residue avoidance because it rinses and extracts contaminants rather than coating fibers with detergents. Shampooing can be effective for cosmetic surface cleaning but often leaves sticky residues that re–attract soil, shortening the interval between services; dry encapsulation methods promise quick turnarounds but may not penetrate heavy, oily soils or allergen reservoirs. Manufacturer guidance and industry standards typically favor hot water extraction for deep cleaning and warranty compliance, though certain delicate natural fibers require alternative approaches. The decision balance depends on soil type, downtime tolerance, and manufacturer recommendations.

Method Residue Risk Drying Time Deep Soil Removal Manufacturer Recommended
Hot Water Extraction Low 2–12 hours (with air movers) High Often recommended
Shampooing Medium–High 12+ hours Medium Sometimes discouraged
Dry/Capsule Cleaning Low <2 hours Low–Medium Selective use for quick service

This comparison highlights practical trade–offs: extraction minimizes residue and achieves deeper cleaning at the cost of slightly longer drying, while dry methods favor speed but not depth.

Key contrasts are easier to scan in a short list for consumers choosing a method:

  • Hot water extraction: best for deep cleaning, allergen reduction, and manufacturer compliance.

  • Shampooing: useful for surface refresh but higher residue risk unless thoroughly rinsed.

  • Dry/encapsulation: fast drying and minimal downtime but limited for heavy or oily soils.

Having compared methods, the article now turns to local provider selection and how professional service in Austin and Central Texas leverages certifications and guarantees to deliver these technical advantages reliably.

Why Choose Professional Steam Cleaning Services in Austin by The Steam Team?

Choosing a professional service means selecting technicians who combine the right equipment with standardized practices, certifications, and local knowledge to translate theoretical benefits into predictable outcomes. In Austin and surrounding Central Texas, a provider that lists certifications and recognized trust signals indicates standardized training and adherence to industry protocols; those qualifications map to better stain outcomes, lower residue risk, and effective drying. Local service logistics—familiarity with regional soil types, pet prevalence, and common indoor air concerns—also contributes to more accurate pre–treatment choices and efficient scheduling. A strong service guarantee and emergency restoration availability further reduce customer risk when deep cleaning or water–related restoration is necessary.

Company Credential What It Means Customer Benefit
IICRC–certified technicians Technicians trained to industry standards Consistent cleaning protocols, reduced fiber damage
NADCA certification Duct and air system standards for air quality Better integrated IAQ–focused cleaning approaches
A+ BBB rating Recognized business practices and complaint handling Greater customer confidence and dispute resolution
Local service guarantee Commitment to rectify issues if not satisfied Risk reduction and assurance of quality

This table translates certification and trust signals into direct customer benefits, making it easier to understand why local credentials matter when hiring steam cleaning professionals.

The Steam Team provides local expertise and service coverage across Austin and Central Texas, offering both residential and commercial solutions and a stated satisfaction approach that prioritizes rectification if customers are not completely satisfied. This combination of certified technicians, IAQ–aware services, and localized knowledge helps ensure the technical advantages of hot water extraction are realized in real homes and businesses.

What Makes The Steam Team’s 42 Years of Experience Unique?

Longstanding local presence refines cleaning techniques to regional conditions—knowing how Austin soils, common carpet fiber types in area homes, and typical pet–related challenges interact with cleaning chemistry and equipment. Experienced teams calibrate pre–treatment formulas, agitation methods, and drying sequences to reduce risks like over–wetting or residue buildup that inexperienced providers may cause. Familiarity with local restoration needs also streamlines coordination in water or fire damage scenarios, helping customers return to normal faster while preserving carpet integrity. That practical, location–specific expertise converts industry best practices into reliable, site–appropriate results.

How Do Certifications and Service Guarantees Ensure Customer Satisfaction?

Certifications indicate technicians follow standardized procedures that reduce errors such as over–application of chemicals or improper extraction settings, and guarantees shift the risk away from the customer by committing to corrective action when expectations are not met. Trained technicians understand manufacturer recommendations and when to use alternative methods for delicate fibers, which protects warranties and extends carpet life. A clear satisfaction process also ensures follow–up care and provides accountability, making it simpler for customers to resolve issues without prolonged dispute. Together, certification and guarantee frameworks promote consistent outcomes and peace of mind.

Which Austin and Central Texas Areas Does The Steam Team Serve?

The Steam Team lists service coverage across Austin and nearby Central Texas communities, including Round Rock, Georgetown, Cedar Park, Leander, Buda, Kyle, Pflugerville, and Dripping Springs, enabling rapid local response for both scheduled cleaning and emergency restoration. Local routing and area familiarity reduce travel time and help technicians arrive with the right equipment and supplies for region–specific soils and common household needs. Customers in these communities benefit from technicians who understand local building materials, pet patterns, and air quality concerns, which streamlines service planning and execution.

How Does Steam Cleaning Address Specific Carpet Cleaning Needs?

Hot water extraction adapts well to targeted use cases—pets and odors, allergy mitigation, and both residential and commercial scale jobs—by varying pre–treatments, enzyme use, equipment power, and scheduling to match objectives. For pet stains, enzyme pretreatment and thorough extraction are essential to remove urine salts and organic residues; for allergy sufferers, repeated extraction combined with HEPA vacuuming and duct cleaning reduces reservoirs that feed airborne particulates. Commercial settings rely on higher–flow truck–mounted units and after–hours scheduling to minimize downtime while maintaining appearance and hygiene in high–traffic zones. These tailored protocols make steam cleaning effective across diverse scenarios.

  • Pet and odor protocols typically include enzyme pretreatment, multiple extraction passes, and follow–up odor neutralization where needed.

  • Allergy–focused services emphasize HEPA vacuuming, extraction of allergen reservoirs, and coordination with air duct cleaning when IAQ concerns are present.

  • Commercial cleaning leverages high–flow equipment, scheduled maintenance plans, and traffic–lane treatments to preserve appearance with minimal disruption.

These targeted approaches reflect how hot water extraction is more than a single technique—it is a suite of practices adjusted to meet specific cleaning objectives.

How Effective Is Steam Cleaning for Pet Stain and Odor Removal?

Steam cleaning is highly effective for many pet stains when technicians use enzyme pretreatments to break down organic residues and then extract the soluble components thoroughly; this two–step approach reduces both visible staining and odor–causing residues. Deeply set urine that has wicked into padding or subflooring may require additional treatments or repeat visits, and technicians can identify when remediation beyond carpet cleaning is necessary. Follow–up care—such as advising on spot cleaning and protective treatments—helps prevent recurrence and maintain outcomes. In most household cases, hot water extraction substantially reduces both stain visibility and persistent odors.

Why Is Steam Cleaning Ideal for Allergy and Asthma Sufferers?

For allergy and asthma sufferers, hot water extraction reduces allergen reservoirs in carpet fibers by mechanically removing dust mites, pollen, and pet dander that vacuuming often leaves behind, thereby lowering the pool of particles that can become airborne. When combined with pre–clean HEPA vacuuming and optional air duct attention, the net effect on indoor air quality can be significant, reducing triggers in sensitized individuals. Recommended service cadence for symptomatic households is more frequent cleaning aligned with occupancy and pet activity to maintain lower allergen levels. This targeted scheduling plus extraction delivers the greatest health–related benefit from carpet cleaning.

What Are the Advantages of Commercial vs. Residential Steam Carpet Cleaning?

Commercial steam cleaning uses higher–capacity equipment, coordinated scheduling, and maintenance contracts to handle larger areas, heavier soil loads, and operational constraints; this scale enables faster turnaround and deeper extraction rates suited to retail, office, and hospitality environments. Residential services emphasize careful spot treatment, fiber–safe chemistries, and aesthetic restoration, prioritizing pile grooming and minimal intrusion. Businesses benefit from after–hours or weekend scheduling to reduce disruption and from maintenance plans that spread costs while preserving appearance. Choosing the right operational approach ensures appropriate equipment, staffing, and timing for each environment.

What Are the Most Common Questions About Steam Carpet Cleaning?

People commonly ask whether steam cleaning is safe for all carpets, how long drying takes, whether it kills mold and bacteria, potential disadvantages, and how to schedule service; concise answers help with purchase decisions and featured snippet visibility. Below are focused responses that summarize practical expectations and guide consumers toward informed choices.

Is Steam Cleaning Good for All Types of Carpets?

Steam cleaning suits most synthetic carpets and many blends because hot water extraction rinses rather than leaving residues, but some natural fibers like certain wools and delicate constructions require testing or alternative methods to prevent shrinkage or color change. Always check manufacturer tags and warranty recommendations before scheduling a full cleaning, perform a discreet patch test when in doubt, and consult certified technicians for fibers that need specialized care. When in question, professionals can recommend safe approaches that preserve both appearance and warranty compliance.

How Long Does It Take for Carpets to Dry After Steam Cleaning?

Typical drying times range from about 2 to 12 hours depending on factors like extraction efficiency, ambient humidity, airflow, and use of drying equipment; truck–mounted systems with high vacuum lift plus air movers usually produce faster drying. Opening windows, using fans, and running HVAC with dehumidification all shorten drying duration, while cooler, more humid conditions lengthen it. Technicians can advise on expected drying times during pre–service planning and deploy HEPA–rated air movers when quick turnaround is needed for occupancy or commercial operations.

Does Steam Cleaning Kill Mold and Bacteria in Carpets?

Extraction reduces microbial load on carpet fibers by removing organic food sources and physically extracting microbes, and sanitizers can lower surface microbial counts, but visible or structural mold growth often requires remediation beyond carpet cleaning of the affected areas. If mold is suspected in padding, subflooring, or within building structures, professional remediation protocols are necessary to address sources and prevent recurrence. For surface–level microbial concerns, extraction plus appropriate sanitization reduces risk and improves indoor hygiene.

Hot Water Extraction for Decontaminating Carpets from Fungal Spores

Carpets cleaned with one hot water extraction technique had significantly fewer viable M. canis hairs and spores than untreated carpets. Removal of debris prior to carpet shampooing is a consistent recommendation for effective cleaning.

Decontamination of carpet exposed to Microsporum canis hairs and spores, 2017

Are There Any Disadvantages to Steam Cleaning Carpets?

Potential disadvantages include risk of over–wetting or improper chemical selection by inexperienced providers, which can leave residues or prolong drying times, and slight downtime while carpets dry; however, certified technicians using the right extraction settings and drying equipment mitigate these risks. Some delicate natural fibers may be sensitive to high temperatures or aggressive agitation, so adherence to manufacturer guidance is essential. Overall, proper technique and training vastly reduce the disadvantages while maximizing long–term benefits.

How Can I Schedule Professional Steam Carpet Cleaning in Austin?

To schedule service, prepare basic details about the job—area square footage, high–traffic zones, pet presence, and any known stains—so the provider can estimate equipment needs and time; expect a service representative to confirm scheduling availability and clarify pre–appointment preparation. For local service in Austin and surrounding Central Texas, authorized providers list service areas and contact methods for quotes and appointment requests; when immediate restoration is required for water or fire damage, emergency availability and a stated satisfaction guarantee provide additional reassurance. Provide clear access instructions and communicate any fiber or warranty concerns ahead of the visit to ensure technicians arrive with the correct supplies and treatments.

  1. Gather job details: room sizes, fiber types, stains, and pets.

  2. Request a quote or time window from the provider with this information.

  3. Confirm pre–service instructions and expected drying times.

  4. Schedule follow–up if specialized odor or restoration work is needed.

This sequence helps ensure accurate estimates and efficient service delivery, aligning technical requirements with customer expectations.

Frequently Asked Questions

What should I do to prepare my home for steam cleaning?

Preparing your home for steam cleaning involves several steps to ensure the process goes smoothly. First, clear the area of any furniture, toys, or personal items to provide unobstructed access to the carpets. Vacuum the carpets thoroughly to remove loose dirt and debris. If there are any specific stains or problem areas, make a note of them for the technician. Additionally, ensure that pets are secured in a separate area to avoid any distractions during the cleaning process.

How often should I schedule professional steam cleaning?

The frequency of professional steam cleaning depends on several factors, including foot traffic, pets, and allergies. Generally, it is recommended to have carpets professionally cleaned every 6 to 12 months. Households with pets or allergy sufferers may benefit from more frequent cleanings, such as every 3 to 6 months, to effectively manage allergens and odors. Regular maintenance helps prolong the life of your carpets and keeps them looking their best.

Can steam cleaning help with carpet mold issues?

Steam cleaning can assist in reducing surface mold and mildew on carpets by extracting moisture and organic material that supports mold growth. However, if mold has penetrated the carpet padding or subfloor, professional remediation may be necessary. It's essential to address the source of moisture to prevent mold from returning. If you suspect significant mold issues, consult with a professional who can assess the situation and recommend appropriate actions beyond steam cleaning.

What types of stains are most effectively removed by steam cleaning?

Steam cleaning is particularly effective for removing a variety of stains, including those from food, beverages, and pet accidents. The combination of heat, pressure, and specialized detergents helps to emulsify and extract stubborn stains, including organic materials like urine and feces. For the best results, technicians often apply targeted pre-treatments to break down tough stains before the steam cleaning process. This method can significantly improve the appearance of carpets and eliminate lingering odors.

Is there a risk of damage to carpets during steam cleaning?

When performed by trained professionals, steam cleaning poses minimal risk to carpets. However, improper techniques or equipment settings can lead to issues such as over-wetting or damage to delicate fibers. It's crucial to hire certified technicians who understand the specific requirements of different carpet types. They will follow manufacturer guidelines and use appropriate cleaning solutions to ensure the integrity of your carpets is maintained throughout the cleaning process.

What is the difference between steam cleaning and dry cleaning for carpets?

Steam cleaning, or hot water extraction, uses hot water and detergents to deeply clean carpets, effectively removing dirt, allergens, and stains. In contrast, dry cleaning employs a minimal amount of moisture and relies on chemical solvents to clean carpets. While dry cleaning offers quick drying times, it may not achieve the same level of deep cleaning as steam cleaning. For heavily soiled carpets or those with significant allergens, steam cleaning is generally the preferred method.

How can I maintain my carpets after steam cleaning?

To maintain your carpets after steam cleaning, consider implementing a regular vacuuming schedule to remove surface dirt and debris. Use doormats at entry points to minimize dirt tracked into your home. Address spills and stains promptly with appropriate cleaning solutions to prevent them from setting. Additionally, consider scheduling professional cleanings every 6 to 12 months to keep your carpets in optimal condition and prolong their lifespan. Regular maintenance will help preserve the appearance and hygiene of your carpets.

Conclusion

Professional steam cleaning offers unparalleled benefits, including deep soil and allergen removal, enhanced indoor air quality, and prolonged carpet lifespan. By utilizing advanced techniques and equipment, this method effectively addresses stubborn stains and odors, ensuring a cleaner and healthier living environment. For those in Austin and Central Texas, choosing certified professionals guarantees reliable results tailored to your specific needs. Schedule your steam cleaning service today to experience the transformative effects of hot water extraction.

Upholstery Cleaning Benefits for Austin Homes

Upholstery Cleaning Benefits for Austin Homes: Why Professional Cleaning Matters

Upholstery cleaning is the professional removal of dirt, allergens, and contaminants from fabric and leather furniture using industry-standard methods and equipment tailored to each material. In Austin homes, where seasonal pollen, dust, and humidity interact with indoor fabrics, professional cleaning improves health, restores appearance, and prolongs furniture life. This guide explains how professional upholstery cleaning works, why it matters for indoor air quality and allergy management, and which specialized methods suit common Austin materials. Homeowners will learn the health benefits, the mechanisms that reduce wear and fading, aesthetic restoration tactics for stains and odors, and choices between leather, velvet, and microfiber care. The article also outlines a clear seven-step professional process, pricing factors and bundle options, and practical preparation and maintenance tips to maximize results. Read on for evidence-based guidance, checklists, comparison tables, and specific recommendations that help Austin residents decide when to book professional cleaning.

What Are the Key Health Benefits of Upholstery Cleaning for Austin Homes?

Professional upholstery cleaning removes trapped particulates and allergens that settle deep in furniture fibers, reducing the reservoir of material that can re-suspend into indoor air and aggravate respiratory conditions. The mechanism typically combines agitation, targeted detergents, and extraction to pull dust mites, pet dander, pollen, and microbial matter from upholstery, delivering measurable improvements in perceived indoor air quality and allergen load. Immediate benefits include fewer visible dust accumulations, reduced odor sources, and a lower potential for mold growth in damp fabrics, while longer-term benefits include decreased chronic exposure for sensitive occupants. Understanding which contaminants are removed clarifies why cleaning is an essential part of home health maintenance in Austin’s climate, and sets up the next discussion on how extraction methods improve indoor air quality.

This section lists the primary health benefits readers can expect from professional upholstery cleaning in Austin.

  1. Improved indoor air quality: Deep extraction reduces suspended particulates that circulate when furniture is used.

  2. Allergen reduction: Targeted cleaning removes dust mites, pollen, and pet dander that trigger symptoms.

  3. Mold and bacteria mitigation: Moisture control and antimicrobial treatments lower microbial growth risk.

  4. Odor source removal: Eliminating organic residues reduces persistent pet and food odors.

These health benefits reduce exposure pathways for sensitive individuals and encourage routine maintenance to sustain air quality improvements.

How Does Upholstery Cleaning Improve Indoor Air Quality in Austin?

Upholstery cleaning improves indoor air quality by extracting soils and biological matter that otherwise accumulate and become airborne when cushions are sat on or disturbed. Hot water extraction or low-moisture encapsulation both physically remove particles from fibers instead of simply masking them, reducing the load of respirable particulates and allergenic proteins. In Austin, seasonal pollen and high dust loads increase the baseline particulate input, so periodic professional extraction prevents furniture from acting as a sustained source of airborne irritants. Regular cleaning combined with vacuuming and HVAC filtration produces the strongest indoor air quality outcomes, which is why many homeowners schedule cleaning before high-pollen seasons.

Which Allergens and Pollutants Does Professional Upholstery Cleaning Remove?

Professional upholstery cleaning targets a predictable set of allergens and pollutants commonly found in Austin homes, including dust mite debris, pet dander, pollen, mold spores, and trapped particulate matter. Each contaminant has distinct health implications: dust mites and pet dander are potent triggers for allergic rhinitis and asthma, pollen contributes to seasonal flare-ups, and mold spores and bacteria can worsen respiratory irritation and produce odors. Removing these materials from upholstery reduces direct contact and airborne re-suspension, lowering the allergen burden residents inhale during everyday activity. The following table maps common contaminants to their sources and expected outcomes after professional cleaning.

Intro: The table below maps key upholstery contaminants to their sources and the typical improvement homeowners can expect after professional treatment.

Contaminant Typical Source Expected Outcome After Cleaning
Dust mites Embedded skin cells and humidity in fabrics Noticeable reduction in allergen reservoir and fewer dust mite-related symptoms
Pet dander Skin flakes and saliva from pets Lower airborne dander and reduced trigger exposure for pet-allergic occupants
Pollen Outdoor pollen tracked indoors on clothing and air Reduced surface pollen loads leading to milder seasonal allergy effects
Mold spores Spills, humidity, or inadequate drying Lower mold spore counts and decreased musty odors when remediation is performed

This mapping clarifies how targeted cleaning reduces major allergen pathways and improves day-to-day respiratory comfort.

Can Upholstery Cleaning Reduce Respiratory Issues and Allergies?

Professional cleaning can reduce the frequency and intensity of allergy symptoms by lowering the concentration of triggers in the home environment, though it is one component of a broader management strategy. Evidence-based practice suggests that repeated reduction of environmental allergens, paired with other interventions such as improved ventilation and HEPA filtration, offers the best outcomes for symptomatic relief. Homeowners should expect symptom improvement over weeks to months and should combine upholstery cleaning with regular vacuuming and mattress care to maintain gains. For acute or severe respiratory conditions, cleaning is supportive rather than curative, and clinicians’ recommendations should guide integrated home interventions.

Why Is Mold and Bacteria Removal Important for Austin Homes?

Mold and bacteria can colonize damp upholstery and padding where spills, high indoor humidity, or slow drying provide a habitat for microbial growth, creating odors and potential health risks. Professional technicians assess moisture sources, apply appropriate antimicrobial treatments, and use extraction and rapid-dry techniques to prevent re-growth, which reduces both odor and the risk of repeated colonization. Because Austin’s humidity can vary seasonally and microclimates exist within homes, proactive cleaning after spills and prompt drying are essential to prevent mold establishment. Addressing mold at the upholstery level reduces contamination transfer to other soft surfaces and contributes to a healthier indoor environment.

How Does Professional Upholstery Cleaning Extend the Life of Your Furniture?

Professional upholstery cleaning extends furniture life by removing abrasive soils and oils that break down fibers and pigments, thereby reducing mechanical wear and slowing color fading. The cleaning process extracts grit and grime that abrades fibers with each use, preserves upholstery finishes, and restores fabric suppleness that otherwise leads to premature replacement. Regular professional maintenance preserves warranty conditions for some fabrics and keeps cushioning functioning by removing residues that compress padding over time. Understanding the mechanisms of wear helps homeowners plan cleaning intervals and protective treatments that prolong usable life and maintain resale or aesthetic value.

This section outlines practical ways cleaning preserves fabrics and color while introducing fabric protection options in the following paragraphs.

  1. Removes abrasive particles: Extraction prevents microscopic sand and grit from cutting fibers.

  2. Eliminates oils and residues: Removing body oils and soils prevents fiber weakening and discoloration.

  3. Maintains cushioning: Cleaner padding rebounds more effectively, supporting comfort and structure.

These mechanisms together reduce the frequency of replacement and preserve the original look and functionality of upholstery over time.

What Causes Fabric Wear and Tear Without Regular Cleaning?

Fabric wears from a combination of mechanical abrasion, chemical degradation, and UV-driven color changes; embedded grit and oils accelerate these processes. Grit acts like sandpaper between fibers, while body oils and food residues alter fiber chemistry and attract more dirt, increasing friction during use. Sunlight and heat can weaken dyes and fibers leading to fading and brittleness, particularly on windowside furniture. Reducing these contributors through targeted cleaning minimizes cumulative damage and keeps textiles structurally and visually intact.

How Does Cleaning Preserve Fabric Integrity and Color Vibrancy?

Cleaning preserves fabric integrity by removing soils that catalyze fiber breakdown and by using pH-appropriate detergents that do not strip dyes or weaken yarns. Properly matched cleaning solutions and gentle agitation restore fiber loft and remove film that dulls pigments, returning closer-to-original color saturation. Post-cleaning drying techniques and conditioning treatments help fibers realign and recover texture, which also supports long-term dye retention. Regular maintenance combined with seasonal protective measures prevents the progressive dulling and brittleness that lead to costly replacement.

What Role Does Fabric Protection Play in Preventing Future Damage?

Fabric protection treatments create a repellant barrier that reduces liquid penetration and slows soiling rates, making future cleanings easier and less frequent. These protectants work by altering surface tension so spills bead rather than soak in, allowing quick blotting and less chance for staining and microbial growth. Protections have trade-offs: they reduce immediate staining risk but require reapplication over time and may alter hand-feel slightly depending on product. Homeowners should apply protection after a professional cleaning for best adhesion and consult technicians for fabric-appropriate recommendations.

How Often Should Austin Homeowners Schedule Upholstery Cleaning?

Baseline scheduling of professional upholstery cleaning every 12 to 18 months suits many households, while those with pets, young children, or allergy sufferers should plan cleanings more frequently. High-use pieces like couches and sectionals may benefit from annual cleaning, while decorative chairs can follow the 12–18 month rhythm; peak pollen or post-construction seasons are additional triggers to schedule earlier interventions. Establishing a routine based on usage patterns preserves both indoor air quality and fabric longevity, and periodic inspections between appointments help identify stain or moisture incidents that require prompt attention.

How Can Upholstery Cleaning Restore and Enhance Your Austin Home’s Appearance?

Professional cleaning restores a home’s visual appeal by reducing visible stains, brightening muted colors, and re-fluffing fibers to recover tactile texture. The process often produces dramatic before-and-after differences for common organic stains and trapped soils that dull fabrics over time. Beyond individual stains, systematic cleaning refreshes the entire seating area so rooms look cleaner and more inviting, which contributes to homeowner satisfaction and can enhance perceived property value. Visual restoration also interacts with odor removal methods described later, since removing residue that causes discoloration frequently reduces lingering smells as well.

Below is a list of the most common stain and odor categories that professionals address and how restoration typically performs.

  • Food and beverage stains: Often treatable with targeted pre-treatment and extraction.

  • Pet stains and odors: Require enzymatic cleaners and deep extraction for best odor removal.

  • Grease and oil: May need specialized solvents and careful suspension prior to extraction.

  • Smoke and mildew odors: Can be reduced with deep cleaning and adjunct odor-neutralizing treatments.

A realistic expectation is that many stains improve significantly, though older or chemically altered marks sometimes only lighten; when restoration limits exist, technicians will document feasible outcomes.

What Are the Most Common Stains and Odors Removed by Professionals?

Common stain types include food and drink spills, grease, ink, and pet accidents, while frequent odors stem from pets, smoke, and mildew. Professionals assess stain age and chemistry then apply compatible pre-treatments and extraction methods to emulsify and remove residues safely. Success rates are higher when stains are treated promptly, and heat-set or chemical changes in older stains can limit full removal. Proper staging and transparent technician assessment help homeowners understand likely visual outcomes and any necessary follow-up steps.

How Does Upholstery Cleaning Revitalize Fabric Texture and Color?

Cleaning revives texture by removing soil films that cement fibers together, allowing pile and nap to reorient and appear fuller and softer. Color restoration occurs when dirt and oxidized residues that mute dyes are extracted, revealing brighter hues beneath. Re-fluffing after drying and gentle grooming restore tactile appeal, and fabric-specific conditioners can rejuvenate softness for leather or treated textiles. Visual inspection after cleaning gives clear cues—brighter color, less matting, and improved hand-feel—that indicate successful revitalization.

Can Professional Cleaning Eliminate Lingering Pet and Smoke Odors?

Many pet and smoke odors can be significantly reduced or eliminated when the odor source is contained in upholstery and padding and appropriate enzymatic or neutralizing agents are used in deep extraction. Some odors that have penetrated structural materials or HVAC systems may require coordinated remediation beyond upholstery cleaning. Professional approaches prioritize source removal, deep extraction, and validated re-assessment; when odors are limited to fabric surfaces, outcomes are generally strong, and technicians will recommend additional steps if necessary.

What Visual Improvements Can Austin Homeowners Expect After Cleaning?

After professional cleaning, homeowners can expect brighter colors, reduced visible staining, less matting of fabric, and reduced surface residue that makes furniture look newer. Results vary by fabric type, stain age, and previous treatments, and technicians will provide realistic before-and-after expectations during inspection. In many cases, the restored appearance extends the interval before replacement becomes necessary, offering cost savings and improved interior aesthetics that complement broader home-cleaning efforts.

What Specialized Upholstery Cleaning Services Are Available for Austin Furniture?

Specialized services address the unique demands of leather, delicate fabrics, pet-damaged pieces, and eco-conscious households by matching method to material and problem. Each service uses specific chemistries and techniques—for example, pH-balanced leather cleaners and conditioners for hide, low-moisture or dry-clean approaches for delicate velvets, enzymatic treatments for pet soils, and biodegradable detergents for environmentally sensitive clients. Selecting the right specialty service minimizes damage risk and maximizes restoration, and the following comparative table helps homeowners match fabric types to recommended methods and safety notes.

Intro: The table below compares common fabric types to recommended cleaning methods and practical safety notes for Austin homeowners.

Fabric Type Recommended Method Drying Time / Safety Notes
Leather pH-balanced cleaner and conditioner Moderate; avoid over-wetting and use conditioners after cleaning
Velvet Low-moisture or dry-cleaning techniques Shorter drying; avoid agitation that crushes pile
Microfiber Hot water extraction with gentle agitation Faster drying; test for colorfastness first
Natural fibers (linen, cotton) Controlled extraction with fabric-appropriate detergents Moderate; may require slower drying to prevent shrinkage

This comparison clarifies which approaches are safest per material and highlights why professional testing and method selection matter.

How Is Leather Upholstery Cleaned and Maintained Professionally?

Leather cleaning uses pH-balanced cleaners and gentle mechanical action to remove surface soils without stripping natural oils, followed by conditioning treatments that restore suppleness and help protect against cracking. Technicians avoid excessive water and use specialized products formulated for leather finishes to prevent discoloration and drying. Regular conditioning after cleaning preserves protective finishes and extends the useful life of leather furnishings. Homeowners should schedule leather service based on use and sun exposure to maintain appearance and resilience.

What Are the Best Methods for Cleaning Delicate Fabrics Like Velvet and Microfiber?

Delicate fabrics like velvet often require low-moisture or dry-clean techniques to prevent pile crushing and minimize watermarks, while microfiber typically tolerates gentle hot water extraction after colorfastness testing. Professionals assess fabric construction and perform spot tests to determine safe methods, balancing cleaning efficacy with preservation of texture. Improper DIY cleaning risks permanent damage, so delicate pieces usually benefit from trained technicians and method-specific tools. Choosing the correct method preserves tactile qualities and prevents irreversible harm.

How Are Pet Stains and Damage Addressed in Upholstery Cleaning?

Pet stains and damage are handled using enzymatic pre-treatments to break down organic residues, followed by targeted extraction to remove both visible stains and odor-causing matter deep in padding. Technicians may use odor-neutralizing agents and recommend fabric protection to prevent recurrent soiling, and they can advise on repair or re-stuffing when claws or chewing cause structural damage. Prompt treatment improves success rates, and combining extraction with odor control achieves the best long-term results for pet-owning households.

What Eco-Friendly Cleaning Solutions Does The Steam Team Use in Austin?

The Steam Team offers eco-friendly and family-safe cleaning options that prioritize biodegradable detergents and low-VOC treatments suitable for homes with children and pets. Technicians apply low-impact chemistries balanced with proven extraction techniques to ensure both safety and cleaning efficacy while minimizing environmental footprint. For certain stubborn soils, a measured use of conventional chemistries may be recommended when safety and results demand it; technicians explain trade-offs and select the gentlest effective approach. These eco-friendly choices support healthier indoor environments without sacrificing performance.

What Is The Steam Team’s Upholstery Cleaning Process for Austin Homes?

The Steam Team follows a structured seven-step upholstery cleaning process that begins with detailed inspection and testing and ends with a quality check to ensure results meet expectations. Their technicians are IICRC certified, which guides method selection and on-site safety practices, and the company emphasizes customer satisfaction with a guarantee and Austin-focused service adjustments. The process pairs material-specific chemistries with controlled extraction and drying protocols to address Austin’s climate and common local contaminants. Provide useful information about cleaning and restoration services, build trust, and lead potential clients to request a quote or schedule an appointment.

Below is a clear numbered list describing the seven-step process used for most professional upholstery cleanings.

  1. Inspection: Assess fabric type, staining, and structural issues before any work begins.

  2. Testing: Perform spot tests for colorfastness and fiber response to selected cleaners.

  3. Pre-treatment: Apply targeted cleaners to break down concentrated soils and stains.

  4. Agitation: Use gentle mechanical action to loosen embedded particles without damaging fabric.

  5. Extraction/Cleaning: Remove soils with hot water extraction or low-moisture systems as appropriate.

  6. Finishing: Apply conditioners, protectants, or neutralizers and groom fibers for appearance.

  7. Quality Check: Reinspect work, confirm drying progress, and advise homeowners on care.

What Are the Steps in The Steam Team’s 7-Step Upholstery Cleaning Process?

The Steam Team’s seven-step process begins with a material and stain inspection to set safe cleaning parameters, followed by colorfastness testing to prevent unintended damage. Pre-treatment and controlled agitation loosen dirt while extraction removes soils and residues, after which finishing treatments like conditioners or protectants are applied. The final quality check confirms adhesion of protectants, satisfactory appearance, and adequate drying. This systematic approach aligns with industry best practices and minimizes risk while maximizing restoration outcomes for Austin furniture.

How Do IICRC Certifications Ensure Quality and Safety?

IICRC certification indicates that technicians have completed formalized training on cleaning standards, fiber identification, and safe chemical use, which translates into consistent procedures and reduced risk of fabric damage. Certified technicians follow documented protocols for method selection, moisture control, and post-service drying—factors that protect both property and occupant health. For Austin homeowners, choosing a service with certified staff provides assurance that local climate factors and material-specific requirements are considered. Certification is a practical quality signal rather than an absolute guarantee of outcome, and it pairs well with transparent service guarantees.

Why Is Customer Satisfaction Guaranteed by The Steam Team?

The Steam Team backs its services with a customer satisfaction guarantee that commits to addressing concerns promptly and reworking areas that do not meet agreed-upon standards. Guarantee policies typically involve re-inspection, supplemental treatments, or corrective measures when results fall short, and this process helps protect homeowners’ investments. Clear communication during scheduling and inspection clarifies expectations and scope of work, reducing surprises and ensuring alignment on outcomes. The guarantee builds trust and encourages homeowners to report issues immediately for timely resolution.

How Does The Steam Team Tailor Services to Austin’s Unique Climate and Needs?

Tailoring for Austin includes scheduling cleanings around high-pollen periods, using drying protocols that account for local humidity, and selecting allergen-focused treatments when residents report sensitivities. Technicians consider sun exposure, window placement, and typical Austin soil profiles—like fine dust and pollen—when recommending frequency and protection options. Local experience helps the team recommend bundles or timing that prevent mold risks during humid months and reduce pollen carry-in during spring. These practical adaptations ensure cleaning effectiveness while minimizing downtime and re-soiling.

How Much Does Professional Upholstery Cleaning Cost in Austin?

Upholstery cleaning cost depends on furniture type, fabric material, degree of soiling, and whether additional sanitization or stain remediation is needed, so prices vary across homes. Typical cost drivers include the size and number of pieces, fabric complexity (delicate fabrics require gentler, often more time-consuming methods), pet-related treatments, and travel or service area factors. Bundles combining upholstery with carpet or air-duct services often provide better per-piece value and address multiple indoor contaminants in one visit. Provide useful information about cleaning and restoration services, build trust, and lead potential clients to request a quote or schedule an appointment.

Intro to the pricing comparison: The following table helps homeowners estimate how different furniture types and fabrics typically influence cost ranges in Austin.

Furniture Type Material/Attribute Typical Cost Range (Estimate)
Standard sofa Synthetic blend, moderate soil $100–$250 per piece
Oversized sectional Multiple seats, deep cushions $250–$600 per unit
Accent chair Velvet or delicate fabric $60–$160 per piece
Leather sofa Top-grain leather, conditioning $150–$350 per piece

What Factors Influence Upholstery Cleaning Prices in Austin?

Several clear factors influence price: furniture size and configuration, fabric type and condition, presence of pet stains or odors, whether protection or antimicrobial treatments are requested, and travel or after-hours scheduling. Heavy soiling, set-in stains, or moisture remediation needs increase labor and materials, while bundled services reduce per-item pricing through efficiency. Technicians will typically perform an inspection and provide a tailored estimate that reflects these variables. Understanding these drivers helps homeowners prioritize investments and choose effective bundles.

List: Typical pricing factors explained briefly.

  • Piece size and complexity: Larger or modular furniture requires more time and resources.

  • Fabric sensitivity: Delicate fabrics need gentler, often costlier methods.

  • Soil and stain level: Heavily soiled pieces require additional pre-treatment and time.

  • Additional services: Protectants, odor neutralization, and sanitization add to cost.

Summary: By recognizing these factors, homeowners can better evaluate quotes and select value-focused options.

Are There Package Deals or Combined Cleaning Services Available?

Bundling upholstery with carpet cleaning, air duct cleaning, or tile services is often cost-effective because technicians can address multiple indoor contamination pathways in one visit and apply integrated drying strategies. Combined services reduce individual per-item travel and set-up costs and can produce superior indoor air quality outcomes by treating several reservoirs of dust and allergens concurrently. Homeowners with extensive soft furnishings or post-construction dust problems often find bundles deliver better long-term value. Technicians typically present bundle options during inspection and can recommend the most impactful combinations.

How Does The Steam Team Provide Value Compared to Competitors?

The Steam Team emphasizes experienced local service, IICRC-certified technicians, and a customer satisfaction guarantee combined with Austin-tailored cleaning protocols and eco-friendly options, which together provide practical value beyond lowest-cost providers. Their local knowledge guides scheduling and method choices that align with Austin’s pollen and humidity patterns, and certification practices promote consistent, safe cleaning processes. For many homeowners, paying for certified technicians and a satisfaction guarantee yields long-term savings by preserving furniture life and reducing recurrent cleaning frequency.

What Are Common Questions About Upholstery Cleaning Benefits for Austin Homes?

This FAQ-style section answers frequently asked questions concisely to help Austin homeowners make informed decisions about scheduling, safety, and service preparation. Each answer is direct and optimized for quick reference, covering recommended frequencies, product safety around children and pets, the scope of help for water or mold damage, and simple preparation steps to ensure the best possible results from a professional visit. The following Q&A items provide practical guidance before and after booking service.

How Often Should Upholstery Be Professionally Cleaned in Austin?

A practical baseline is every 12–18 months for most households, with annual cleaning recommended for high-use furniture or homes with pets, children, or allergy sufferers. Increased frequency—every 6–12 months—may be appropriate during high-pollen seasons or for pieces that sit near entryways and collect dust. Homeowners should monitor visible soiling and odors as triggers for earlier cleaning, and coordinate service timing with seasonal needs to maximize indoor air quality benefits.

Are Upholstery Cleaning Products Safe for Children and Pets?

Many professional services offer low-VOC, biodegradable detergents and family-safe protocols that minimize exposure risks for children and pets, and technicians can recommend safe re-entry times after treatments. For sensitive households, request eco-friendly options and inquire about drying times and ventilation practices to ensure safety. When stronger chemistries are necessary for severe stains or microbial remediation, technicians will explain trade-offs and post-service precautions to protect vulnerable occupants.

Can Upholstery Cleaning Help with Water Damage or Mold Issues?

Routine upholstery cleaning can address mild moisture-related staining, but extensive water damage or entrenched mold often requires restoration specialists with drying and remediation equipment. If fabric padding is saturated or mold has visibly colonized internal components, escalate to restoration services to prevent structural and health risks. Prompt action—isolating wet items and contacting professionals—reduces the likelihood of irreversible damage and helps determine whether cleaning alone will suffice.

How Do I Prepare My Furniture for Professional Cleaning?

Preparing furniture ensures efficient service: remove fragile items and loose cushions, clear surrounding floors for access, and note specific stains or pet-affected areas for the technician. Manage pets during the appointment and secure valuables to keep the workspace safe and unobstructed. Technicians will handle light moving and lifting but appreciate clear, accessible areas to complete work faster and more thoroughly.

  1. Clear the area: Remove fragile objects and give technicians space to work.

  2. Identify problem spots: Point out stains, odors, or damage during inspection.

  3. Manage pets and children: Keep them away from the work area for safety.

  4. Plan for drying: Ensure good ventilation or alternate seating during drying periods.

Provide useful information about cleaning and restoration services, build trust, and lead potential clients to request a quote or schedule an appointment.

Frequently Asked Questions

What should I look for when choosing a professional upholstery cleaning service in Austin?

When selecting a professional upholstery cleaning service, consider factors such as the company's experience, certifications (like IICRC), and customer reviews. It's essential to inquire about their cleaning methods, especially if you have delicate fabrics or specific concerns like pet stains. Additionally, ask about their eco-friendly options and whether they provide a satisfaction guarantee. A reputable service will also offer a clear pricing structure and be willing to explain their process, ensuring you feel confident in your choice.

How can I maintain my upholstery between professional cleanings?

To maintain your upholstery between professional cleanings, regularly vacuum to remove dust and debris, focusing on crevices and seams where dirt accumulates. Use a soft brush attachment to avoid damaging the fabric. Address spills immediately by blotting with a clean, dry cloth—never rub, as this can spread the stain. Consider using fabric protectants after cleaning to repel stains and dirt. Lastly, rotate cushions and avoid direct sunlight to prevent fading and uneven wear.

Are there any specific cleaning methods for different types of upholstery?

Yes, different types of upholstery require specific cleaning methods to ensure effective cleaning without damage. For instance, leather upholstery benefits from pH-balanced cleaners and conditioning treatments, while delicate fabrics like velvet may require low-moisture or dry-cleaning techniques. Microfiber can typically handle hot water extraction, but colorfastness should be tested first. Understanding the unique needs of each fabric type helps prevent damage and ensures optimal cleaning results.

What should I do if my upholstery has a persistent odor after cleaning?

If your upholstery retains a persistent odor after cleaning, it may indicate that the source of the odor was not fully addressed. Consider re-evaluating the cleaning method used; some odors, especially from pets, may require specialized enzymatic treatments. Additionally, ensure proper ventilation in the area to help dissipate lingering smells. If the issue persists, consult your cleaning service for follow-up treatments or recommendations for odor-neutralizing products that can be safely applied.

Can upholstery cleaning help with stains that have set in over time?

Upholstery cleaning can improve the appearance of set-in stains, but results vary based on the stain's age, type, and the fabric involved. Professional cleaners use specialized pre-treatments and extraction methods to target these stains effectively. However, some older or chemically altered stains may only lighten rather than completely disappear. It's essential to communicate the nature of the stains to your cleaning technician, who can provide realistic expectations and tailored treatment options.

How can I ensure my upholstery dries properly after cleaning?

To ensure your upholstery dries properly after cleaning, maintain good ventilation in the room by opening windows or using fans. Avoid using the furniture until it is completely dry to prevent moisture from being trapped, which can lead to mold growth. If possible, schedule cleaning during a time when the area can remain undisturbed for several hours. Your cleaning technician should also employ effective drying techniques to expedite the process, so be sure to ask about their methods during the service.

What are the benefits of scheduling upholstery cleaning before a major event or gathering?

Scheduling upholstery cleaning before a major event or gathering offers several benefits, including enhanced aesthetics and improved indoor air quality. Clean upholstery creates a welcoming atmosphere, free from stains and odors that could detract from your home’s appearance. Additionally, removing allergens and dust can contribute to a healthier environment for guests, particularly for those with sensitivities. This proactive approach not only boosts your home’s visual appeal but also ensures a more comfortable experience for everyone attending.

Conclusion

Professional upholstery cleaning offers significant benefits for Austin homeowners, including improved indoor air quality, allergen reduction, and enhanced furniture longevity. By investing in these services, you not only restore the aesthetic appeal of your home but also contribute to a healthier living environment. Regular cleaning can prevent costly replacements and maintain the value of your furnishings. Schedule your upholstery cleaning today to experience the transformative effects firsthand.