
Air Duct Cleaning Cost in Austin: Complete Pricing Guide
/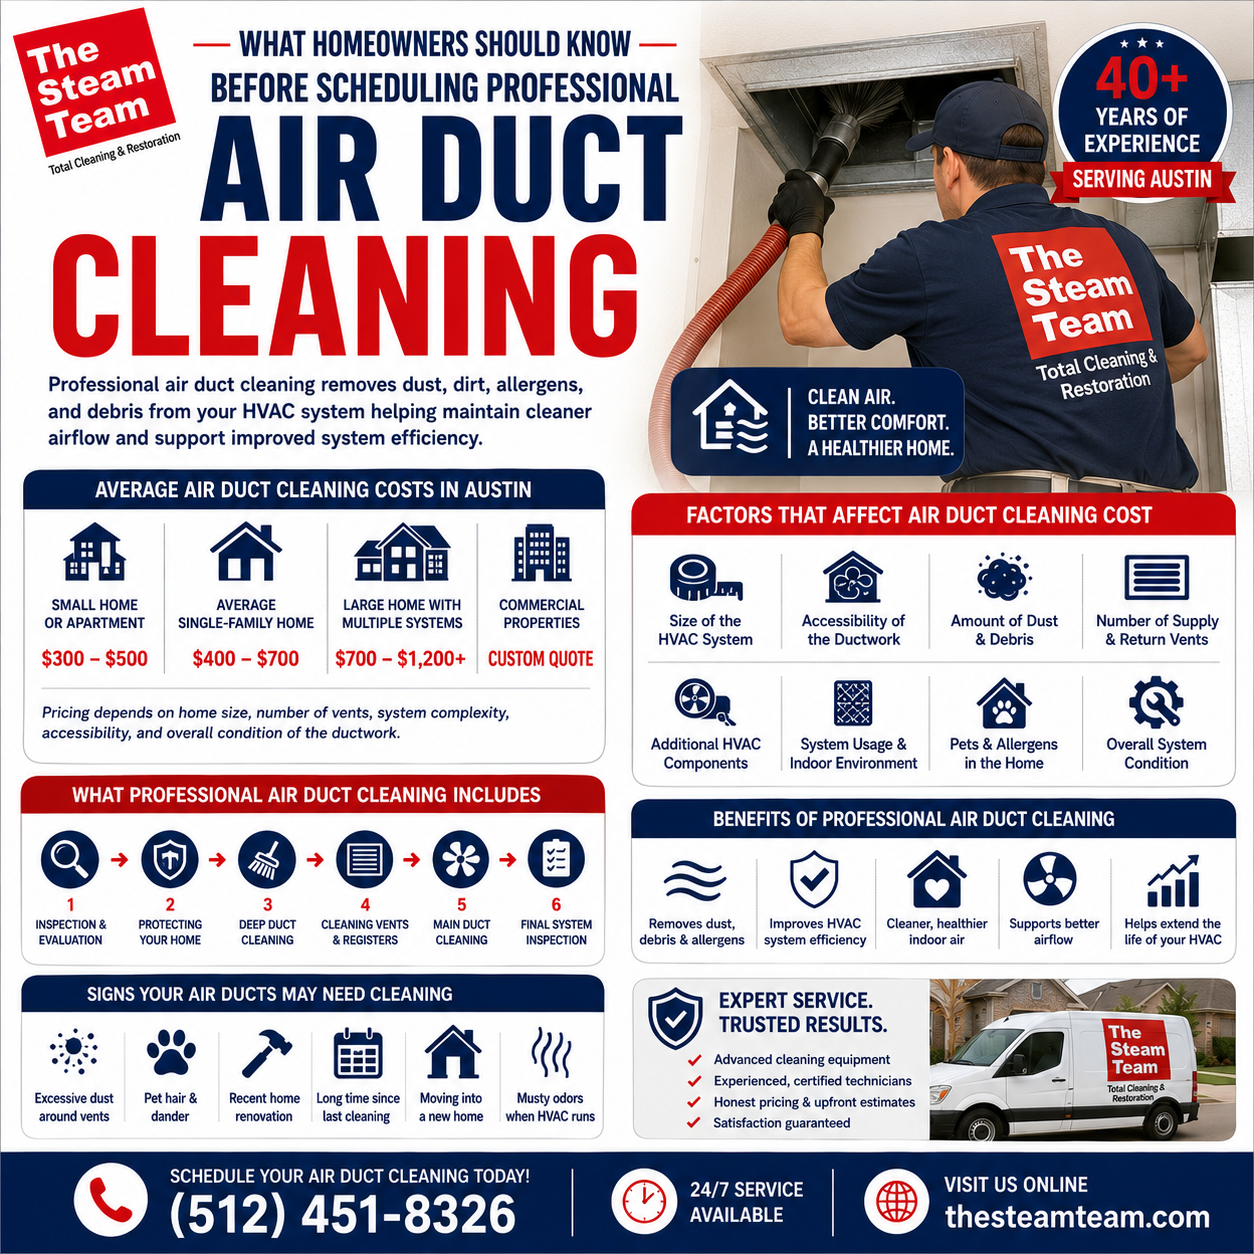
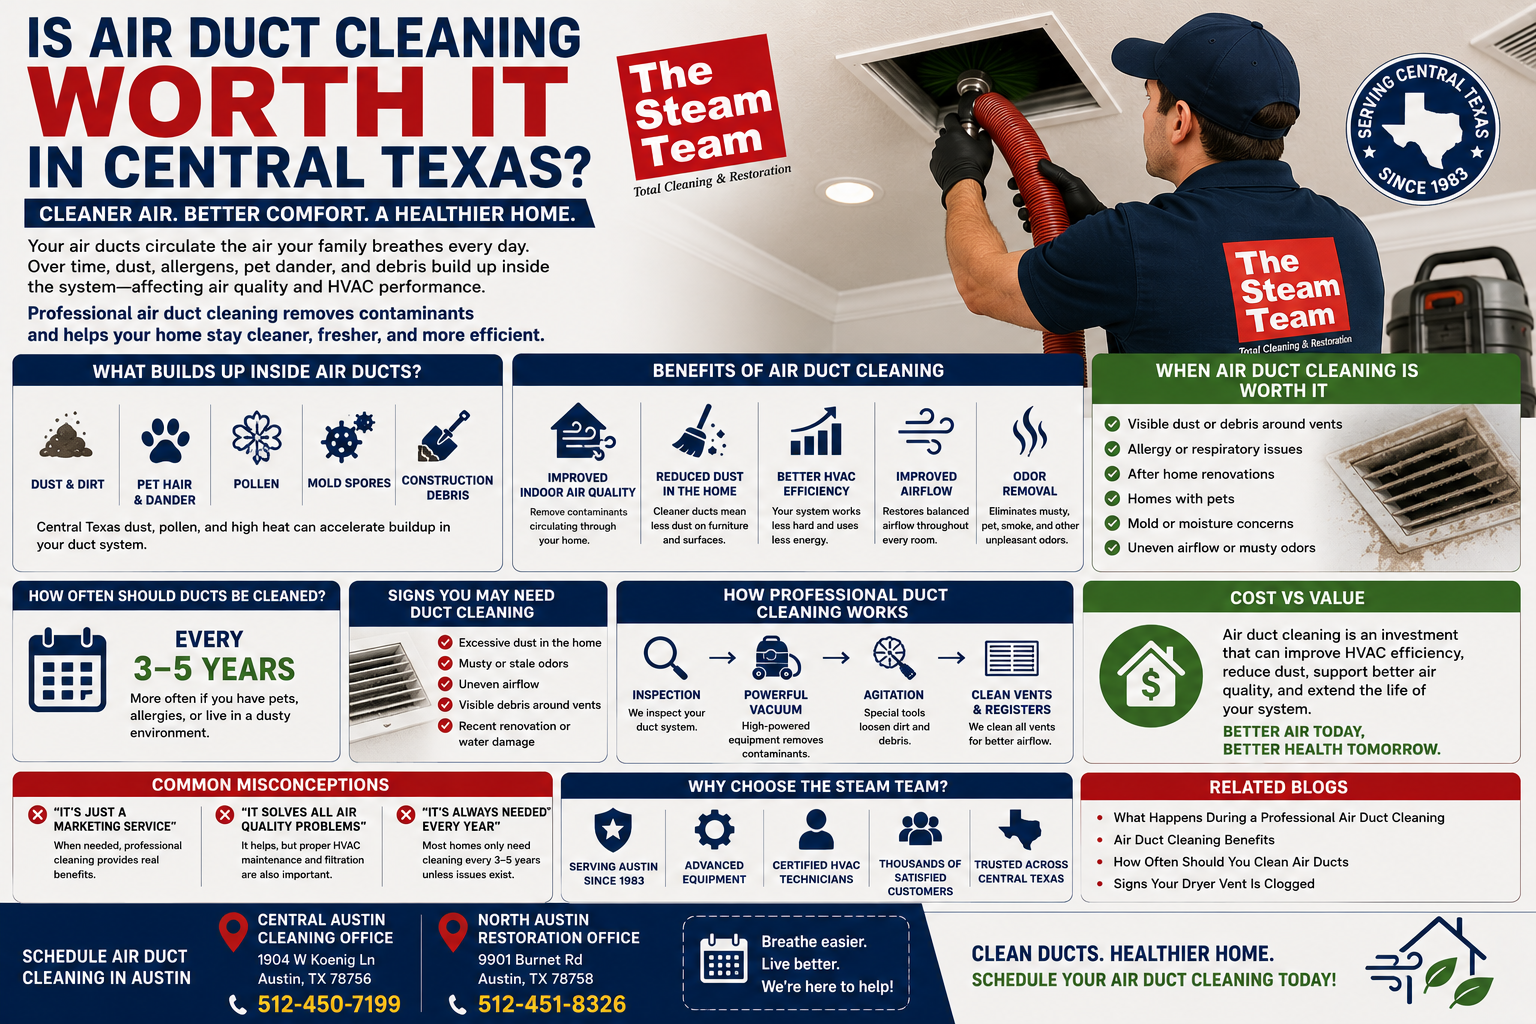
Wondering how much air duct cleaning costs in Austin? Learn average pricing, what affects the cost, cleaning methods, and why professional duct cleaning improves indoor air quality.
Read More