Flood Cleanup Costs Explained for Austin Homeowners
/
Wondering how much flood cleanup costs in Austin? Learn average pricing, cost factors, insurance coverage, and what affects professional flood restoration costs.
Read More
Explore expert tips on water damage restoration, carpet cleaning, rug cleaning, mold remediation, and air duct cleaning in Austin, TX. Trusted local insights from The Steam Team since 1983.
Wondering how much flood cleanup costs in Austin? Learn average pricing, cost factors, insurance coverage, and what affects professional flood restoration costs.
Read MoreFlooding can cause serious damage to flooring materials inside a home. Whether the water comes from a burst pipe, storm flooding, appliance leak
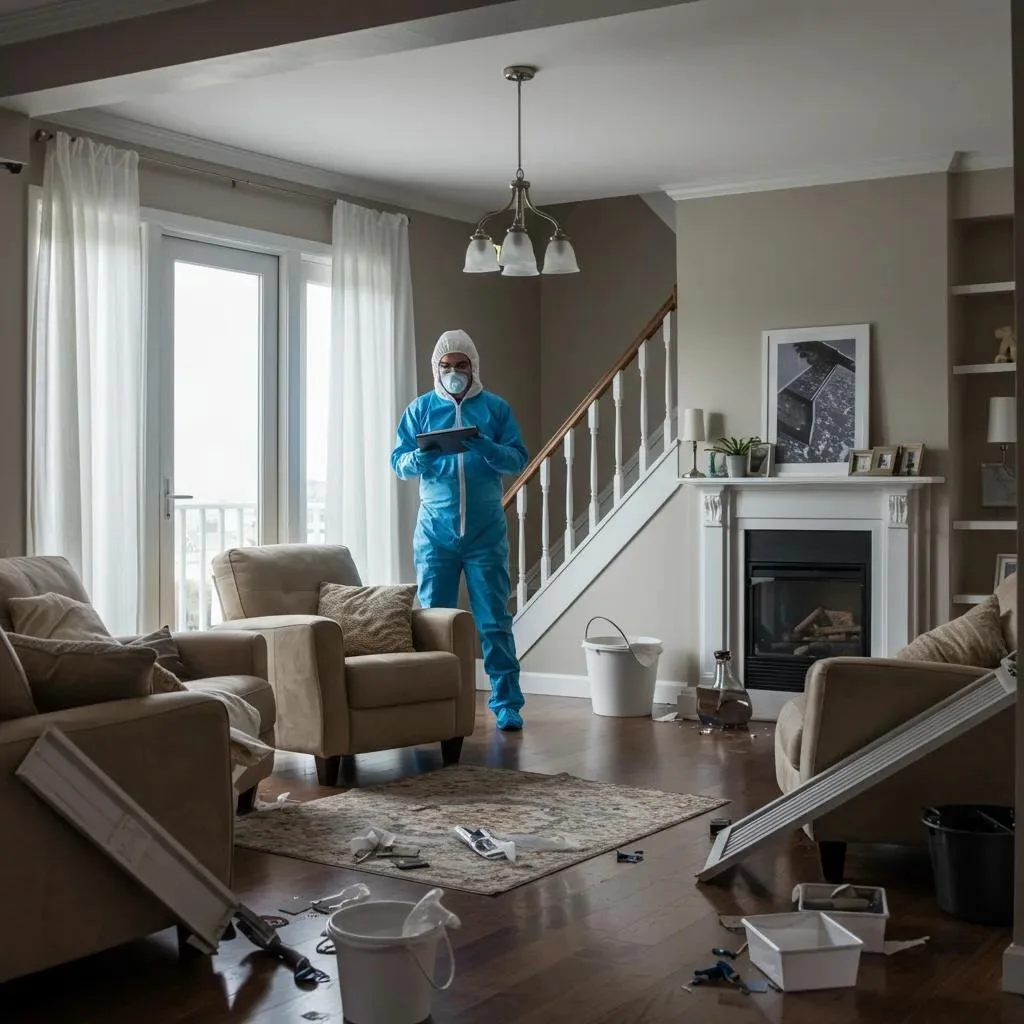
Read MoreFlooding can cause serious damage to homes and businesses within minutes. Whether caused by severe storms, burst pipes, appliance failures, or plumbing issues, floodwater spreads quickly and can affect flooring, drywall, furniture, and structural materials.
The first 24 hours after flooding are the most important for preventing additional damage. Immediate response can reduce repair costs, prevent mold growth, and protect structural components of the home.
Understanding what happens during emergency flood cleanup in Austin helps homeowners respond quickly and begin the restoration process safely.
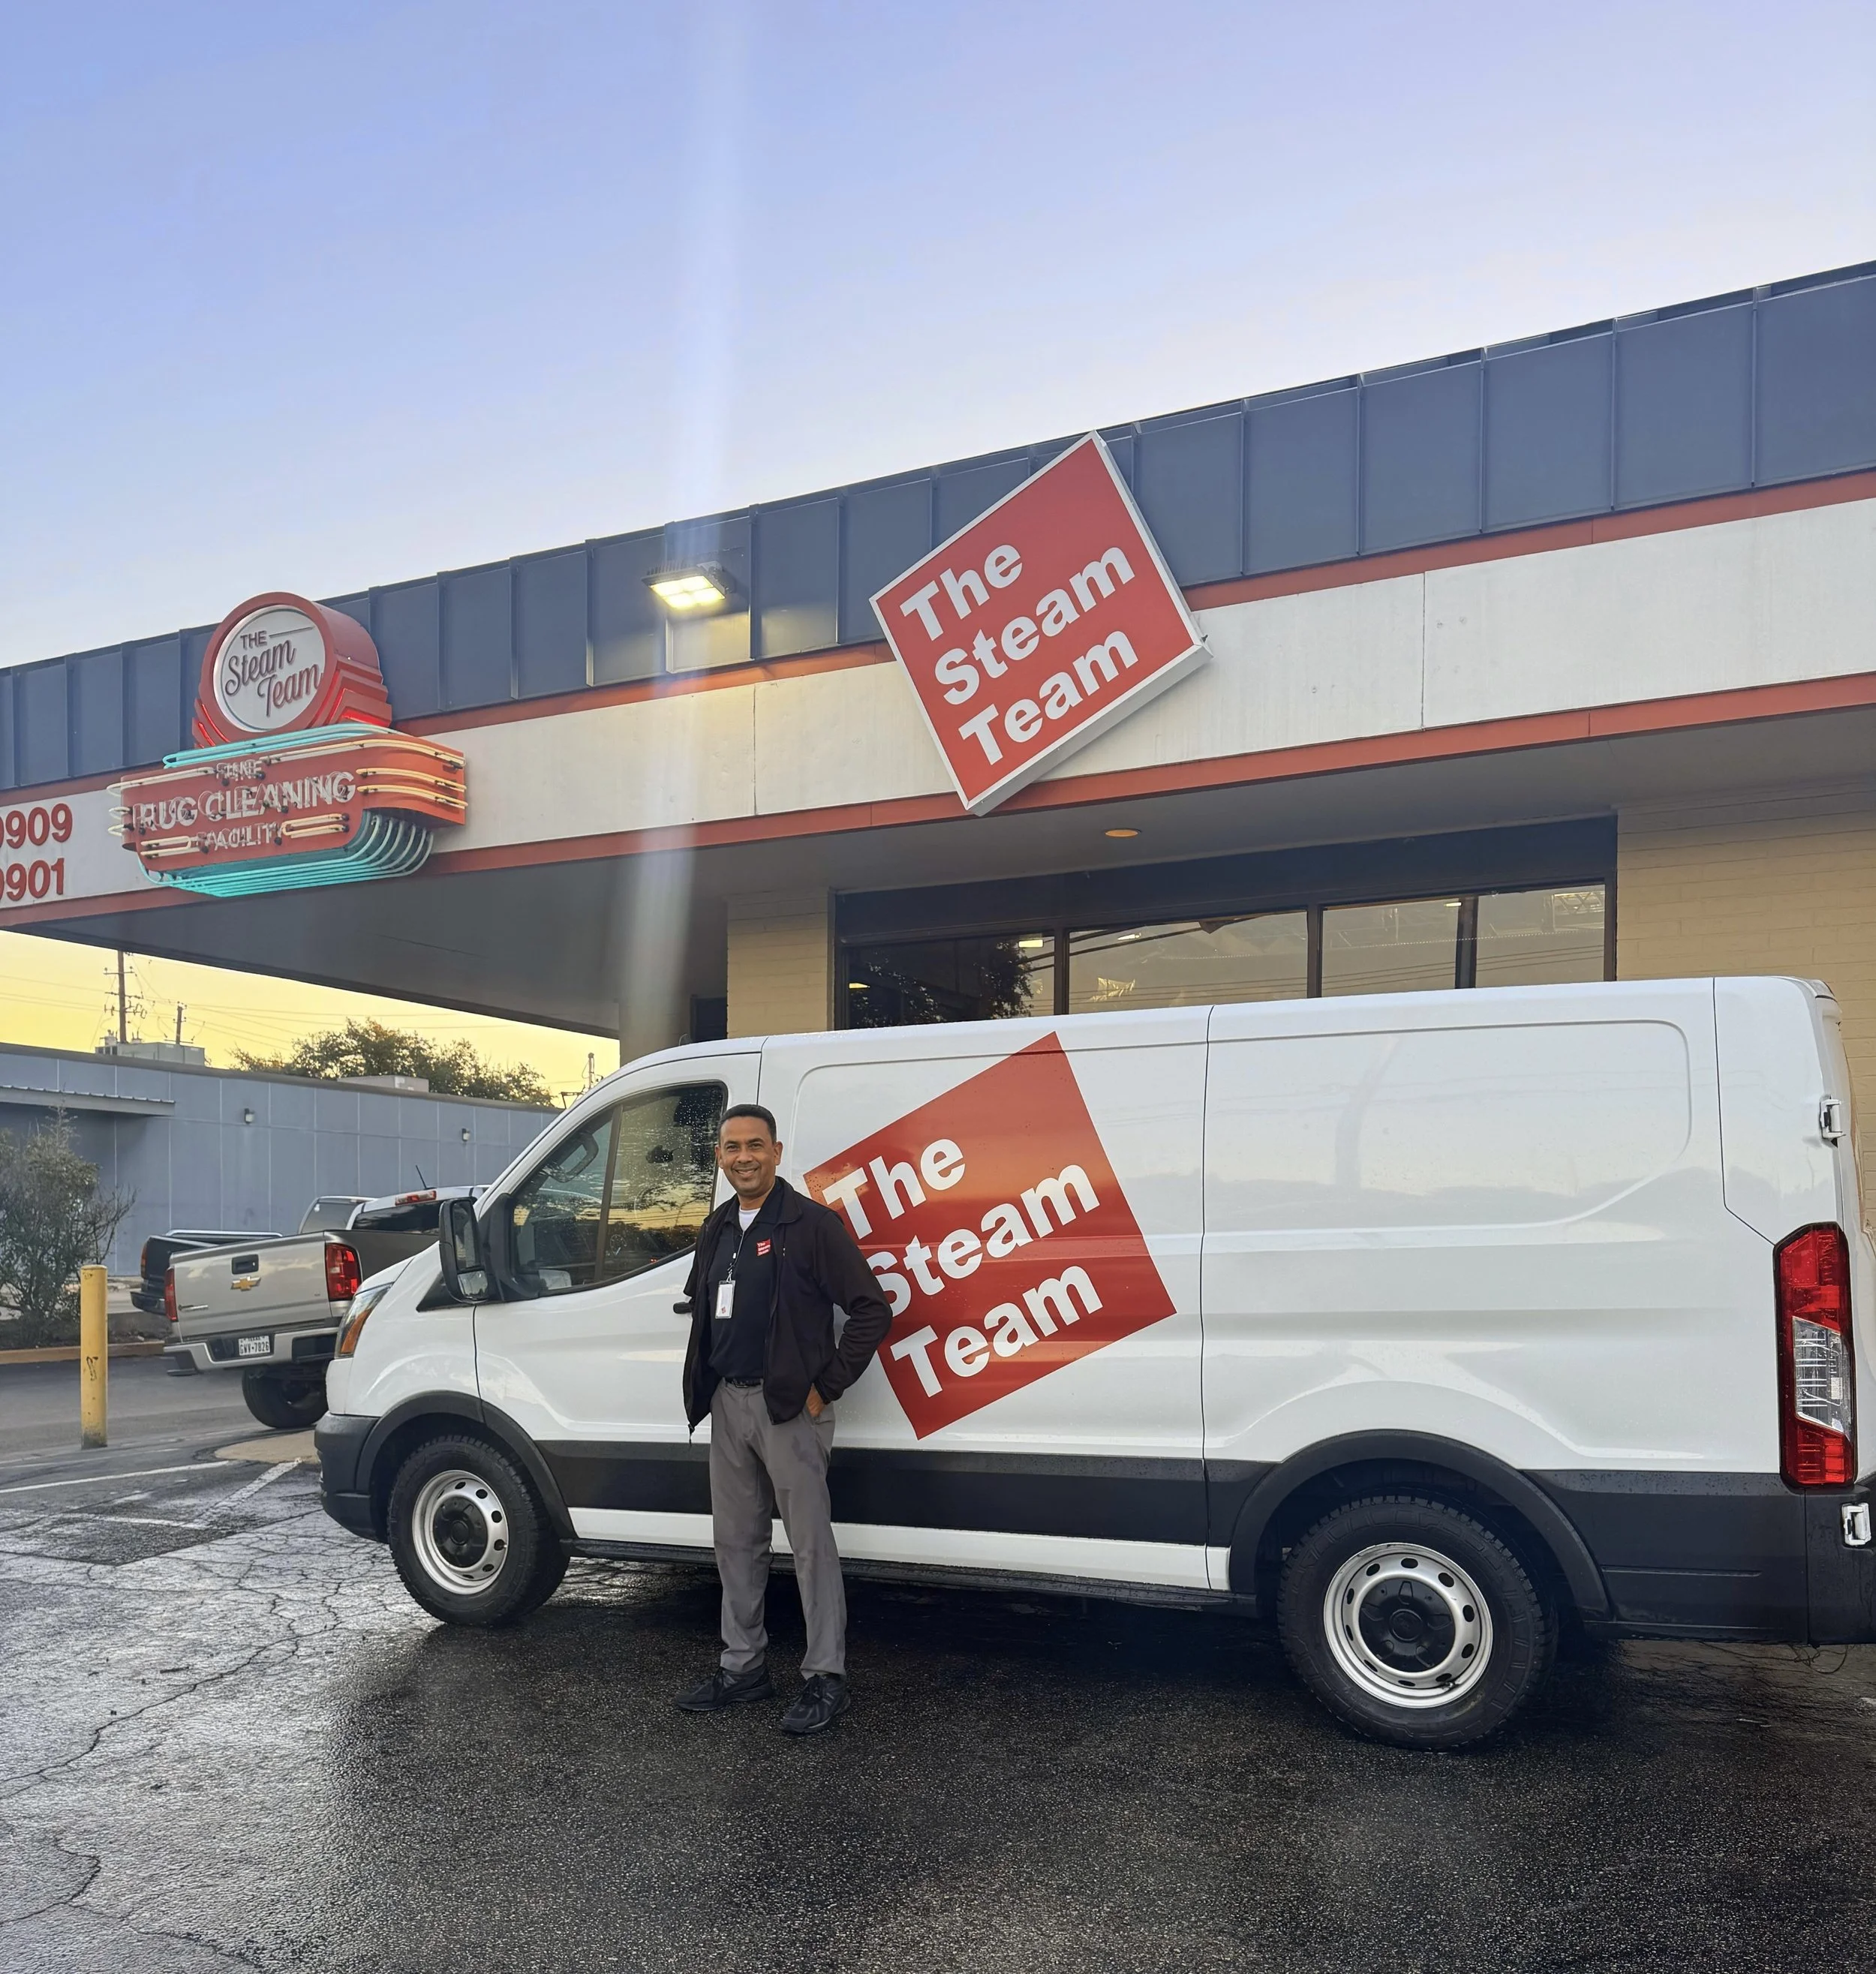
The Steam Team has been providing emergency flood cleanup and water damage restoration in Austin since 1983, helping homeowners and businesses recover from water damage quickly and efficiently.
When flooding occurs inside a home, the first step is identifying and stopping the source of water if possible.
Common causes of indoor flooding include:
• Burst pipes
• Overflowing appliances
• Water heater failures
• Roof leaks during storms
• Plumbing system failures
Turning off the main water shutoff valve can prevent additional water from entering the home.
If flooding is caused by storms or external water sources, professional help may be required to safely remove the water.
After the water source is controlled, the next step is assessing the damage.
Professional restoration teams typically perform:
• Property inspection
• Identification of water source
• Moisture mapping of affected areas
• Safety evaluation of electrical systems
This inspection helps determine the extent of damage and the best approach for water removal and drying.
Homes in Austin, Round Rock, and Cedar Park often experience flash flooding after heavy storms, making early inspection essential.
Once the inspection is complete, the next priority is removing standing water.
Professional restoration companies use commercial-grade equipment such as:
• High-capacity water pumps
• Industrial wet vacuums
• Extraction tools for carpets and flooring
Water extraction must be performed quickly to prevent water from spreading deeper into building materials.
The faster water is removed, the easier it is to restore affected materials.
During major flooding events, some materials may already be too saturated to salvage.
Common materials removed during flood cleanup include:
• Carpet and carpet padding
• Severely soaked drywall
• Damaged insulation
• Waterlogged furniture
Removing saturated materials helps speed up the drying process and reduces the risk of mold growth.
Once standing water is removed and damaged materials are addressed, the structural drying phase begins.
Professional drying equipment may include:
• High-powered air movers
• Commercial dehumidifiers
• Moisture monitoring devices
• Temperature and humidity controls
These tools help remove moisture trapped inside walls, flooring, and structural materials.
Proper drying is essential for preventing mold and long-term structural damage.
One of the biggest risks after flooding is mold growth.
In warm climates like Austin and Central Texas, mold can begin growing within 24–48 hours after water exposure.
Professional restoration teams focus on rapid drying and humidity control to reduce the risk of mold contamination.
Floodwater can create several safety hazards inside the home.
Potential risks include:
• Electrical hazards
• Structural weakening of floors or ceilings
• Contaminated water exposure
• Slip and fall hazards
For safety reasons, homeowners should avoid entering heavily flooded areas until professionals assess the property.
While minor water spills can sometimes be handled by homeowners, large flood events require professional restoration.
Signs professional help is needed include:
• Standing water covering large areas
• Water reaching walls or ceilings
• Floodwater entering multiple rooms
• Electrical systems exposed to water
• Persistent moisture or odors
Professional equipment ensures water is removed completely and drying is performed properly.
After the initial emergency response, restoration continues with:
• Ongoing structural drying
• Daily moisture monitoring
• Cleaning and sanitizing affected areas
• Repairing or replacing damaged materials
Depending on the severity of flooding, full restoration may take several days to several weeks.
If flooding occurs in your home, these tips may help minimize damage:
• Shut off water supply if possible
• Avoid electrical hazards
• Document damage for insurance claims
• Remove valuables from affected areas
• Contact a professional restoration company quickly
Fast action is the most important factor in reducing water damage.
Floodwater should be removed as soon as possible, ideally within the first few hours.
Yes. Floodwater can soak into drywall, flooring, insulation, and structural materials.
Initial water removal may take several hours, while full restoration can take 3–7 days or longer.
Yes. Mold can begin growing within 24–48 hours if moisture is not properly removed.
Coverage depends on the cause of flooding and the homeowner’s insurance policy.
• Serving Austin since 1983
• 24/7 emergency flood cleanup services
• Certified restoration technicians
• Advanced water extraction and drying equipment
• Trusted across Central Texas
Our team responds quickly to minimize damage and restore homes safely.
Flood damage requires immediate attention.
The Steam Team provides 24/7 emergency flood cleanup in Austin, helping homeowners remove water, dry structures, and restore their homes quickly.
📞 Call 512-451-8326 for emergency service
Serving Austin, Round Rock, Cedar Park, Georgetown, and surrounding Central Texas communities.
Flooding introduces large amounts of moisture into building materials, creating ideal conditions for mold spores to germinate and colonize within 24–48 hours; understanding and acting on mold prevention after flooding reduces long-term damage and health risks. This article explains practical, time-sensitive steps for mold prevention after water damage, including immediate actions, safe cleaning and disinfection protocols, mechanical drying and dehumidification, early detection signs, long-term prevention measures, safety precautions, and end-to-end cleanup management. You will learn what to do in the first 24–72 hours, which tools and equipment to use, how to decide what to salvage or discard, and when to bring in professional remediation. The guidance we provide integrates moisture-monitoring targets, lists of essential equipment (air movers, dehumidifiers, moisture meters), clear disposal decision rules for porous vs non-porous materials, and safety/PPE recommendations so you can make informed decisions and document actions for insurance. Read on for step-by-step timelines, equipment specifications, handling protocols, and verification techniques that prevent mold after flooding and protect indoor air quality.
Immediate actions after flooding prioritize safety, rapid water removal, documentation, and containment to reduce mold growth risk; acting within the first 24–48 hours is critical to prevent spores from establishing. Start with a safety assessment—check structural integrity, gas or electrical hazards, and only enter when safe—then remove standing water and begin drying and ventilating. Early documentation (photos, notes) supports insurance claims and helps prioritize salvageable items. These immediate steps set the stage for proper cleaning and mechanical drying, which are discussed in the next section.
Remove standing water as soon as it is safe; the goal is to begin drying within the first 24 hours and complete bulk drying within 24–48 hours to prevent mold proliferation. Rapid extraction halts capillary rise in porous materials and reduces moisture reservoirs that feed spores. For example, soaked carpets and padding can trap moisture and should be removed within 24 hours, while hard surfaces dry faster with active ventilation and mechanical air movement. Prompt water removal and initiating drying equipment directly reduce the time mold spores have to germinate and colonize, which leads into what equipment is best for the job.
The urgency of rapid water removal and drying is underscored by the need for specialized tools and methods to monitor and manage moisture levels in building structures.
Measuring Moisture in Buildings: Methods and Instrumentation for Damage Prevention
Excess moisture in building structures may damage the structures and provide suitable conditions for microbe growth. As a consequence, moisture may cause different health effects to the occupants, and lead to costly refurbishments, if the damage is not perceived in time. Currently, there are several work-intensive, destructive methods for verifying suspected moisture problems and for monitoring the drying of concrete structures. However, it has not been previously feasible to monitor moisture routinely, on a regular basis.
This thesis introduces new methods for measuring moisture in building structures, and the instrumentation developed for implementing them. First of all, the study defines accurately the current need for new methods, and selects the specific problems to approach. The study then elucidates the physical principles of the novel measurement methods and presents the practical instrumentation. The functionality of the system is then verified in laboratory and field
Methods and instrumentation for measuring moisture in building structures, 2005
Effective water removal combines extraction and drying tools scaled to the incident size: pumps and submersible pumps for deep standing water, wet/dry vacuums for shallow flooding, and air movers for surface evaporation. Homeowners often use consumer wet/dry vacs and portable fans, but professional-grade pumps and high-capacity air movers speed recovery for larger events. Always pair air movers with dehumidifiers to remove moisture from the air; without dehumidification, fans can spread moisture. Knowing when equipment exceeds DIY capability helps you decide to call professionals for rapid extraction and containment, which is important if structures remain saturated.
Ventilation replaces moisture-laden indoor air with drier outdoor air and supports evaporation from wet surfaces, but outdoor humidity must be lower than indoor humidity to be helpful. Cross-ventilation—opening windows on opposite sides of a room—can work for short-term drying on low-humidity days, while exhaust fans can pull damp air out of enclosed spaces. However, ventilation alone is insufficient when outdoor relative humidity is high or when bulk water remains; mechanical drying and dehumidification are then required. Implementing safe ventilation practices reduces airborne moisture and complements mechanical drying strategies described later.
Immediate actions list: prioritized first 48 hours
Ensure safety: Confirm structural and electrical safety before entering.
Extract standing water: Use pumps or wet vacs immediately where safe.
Document damage: Photograph and log items and areas for insurance.
Begin drying: Place air movers and start dehumidification within 24 hours.
These prioritized steps reduce mold risk and create conditions for effective cleaning and disinfection.
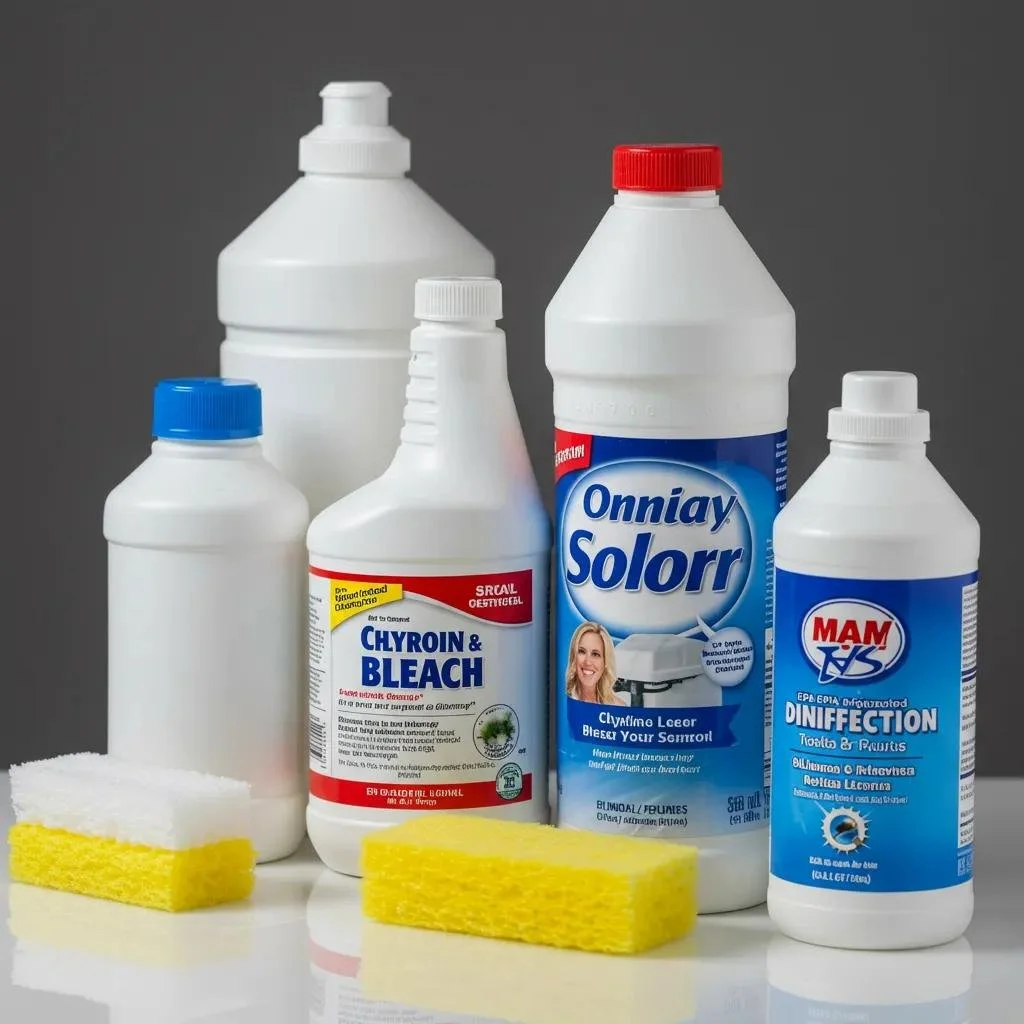
Cleaning and disinfecting after flooding require distinguishing between cleaning (removing dirt and organic material), disinfecting (killing microbes on surfaces), and remediation (removal of mold-contaminated materials); each action has a distinct role in preventing mold after water damage. Start by removing debris and wet porous materials, clean non-porous surfaces with detergent and water, and follow with an EPA-recommended disinfectant or a properly diluted disinfectant for contaminated water exposures. For porous materials that cannot be fully dried and cleaned, removal is the correct path to prevent future mold growth. The next subsections cover effective agents, salvage decisions by material type, and disposal triggers that protect indoor air quality and documentability.
Effective cleaning begins with detergent and water to remove organic soil, followed by targeted disinfectants for surfaces exposed to contaminated floodwater; chlorine bleach can disinfect non-porous surfaces when used safely and at correct dilution. Common protocols include using a general detergent for initial cleaning, then a disinfectant registered for antimicrobial use with manufacturer-specified contact times; for chlorine bleach, a typical household dilution is one cup of bleach per gallon of water, applied with caution and adequate ventilation. Avoid using bleach on porous materials like drywall where it won’t penetrate to remove spores. Proper application, protective equipment, and allowing the required contact time are essential to reduce viable spores and prepare surfaces for drying.
Different cleaning agents compared:
| Cleaning Agent | Surfaces Recommended | Typical Dilution / Contact Time |
| Detergent + Water | General soil on most surfaces | Clean until soil removed; no disinfectant claim |
| Chlorine bleach (sodium hypochlorite) | Non-porous surfaces (tile, sealed linoleum) | ~1 cup bleach / 1 gallon water; 10–15 min contact, ventilate |
| EPA-registered disinfectant | Non-porous and some semi-porous after cleaning | Follow label for dilution/contact time (varies by product) |
These agents serve complementary roles: detergents remove organic matter, while disinfectants reduce microbial loads when used with correct contact time and surface compatibility.
Porous materials (drywall, insulation, carpet padding, upholstered furniture) trap moisture and organic matter and are difficult to fully decontaminate if soaked by contaminated floodwater; these items often require removal and disposal. Non-porous materials (ceramic tile, metal, solid wood with sealed finishes) can generally be cleaned, disinfected, and dried in place if water damage is limited and drying begins quickly. For semi-porous materials like unfinished wood, aggressive drying and surface cleaning may salvage the item if moisture content returns to safe levels. Apply a practical rule: if you cannot visibly and physically remove contamination or fully dry the material within 48 hours, prioritize removal to prevent mold colonization.
Dispose of flood-damaged items when contamination is extensive, materials are porous and saturated with contaminated water, or when drying will not restore structural or hygienic integrity; document items and condition before disposal for insurance. Examples requiring disposal include wet insulation, soaked carpet padding, gypsum board that crumbles, and mattresses exposed to contaminated water. When discarding, double-bag materials where possible, label and photograph removed items, and record disposal dates to support claims. Safe disposal protects occupants and removes potential reservoirs for mold, enabling the next phases of cleaning and drying to focus on salvageable assets.
For complex contamination or large-scale removal, professional restoration specialists can safely perform disinfection and disposal and offer disposal documentation and insurance-friendly reports; request a quote or schedule an inspection from qualified remediation providers to handle hazardous waste and large jobs safely.
The impact of fungal contamination after flooding necessitates careful remediation strategies and adherence to guidelines, especially in the context of increasing extreme weather events.
Mould Contamination After Flooding: Impact, Remediation, and Guidelines
Australia’s sub-tropical coastline has been subjected to catastrophic flooding, congruent with a global trend of extreme weather events exacerbated by climate change. This study examined buildings post-flooding, to determine the impact of fungal contamination and evaluate remediation strategy success. Fungal species prevalence in association with wet building materials are outlined. Remediation methods found to be effective are highlighted. These findings support the necessity of establishing internationally recognised guidelines pertaining to mould contamination and remediation. This is particularly pertinent within the context of climate change. This research contributes to the scientific understanding of mycobiota in flood affected buildings, their health and safety implications and design of effective mitigation strategies.
Mould contamination of dwellings after flooding, 2023
Mechanical drying and dehumidification remove surface and embedded moisture, preventing conditions that favor mold growth; effective drying targets both ambient relative humidity and material moisture content. Combine air movers (to increase evaporation), dehumidifiers (to remove vapor), and heat where safe to accelerate moisture removal. Monitoring moisture with a hygrometer and moisture meter informs equipment placement and runtime, ensuring the drying goal—typically indoor RH below 50% and moisture content of structural materials returned to normal—is met. The following subsections outline expected drying timelines, equipment comparisons, and monitoring approaches to guide homeowner and professional decisions.
Drying timelines vary: thin, hard surfaces may dry in 24–48 hours with active equipment, while porous assemblies like saturated drywall or hardwood can take several days to weeks depending on conditions and equipment. Factors that extend drying time include colder temperatures, high outdoor humidity, lack of mechanical dehumidification, and concealed water in wall cavities. For example, with properly placed air movers and dehumidifiers, carpet and subfloor components may reach acceptable moisture levels in 48–72 hours; structural drying of wall cavities may require targeted drying mats or openings and several additional days. Timely equipment selection and continuous monitoring shorten timelines and reduce mold risk.
Choose dehumidifiers based on job size and operating conditions: low-grain refrigerant (LGR) dehumidifiers excel in warmer, high-moisture environments and deliver high pints per day; desiccant dehumidifiers perform better at lower temperatures and in enclosed spaces. Air movers should be high-velocity, axial types placed to create cross-flow over wet surfaces, with multiple units for larger rooms to avoid dead zones.
Drying equipment comparison:
| Equipment | Characteristic | Best-Use Scenario |
| Air mover (high-velocity) | Increases evaporation across surfaces | Surface drying, carpet, wall surfaces |
| LGR dehumidifier | High moisture removal at moderate temps | Most residential and commercial flood jobs |
| Desiccant dehumidifier | Effective at low temps, low RH targets | Unheated spaces, cold climates, enclosed cavities |
Selecting the proper equipment and matching capacity to the space reduces drying time and lowers mold risk, which leads into monitoring humidity to confirm outcomes.
Monitor relative humidity with hygrometers and use moisture meters to track material moisture content in wood, drywall, and subfloor; target RH below 50% and material moisture equalized to pre-flood baselines. Measure in multiple locations—near floors, in wall cavities, and in HVAC return air—to detect hidden moisture pockets. Regular readings (several times daily while equipment is running) guide equipment adjustments and determine when dehumidification can be tapered. Accurate monitoring prevents premature shutdown of drying equipment and confirms that mold-prevention thresholds are achieved.
Early detection of mold relies on visual cues, odors, and occupant health symptoms; catching growth early reduces remediation scope. Look for discoloration, fuzzy or powdery textures, and new water stains that worsen despite drying; musty or mildew-like odors often indicate hidden growth. If occupants experience unexplained allergic or respiratory symptoms after flood events, escalate to a targeted inspection. The next subsections list typical indicators, decision triggers for professional inspections, and how mold develops in hidden areas.
Visual indicators include spotting, streaking, or fuzzy colonies in colors ranging from black and green to white, often along baseboards, behind trim, or beneath carpets; water stains that become darker or textured are also suspect. Odor indicators are persistent musty or stale smells that do not dissipate after drying and cleaning and often point to concealed growth in wall cavities, under flooring, or inside ductwork. Regular inspections in these high-risk locations and addressing odors promptly helps detect growth before it spreads extensively. Recognizing these cues leads to clear thresholds for professional evaluation.
Consider a professional inspection when visible mold covers a large area (commonly recommended thresholds start at around 10 square feet), when occupants have health vulnerabilities, when odors persist after cleaning, or when mold is suspected in hidden spaces. Professionals provide tools like moisture mapping, borescopes, infrared imaging, and, if needed, air or surface sampling to define the extent and plan containment. An inspection clarifies whether full remediation is required and provides documentation useful for insurance and risk management. Knowing when to escalate reduces the chance of incomplete cleanup.
Mold grows where moisture persists and organic food sources exist, often behind baseboards, inside wall cavities, under flooring, and within HVAC systems where condensation or trapped water is present. Concealed growth may start from a leak or wicking of moisture, then spread along cavity surfaces and insulation without visible external signs until odors or structural issues appear. Detection techniques include moisture metering, thermal imaging to find cold/wet spots, and probing suspicious assemblies; addressing hidden moisture sources is essential to prevent recurrence. Identifying hidden growth informs containment and removal strategies explained later.
Long-term prevention focuses on structural improvements, moisture control systems, and routine maintenance to make buildings resilient to future flooding and mold growth. Implement moisture barriers, proper grading and guttering, improved ventilation, and consider flood-resistant materials in vulnerable areas. Regular maintenance—seasonal inspections, HVAC filter and coil care, and prompt leak repair—keeps moisture sources minimized. The following subsections explain specific home upgrades, maintenance routines, and preparedness measures that lower long-term mold risk and speed recovery after future events.
Structural upgrades such as installing sump pumps with battery backup, adding vapor barriers on slab foundations, improving exterior grading to divert water, and using water-resistant wallboard or tile in basements reduce moisture intrusion and retention. Upgrading HVAC to include adequate ventilation and humidity control also prevents chronic dampness. Prioritize interventions based on risk exposure: start with drainage and grading, then address interior protections and mechanical systems. These improvements reduce the probability of mold reoccurrence and minimize recovery time after future flooding.
Routine maintenance tasks—cleaning gutters, inspecting roof and foundation seals, servicing HVAC systems, and periodically checking basements and crawlspaces—prevent small issues from becoming moisture sources that support mold. A seasonal checklist ensures inspections occur before high-risk periods (spring rains, hurricane season), enabling early repairs. Documenting maintenance activities and findings creates a history that helps evaluate long-term moisture trends and supports insurance or restoration claims. Regular upkeep keeps the building envelope and systems functioning to limit mold-friendly conditions.
Prepare by elevating critical utilities and valuables above likely flood levels, choosing water-resistant flooring and finishes for basements, and maintaining a documented emergency plan with photos and insurance inventories. Keep essential drying equipment accessible (shop vac, portable dehumidifier, hygrometer) and store important documents in waterproof containers or digitally. Establish relationships with local restoration specialists in advance so you can request a rapid assessment or quote when flooding occurs. Being ready shortens response time and reduces the scope of mold prevention measures needed after an event.
Given the increased frequency of extreme weather events, understanding mold prevention strategies is crucial for health and safety in the aftermath of floods.
Mold Prevention After Floods: CDC Strategies for Health and Safety
Extensive water damage after major hurricanes and floods increases the likelihood of mold contamination in buildings. This report provides information on how to limit exposure to mold and how to identify and prevent mold-related health effects. Where uncertainties in scientific knowledge exist, practical applications designed to be protective of a person's health are presented. Evidence is included about assessing exposure, clean-up and prevention, personal protective equipment, health effects, and public health strategies and recommendations. The recommendations assume that, in the aftermath of major hurricanes or floods,
Mold prevention strategies and possible health effects in the aftermath of hurricanes and major floods, 2006
Safety during post-flood cleanup includes proper personal protective equipment, containment to limit cross-contamination, and safe handling/disposal of contaminated materials to protect occupants and workers. Risk increases with visible mold, heavy contamination, or exposure to contaminated water and debris; follow PPE protocols, create physical containment where remediation occurs, and decontaminate tools and clothing. The subsections below present PPE selection, safe handling protocols, and clear thresholds for hiring professionals to manage risks beyond homeowner capability.
Select PPE based on exposure risk: at minimum wear N95 respirators, gloves, eye protection, and long sleeves for small jobs; for heavy contamination or prolonged exposure use higher-protection respirators (P100 or powered air systems), disposable coveralls, and chemical-resistant gloves. Proper fit-tested respirators protect against airborne spores, while eye and skin protection prevent irritation from spores and cleaning agents. Dispose of single-use PPE after contaminated work or launder reusable gear separately. Choosing appropriate PPE reduces exposure and is a precursor to safe handling and disposal practices described next.
PPE comparison table:
| PPE Item | Protection Level | Recommended Situation |
| N95 respirator | Filters most non-oil particulates | Small-area cleaning with light contamination |
| P100 or PAPR | Higher filtration / powered airflow | Extensive contamination, demolition, professional remediation |
| Disposable coveralls | Prevent clothing contamination | Handling contaminated materials, demolition |
| Chemical-resistant gloves | Protect from disinfectants | Cleaning and applying disinfectants |
Handle contaminated materials by isolating the work area, minimizing dust, and using double-bagging for removal; seal and label bags, and photograph items before disposal for documentation. When removing drywall or insulation, cut damp sections and place directly into heavy-duty bags, then wipe down surrounding surfaces and HEPA-vacuum settled dust. Decontaminate reusable tools with detergent and an appropriate disinfectant and launder protective clothing independently. Proper handling reduces cross-contamination and supports insurance claims through clear records of removed items.
Hire professionals when mold affects large areas (commonly where the affected surface exceeds about 10 square feet), when contamination is within HVAC or structural cavities, when occupants are immunocompromised, or when the job requires containment and hazardous-waste protocols. Professionals provide trained personnel, containment setup, HEPA filtration, safe demolition, waste handling, and post-remediation verification services. Engaging certified remediation teams reduces liability and ensures work meets health and insurance documentation standards; schedule an inspection and remediation when these escalation criteria are met to protect occupants and property.
Effective management follows a structured workflow: initial assessment, containment, targeted removal, cleaning and drying, and verification, with documentation at every step to support insurance and future prevention. Start with a thorough inspection and moisture mapping to scope the job, then isolate affected zones, remove contaminated materials, clean and disinfect remaining surfaces, run mechanical drying until targets are met, and perform verification through moisture readings and visual confirmation. Record photographs, logs, and equipment runtimes to demonstrate thoroughness. The next subsections detail stepwise actions, verification approaches, and common mistakes to avoid.
A practical remediation sequence is:
Safety assessment and documentation
Containment of the work area
Removal of unsalvageable items
Cleaning and disinfection of salvageable surfaces
Mechanical drying and humidity control
Final verification and clearance
Assign responsibilities and keep photographic and written records at each stage to aid insurance and quality assurance. Use HEPA filtration when cutting or disturbing moldy materials to reduce airborne spores. Following a clear sequence prevents recontamination and ensures each phase is completed to recognized standards.
Verify success by confirming moisture and humidity targets (RH <50% and material moisture returned to normal baselines), conducting visual inspections for no visible growth or staining, ensuring no persistent musty odors, and documenting equipment run times and readings. When occupants report symptoms or when hidden contamination was present, consider professional air or surface testing to support clearance. Note that testing has limits—consistent moisture control, absence of visible growth, and lack of odors are practical primary criteria for clearance in most cases. Verification provides confidence the remediation achieved sustained mold prevention.
Common errors include partial drying (stopping equipment too early), inadequate containment (allowing cross-contamination), using inappropriate cleaners on porous materials (e.g., relying on bleach where removal is needed), and failing to document actions for insurance.
Partial drying (stopping equipment too early)
Inadequate containment (allowing cross-contamination)
Using inappropriate cleaners on porous materials (e.g., relying on bleach where removal is needed)
Failing to document actions for insurance
Corrective measures include maintaining drying until multiple days of stable readings confirm dryness, implementing physical barriers and negative pressure during demolition, removing rather than treating heavily contaminated porous materials, and keeping comprehensive photographic and log records. Avoiding these mistakes prevents recurrence and reduces overall remediation costs.
For homeowners facing complex or large-scale contamination, professional restoration specialists provide comprehensive management, containment, and verification services, and can prepare documentation useful for insurance claims; request a professional assessment or quote to confirm scope and required remediation steps.
Key management checklist: documentation and verification steps
Inspect and document: Photograph and log the affected areas before work begins.
Contain and remove: Isolate workspace, remove unsalvageable materials, and bag them.
Clean, dry, and verify: Clean and disinfect salvageable surfaces, run drying equipment until targets are met, and record results.
These management actions tie together the technical steps and provide the evidence necessary to demonstrate successful mold prevention after flooding.
Mold exposure can lead to a variety of health issues, particularly for individuals with respiratory conditions, allergies, or weakened immune systems. Common symptoms include coughing, sneezing, nasal congestion, skin irritation, and eye irritation. In some cases, prolonged exposure can exacerbate asthma or lead to more severe respiratory problems. It's crucial to address mold growth promptly to minimize health risks, especially in vulnerable populations such as children and the elderly.
Hidden mold can often be detected through a combination of visual inspections and sensory cues. Look for signs such as water stains, discoloration on walls or ceilings, and musty odors that persist despite cleaning. Additionally, if occupants experience unexplained allergic reactions or respiratory issues, it may indicate hidden mold. Using moisture meters and thermal imaging can help identify damp areas where mold may be growing out of sight.
If you discover mold in your home, it's essential to take immediate action. First, ensure your safety by wearing appropriate personal protective equipment (PPE) such as gloves and a mask. Contain the affected area to prevent spores from spreading, and then assess the extent of the mold growth. For small areas, you may be able to clean it yourself using appropriate cleaning agents. However, for larger infestations or if you have health concerns, consider hiring a professional mold remediation service.
While bleach can be effective on non-porous surfaces, it is not recommended for porous materials like drywall or wood, as it does not penetrate deeply enough to kill mold roots. Additionally, bleach can create harmful fumes and may not eliminate all mold spores. Instead, use a detergent solution for cleaning and follow up with an EPA-registered disinfectant for effective mold control. Always ensure proper ventilation when using cleaning agents.
To prevent mold from returning after cleanup, focus on controlling moisture levels in your home. Ensure proper ventilation in areas prone to humidity, such as bathrooms and kitchens. Use dehumidifiers in damp spaces and repair any leaks promptly. Regularly inspect your home for signs of water damage and maintain your HVAC system to ensure it operates efficiently. Implementing these measures will help create an environment less conducive to mold growth.
Consider hiring professionals for mold remediation if you notice extensive mold growth (typically over 10 square feet), if mold is present in HVAC systems, or if occupants have health issues that could be exacerbated by mold exposure. Additionally, if you are unsure about the extent of the contamination or if the mold is in hard-to-reach areas, professional services can provide the expertise and equipment necessary for safe and effective remediation.
Documenting mold damage for insurance claims involves taking clear photographs of affected areas, noting the extent of the damage, and keeping records of any cleanup efforts. Make a detailed list of damaged items, including their condition and estimated value. If you hire professionals, request written reports and invoices, as these can support your claim. Maintaining thorough documentation will help ensure a smoother claims process with your insurance provider.
Implementing effective mold prevention strategies after flooding is essential for safeguarding your home and health. By taking immediate action, utilizing the right tools, and following thorough cleaning protocols, you can significantly reduce the risk of mold growth. Understanding these steps not only protects your property but also enhances your peace of mind during recovery. For comprehensive guidance and resources, explore our expert recommendations today.
Our mission is to provide you with the most outstanding service experience ever. Some of our most popular services include Carpet Cleaning, Tile Cleaning, Air Duct Cleaning, Water Damage, Fire Damage Restoration and Construction Services.
Quick Cleaning Quote
Email: info@thesteamteam.com
Georgetown: (512) 868-0358
Dallas: (214) 631-8326
Naples, FL: (239) 450-1936
Toll Free: (800) 880-7785